Extend the Outdoor Living Season

Extend the Outdoor Living Season

Published: October 3, 2011

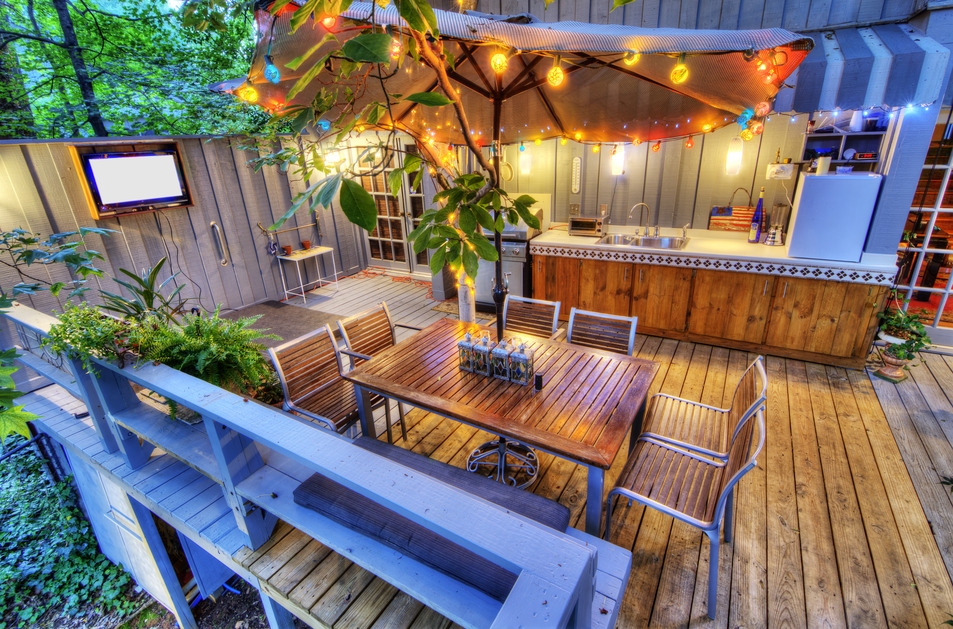
Make an outdoor living area comfy long after the sun sets or the leaves turn with outdoor lighting, a patio heater, and a glowing firepit or portable fireplace.

Light the deck or patio

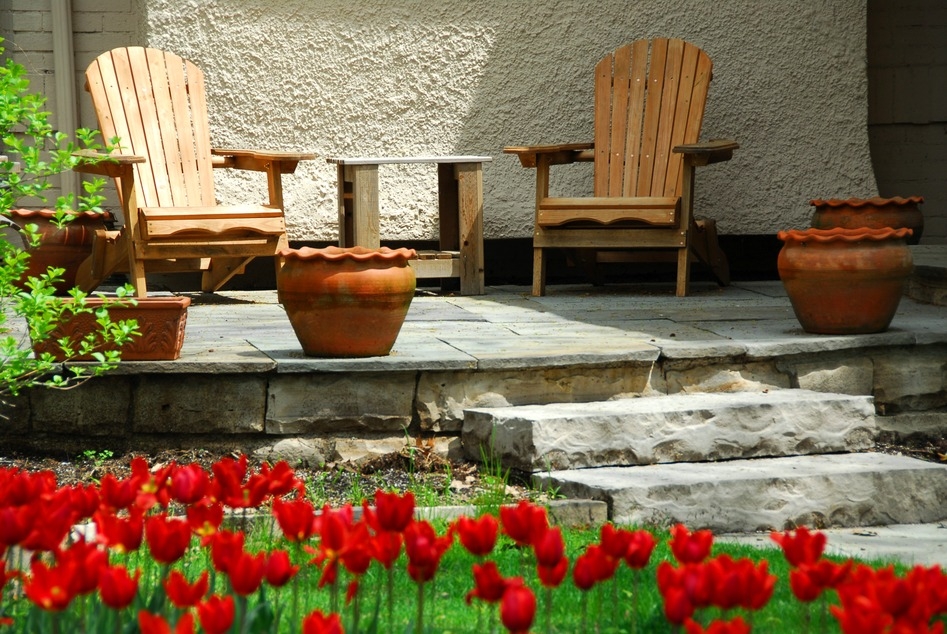
The sun sets sooner on your outdoor living space in the fall, but that shouldn’t limit the hours you use your deck or patio. Adding low-voltage or solar outdoor lighting fixtures lets you party or relax well after dark.

With both lighting types, you can:

  • Light deck railings and stairs
  • Define the patio perimeter
  • Illuminate the edges of paths and walkways
  • Draw attention to a planter or tree

Other fixtures light up dining tables, grill surfaces, and even underwater in swimming pools.

Low-voltage fixtures clip onto a safe, 12-volt cable connected to a transformer, which plugs into a GFCI-protected 120-volt electrical outlet. A timer or light-sensitive control automatically turns lights on and off.

A low-voltage lighting kit with eight LED stainless steel fixtures, 50 feet of cable, and a transformer starts at $60. Individual low-voltage fixtures range in price from $7 for a simple poly-resin fixture up to about $150 for architectural-grade, cast-brass models.

Solar outdoor lighting fixtures don’t need cables and transformers. They simply turn themselves on automatically after dark. Each stand-alone fixture stakes into the ground or secures to a deck or exterior surface. You’ll save energy, as a sunlight-charged battery powers the bulb.

The downside to solar fixtures is a dimmer glow than low-voltage fixtures, and fewer lighting hours – many solar fixtures run out of stored energy after 4-5 hours on the job. Cloudy days also reduce power.

A four-pack of solar light fixtures that mount on top of deck posts starts at about $30. Or, check out a cast-aluminum solar lantern for about $60.

Get glowing with a firepit or portable fireplace


Bring a cozy glow and a stylish focal point to your outdoor living area with a firepit or portable fireplace. Irresistible for gathering, warming up, and roasting marshmallows, firepits and portable fireplaces come in a variety of materials, sizes, and styles. You’ll also find options for fueling your fire with wood, propane, gas, or gel cans.

Check local fire codes first to find out if your community allows the use of a firepit or portable fireplace on the patio or lawn. (Never use a fire feature on a wood deck.)

A firepit ($100-$500) is an open bowl, dish, or pan that varies in size from 24 inches across to about 40 inches. A firepit may come on a stand (some with wheels) or nestle into a tiled tabletop. Select a model with screening to contain flyaway sparks.

A portable fireplace ($100-$600) features a chimney to vent smoke up and away from people. Some portable fireplaces offer 360-degree views of the fire.

Warm up with a patio heater

Boost the warmth of your outdoor living area by as much as 15-25 degrees in the fall or spring with the addition of a portable patio heater. You’ll find three basic models:

  • Freestanding units resemble large floor lamps. Set them anywhere on your patio that will accommodates their 7-8 foot height. Some models include wheels for mobility. Expect to pay from $150 to $1,500, depending on heat output and fuel source.
  • A tabletop patio heater rests on a table, bench, or garden wall. These compact units typically produce less heat than tall, freestanding models. Prices range from $100 to $450.
  • Ceiling- or wall-mount patio heaters free up floor and table space, and typically emit heat via a halogen lamp. Prices vary from $175 to $1,500.

Make your selection based on how much outdoor living area you want to heat and whether you want a model powered by electricity or natural gas (each requiring a connection) or with a propane tank, which allows mobility.

As a rule of thumb, a 47,000 BTU propane-powered, floor-standing patio heater ($200) will heat an 18-foot diameter space. A 20-pound propane tank (about $36, plus $13 for fuel) offers about 10 hours of heating time.

Electric patio heaters use a quartz tube or halogen lamp that emits radiant heat. An infrared wall-mount electric patio heater ($450) equipped with a 1500-watt bulb heats a 9-foot area around the heater and uses about 14.4 kilowatts for a 10 hour period. At 8 cents per kilowatt for electricity, you spend about $1.15 to operate the unit for 10 hours.


By: Jan Soults Walker© Copyright 2015 NATIONAL ASSOCIATION OF REALTORS®


Think Your AC Won’t Make it Through the Summer? We’ve Got the Fixes

Think Your AC Won’t Make it Through the Summer? We’ve Got the Fixes

Is your AC making ominous noises? Maybe it sounds fine but isn’t cooling. Here’s a list of common air conditioning warning signs and their likely causes and fixes.

“Let comfort be your guide,” says Tom Hutchinson of Hutchinson Plumbing Heating Cooling. Air conditioning is all about comfort, so the simplest way to evaluate your system is to ask: Am I comfortable?

Air conditioning and HVAC units don’t last forever — 12 years is an average lifespan — and the moment they fail is usually when you need them the most.

The good news is that not every system malfunction spells total doom. Many nuisances are so cheap and easy to fix, you’ll kick yourself for not doing them sooner.

Quick fixes for your AC checklist on HouseLogic
Warning Sign #1: My Air Conditioning Won’t Turn On

Possible cause: Often, the most likely culprit is the easiest to remedy: The thermostat isn’t set correctly, or power isn’t reaching the AC unit.

The fix: Make sure that the thermostat is set to AC or “cool,” that the temperature setting is correct, and that the battery is fresh. Second, check the circuit breaker: It could simply be a tripped fuse.

Cost: Free

Warning Sign #2: I’m Not as Comfortable as I was Last Year

Possible cause: “Airflow is paramount to comfort,” notes Hutchinson. If you aren’t comfortable, the problem usually can be traced to issues with airflow.

The fix: Change the filter. (You should do this as part of regular HVAC maintenance anyway.) Depending on the quality of the filter, the amount of people living in the house, and if there are pets, the filter should be changed every 30-60 days.

Outdoors, make sure there’s at least 24 inches of clearance on the sides and 5 feet on top of the unit. Also, check to make sure there are no obstructions to the home’s cold air returns and registers.

Cost:
$5 to $20, depending on the filter.

Warning Sign #3: My Utility Bills are Abnormally High

Possible cause: A spike in operating costs typically signals inefficient operation. After a dirty filter (warning sign #2), the most likely culprit is a choked condensing coil. Located within the outdoor unit, the coil has countless cooling fins — much like a car radiator — that can accumulate dust and debris.

The fix: Call out a pro for a spring tune-up.

Cost: $75 to $150

Warning Sign #4: Weird Noises During Startup and Operation

Possible cause: Rattling, buzzing, or ticking? The good news is that the cause might be little more than a loose screw. The bad news is that it could be caused by a bum blower motor (indoors) or bent fan blade (outdoors).

The fix: If you’re lucky, a simple tightening here and lubricating there will fix the problem. If not, you might require a new fan motor or fan blade.

Cost:
$75 to $150 for an inspection and tune-up; $150 to $750 for a new blower motor.

Warning Sign #5: The AC Shuts Off Before or Long After I’m Comfortable

Possible cause: Improper placement of the thermostat can wreak havoc on one’s comfort. The unit might be in direct sun, too close to a register, or near a hot oven. Also, a remodel might have you spending more time where the thermostat is not.

The fix:
Relocate the thermostat.

Cost: Free if you’re handy (and plan on reusing the same unit); up to $250 for a new programmable unit, plus another $90 for an electrician to install it.

Warning Sign #6: There’s a Puddle of Water Next to my Furnace

Possible cause: During normal operation, the system generates moisture in the form of condensate. That water collects in a pan and flows out a line either into a floor drain or condensate sump basin. An accumulation of water signals a blockage or disconnection of the tube.

The fix: Inspect the tube for crimps, clogs, and disconnections. Also, if the water flows into a sump basin, ensure that the sump pump is in good working order.

Cost: Free to clean out blockage; $20 to replace the tube; $40 to $110 for a new condensate sump pump.

Warning Sign #7: The Air Coming Out of the Registers Doesn’t Feel as Cold as it Used to

Possible cause: The refrigerant lines aren’t insulated.

The fix: The outdoor unit is connected to the indoor system by two copper refrigerant lines, which should be covered with insulating sleeves. Make sure that they are. Also, the system may need its refrigerant re-charged.

Cost:
$5 for insulating sleeves; up to $150 for a system re-charge.

Warning Sign #8: My AC Unit Refuses to Kick On at All

Possible cause:
Burnt-out compressor

The fix: If the compressor fails, the unit won’t run. The only fix for this is a costly replacement of the equipment, which includes various small parts, new Freon, and labor.

Cost:
$600 to $1,900. It might be wise to replace your air conditioner if it’s more than eight years old, or if the estimated cost of repair is more than 50% of the cost of a new unit.


By: Douglas Trattner© Copyright 2015 NATIONAL ASSOCIATION OF REALTORS®


Which Way Should Your Ceiling Fan Turn in Summer? The Cool Way!

Which Way Should Your Ceiling Fan Turn in Summer? The Cool Way!

Published: June 28, 2012

Make sure your ceiling fans rotate in the correct direction to cool you in summer.

We’re having a heat wave; so make sure your ceiling fans are spinning in the right direction to move air around the room.

Most fans are reversible: One direction pushes air down, creating a nice summer breeze; the other direction sucks air up, helping you distribute heat in winter. There’s normally a switch on the motor to change the fan’s direction.

Is your fan turning in the right direction for summer?

  • Stand beneath the running fan, and if you feel a cooling breeze, it’s turning correctly.
  • If not, change directions, usually by flicking a switch on the fan’s base.

Typically, it’s counterclockwise or left for summer and clockwise for winter, but the best method is to follow the steps above.

Funny note: We read on Yahoo! that one clever person used bubbles to see which direction his fan was blowing.


By: Lisa Kaplan Gordon© Copyright 2015 NATIONAL ASSOCIATION OF REALTORS®

Quick Ways to Make Some Shade, But Don’t Forget: Trees Are Best

Quick Ways to Make Some Shade, But Don’t Forget: Trees Are Best

Published: May 24, 2011

If you prefer a drier cool, as opposed to the misters we mentioned yesterday, read on to find some quick ways to make some shade. Plus, get some tips on getting shade with some quick-growing trees.

Immediate relief

Umbrellas, awnings, and quick-assembly patio tents are quick, although sometimes costly, methods of creating shade instantly.

The ubiquitous patio umbrella—found even in grocery stores for $30—can either stand alone upright or offset, or slip into a hole in your patio table.

Choose an umbrella that tilts, so you can block the sun at any angle. Or get one that’s fabulous, like Frontgate’s Rimbou Lotus Shade, which looks like a giant palm frond. (Cost: $1,795.)

Retractable awnings, a permanent feature of older southern homes, are traditional shade makers for outdoor areas up to 12 feet from your house. Motorized awnings take the fuss out of opening and closing. Depending on size and what kind of bells and whistles they come with, awnings typically cost from $400 to $3,000.

Portable awnings are my favorite, because they make shade wherever, not just areas close to the house. SunSetter’s Large Oasis Freestanding Awning, measuring 16 ft. by 10 ft., can provide 160 sq. ft. of shade. (Cost: $1,549 manual; $2,099 motorized.)

A cloth gazebo (aka patio tent or canopy) is another option that’s great for entertaining. You can go simple and inexpensive ($50 for Target’s Outdoor Patio Pariesienne Gazebo Canopy, though online reviews indicate you get what you pay for). Or you can step it up with the Garden Oasis Lighted Gazebo, complete with lights and netting for $700 at Sears.

Long-term re-leaf

Growing shade trees is the greenest—and slowest—way to block the sun on patios and decks. There’s nothing as cool as sitting under the shade of an old oak tree.

If you can’t wait 20 years for a little shade, plant a quick-growing variety which, in tree language, means it grows a couple of feet or more each year. You can rush the process by paying more and buying big trees, and you’ll see a return on your investment. Here are some species to consider.

  • American Elm: (Zones 2-9) Grows rapidly up to 100 feet tall and 120 feet wide. Adapts to varied climates and soil conditions.
  • October Glory Red Maple: (Zones 4-9) Provides a 35-foot spread and grows to 40 feet high.
  • Sawtooth Oak: (Zones 4-9) Dark green summer foliage turns yellow to brown in fall. Wildlife will love its acorns.
  • Chinese Pistache: (Zones 6-9) Wonderful wide canopy and grows in all but the coldest zones.
  • Natchez Crape Myrtle: (Zones 7-10) Lots of long-blooming white flowers and cinnamon-colored bark.

How do you block the sun from baking your patio or deck in summer? Did you plant a tree a few years back that is now rewarding you with lots of shade? We’d love to know!


By: Lisa Kaplan Gordon© Copyright 2015 NATIONAL ASSOCIATION OF REALTORS®


5 Deck Makeover Projects Under $300

5 Deck Makeover Projects Under $300

Want to upgrade your deck but watching your budget? Here are 5 easy deck makeover ideas, many well under $300.

1. Add Solar Lighting

If you’d like your wood deck to come alive when the sun goes down, add solar lighting. Solar lights don’t need an on/off switch — they light up when it gets dark, then fade away 4-6 hours later.

You won’t have to plug them in or wire anything, either. Their solar-charged batteries are renewed every day, and the lights are built to withstand all kinds of weather.

Types and cost:

  • Paper lanterns (made from synthetic, weatherproof nylon; $20-$30) are made for hanging and come in all sorts of fun shapes, sizes, and colors.
  • Carriage lights can be fixed on top of a pillar or railing newel post. $45-$150.
  • Solar illuminated replicas of old-fashioned mason jars can be set on any flat surface, about $35.
  • Rope lights have small LED bulbs inside a flexible cord. A 25-foot-long rope with solar charger and stand is $25.

What else: Suspend lanterns from overhead trellises, railings, and nearby trees, where they’ll shed a soft, colorful glow. Wind rope lights around rafters and railings.

2. Install a stone landing at the foot of your deck stairs
3. Put up a privacy screen

4. Paint a faux floor rug on your decking
5. Wash and refinish your wood decking

2. Install a Stone Landing at the Foot of Your Deck Stairs

Dress up the transition from your deck to your yard with a little hardscaping — a stone landing at the bottom of your deck stairs. Stones are a natural compliment to wood decks, and they’ll help prevent mud from forming where there’s heavy foot traffic.

Cost: Flagstone is priced by the pound; you’ll spend $60-$100 for enough stone for a 3-foot-by-4-foot landing.

How-to: Techniques for installing a landing are the same as putting in a patio, although you’ll have to temporarily support your existing stairway while you work around — and under — it.

What else: You should be able to add a landing in less than a day. It’ll get done faster if you hire a pro, but it’ll cost you another $150-$200 in labor.

3. Put Up a Privacy Screen

Whether you’re relaxing alone au naturel or entertaining friends, a little home privacy is always welcome. You can add some vertical supports and fill in a variety of cool screening materials that are as nice for your neighbors to look at as they are for you.

Types and costs:

  • Bamboo fencing comes in a 6-foot-by-16-foot roll for $20-$25.
  • Lattice panels are either wood or plastic, $15-$30 for a 4-foot-by-8-foot panel.
  • Grow climbing plants on a trellis ($20-$100) to create a living privacy screen. Plant climbing vines in tall containers ($40-$120) to raise them above the deck surface and give them a head start filling in your screen.
  • Outdoor fabric resists moisture and fading; $12-$120 per yard. You’ll pay another $20 to have a seamstress cut and hem a 3-foot-by-5-foot panel.

How-to: Your privacy screen should integrate with your deck; make the framework using the same basic materials as your deck railing and structure.

Add some flash by building a frame with 2-by-2- or 2-by-4-inch uprights spaced 1 foot apart, then weaving aluminum flashing between the uprights.

What else: Make sure to position your privacy screen where you’ll get maximum benefit. Sit on your deck and check your lines of sight.

4. Paint a Faux Floor Rug on Your Decking

Punch up a boring old deck with a faux rug. This is a fairly low-cost project with a big wow factor, and one you can share making with your (well-behaved) kids. It works best on a newly cleaned deck (see below).

Cost: Most of your cost will be deck stain or paint in various colors. Because you won’t be using that much stain per color, you can buy quarts. Figure $15-$20 per quart.

How-to: Figure out a size, sketch out the design on your decking, and then all you have to do is paint or stain between the lines. You can use painter’s tape as a guide, but a little leakage is likely on a wood decking surface.

What else: Keep a few basic cleaning supplies on hand for any drips or spills. After the stain is dry, coat the entire deck with a clear deck sealer.

5. Wash and Refinish Your Wood Decking


The ultimate deck makeover is none other than a good cleaning. Applying a coat of deck sealant afterwards ensures your wood decking looks great and will last for decades.

Cost: There are many brands of deck cleaning and brightening solutions. Some require the deck to be wet; others need the decking to be dry. Some are harmful to plants and you’ll have to use plastic sheeting to protect your landscaping. Consult the instructions carefully.

You’ll pay $15-$25 per gallon, enough to clean 300 sq. ft. of decking.

How-to: Scrubbing with a good cleaning solution and rinsing with a garden hose is more foolproof than scouring your decking with a power washer that may damage the surface of the wood.

What else: After you deck is cleaned, apply a coat of deck stain or clear finish. The sealer wards off dirt, wear, and UV rays, and helps prevent deck splinters. A gallon covers 250-350 sq. ft., $20-$35/gallon.

By: John Riha© Copyright 2015 NATIONAL ASSOCIATION OF REALTORS®


The owner of this website has made a commitment to accessibility and inclusion, please report any problems that you encounter using the contact form on this website. This site uses the WP ADA Compliance Check plugin to enhance accessibility.