5 Deck Makeover Projects Under $300

5 Deck Makeover Projects Under $300

Want to upgrade your deck but watching your budget? Here are 5 easy deck makeover ideas, many well under $300.

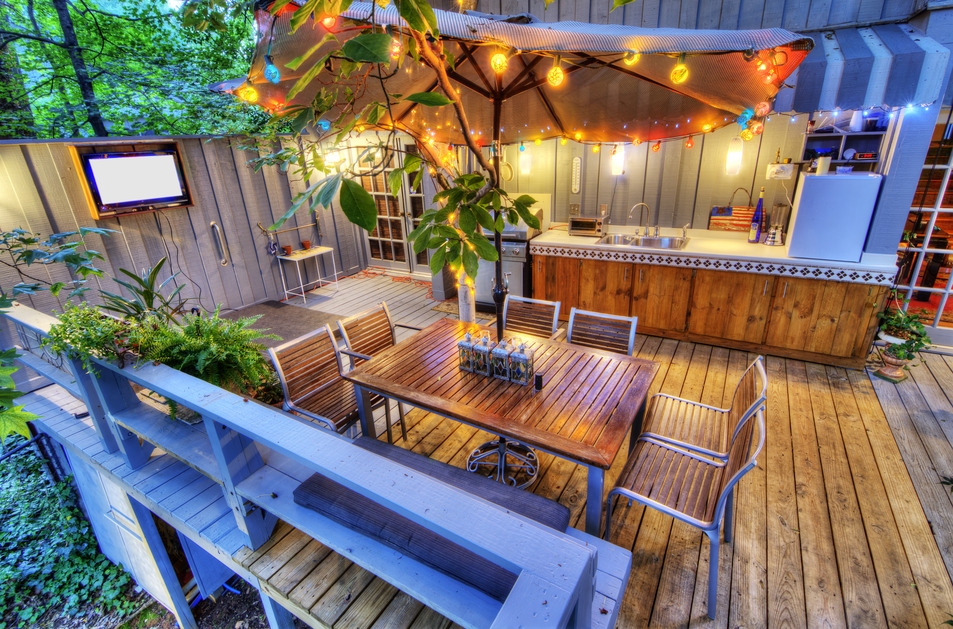
1. Add Solar Lighting

If you’d like your wood deck to come alive when the sun goes down, add solar lighting. Solar lights don’t need an on/off switch — they light up when it gets dark, then fade away 4-6 hours later.

You won’t have to plug them in or wire anything, either. Their solar-charged batteries are renewed every day, and the lights are built to withstand all kinds of weather.

Types and cost:

  • Paper lanterns (made from synthetic, weatherproof nylon; $20-$30) are made for hanging and come in all sorts of fun shapes, sizes, and colors.
  • Carriage lights can be fixed on top of a pillar or railing newel post. $45-$150.
  • Solar illuminated replicas of old-fashioned mason jars can be set on any flat surface, about $35.
  • Rope lights have small LED bulbs inside a flexible cord. A 25-foot-long rope with solar charger and stand is $25.

What else: Suspend lanterns from overhead trellises, railings, and nearby trees, where they’ll shed a soft, colorful glow. Wind rope lights around rafters and railings.

2. Install a stone landing at the foot of your deck stairs
3. Put up a privacy screen

4. Paint a faux floor rug on your decking
5. Wash and refinish your wood decking

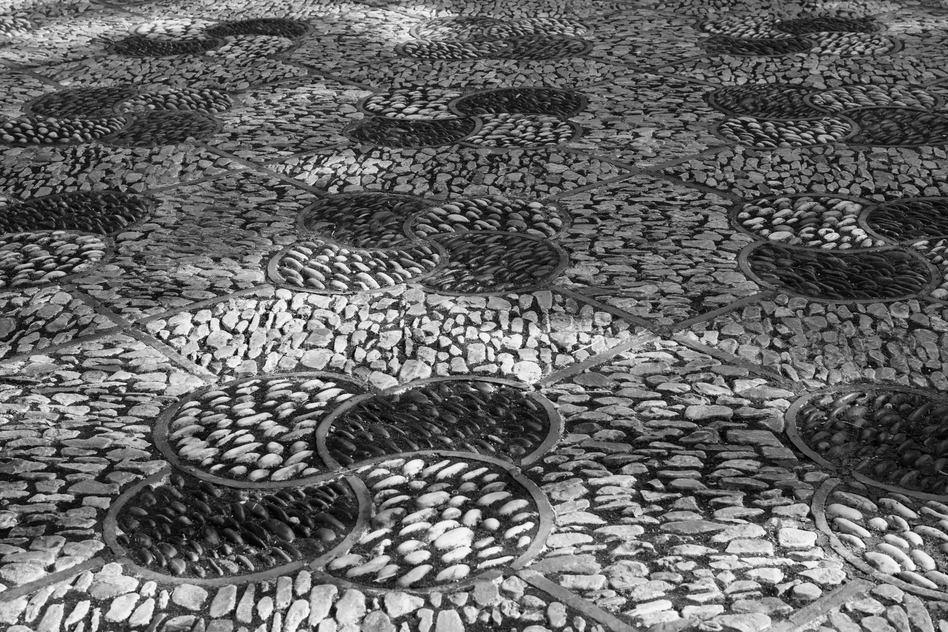
2. Install a Stone Landing at the Foot of Your Deck Stairs

Dress up the transition from your deck to your yard with a little hardscaping — a stone landing at the bottom of your deck stairs. Stones are a natural compliment to wood decks, and they’ll help prevent mud from forming where there’s heavy foot traffic.

Cost: Flagstone is priced by the pound; you’ll spend $60-$100 for enough stone for a 3-foot-by-4-foot landing.

How-to: Techniques for installing a landing are the same as putting in a patio, although you’ll have to temporarily support your existing stairway while you work around — and under — it.

What else: You should be able to add a landing in less than a day. It’ll get done faster if you hire a pro, but it’ll cost you another $150-$200 in labor.

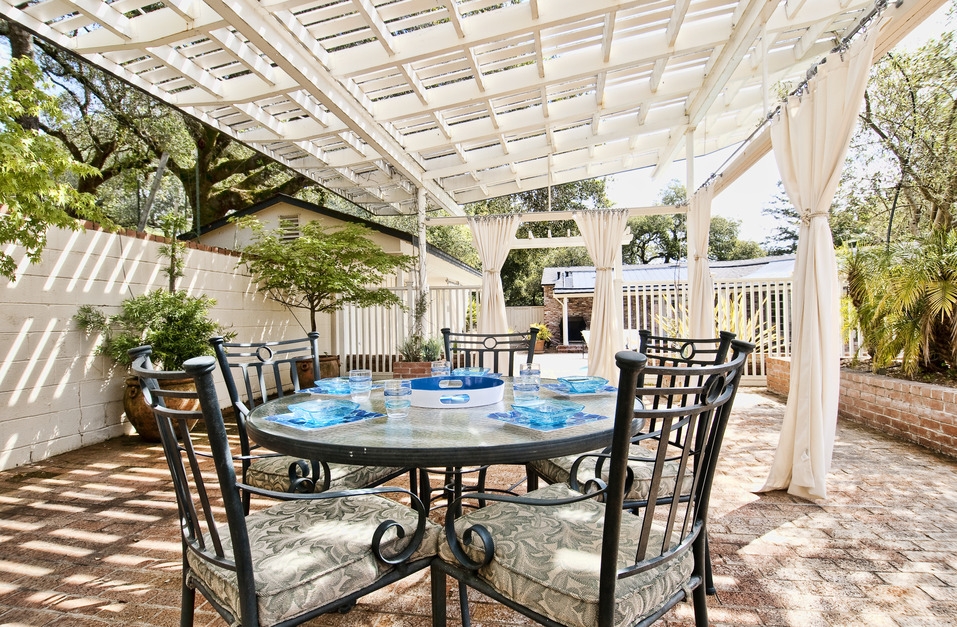
3. Put Up a Privacy Screen

Whether you’re relaxing alone au naturel or entertaining friends, a little home privacy is always welcome. You can add some vertical supports and fill in a variety of cool screening materials that are as nice for your neighbors to look at as they are for you.

Types and costs:

  • Bamboo fencing comes in a 6-foot-by-16-foot roll for $20-$25.
  • Lattice panels are either wood or plastic, $15-$30 for a 4-foot-by-8-foot panel.
  • Grow climbing plants on a trellis ($20-$100) to create a living privacy screen. Plant climbing vines in tall containers ($40-$120) to raise them above the deck surface and give them a head start filling in your screen.
  • Outdoor fabric resists moisture and fading; $12-$120 per yard. You’ll pay another $20 to have a seamstress cut and hem a 3-foot-by-5-foot panel.

How-to: Your privacy screen should integrate with your deck; make the framework using the same basic materials as your deck railing and structure.

Add some flash by building a frame with 2-by-2- or 2-by-4-inch uprights spaced 1 foot apart, then weaving aluminum flashing between the uprights.

What else: Make sure to position your privacy screen where you’ll get maximum benefit. Sit on your deck and check your lines of sight.

4. Paint a Faux Floor Rug on Your Decking

Punch up a boring old deck with a faux rug. This is a fairly low-cost project with a big wow factor, and one you can share making with your (well-behaved) kids. It works best on a newly cleaned deck (see below).

Cost: Most of your cost will be deck stain or paint in various colors. Because you won’t be using that much stain per color, you can buy quarts. Figure $15-$20 per quart.

How-to: Figure out a size, sketch out the design on your decking, and then all you have to do is paint or stain between the lines. You can use painter’s tape as a guide, but a little leakage is likely on a wood decking surface.

What else: Keep a few basic cleaning supplies on hand for any drips or spills. After the stain is dry, coat the entire deck with a clear deck sealer.

5. Wash and Refinish Your Wood Decking


The ultimate deck makeover is none other than a good cleaning. Applying a coat of deck sealant afterwards ensures your wood decking looks great and will last for decades.

Cost: There are many brands of deck cleaning and brightening solutions. Some require the deck to be wet; others need the decking to be dry. Some are harmful to plants and you’ll have to use plastic sheeting to protect your landscaping. Consult the instructions carefully.

You’ll pay $15-$25 per gallon, enough to clean 300 sq. ft. of decking.

How-to: Scrubbing with a good cleaning solution and rinsing with a garden hose is more foolproof than scouring your decking with a power washer that may damage the surface of the wood.

What else: After you deck is cleaned, apply a coat of deck stain or clear finish. The sealer wards off dirt, wear, and UV rays, and helps prevent deck splinters. A gallon covers 250-350 sq. ft., $20-$35/gallon.

By: John Riha© Copyright 2015 NATIONAL ASSOCIATION OF REALTORS®


Patio Shade Ideas Under $300

Patio Shade Ideas Under $300

Published: June 26, 2012

Not all shady deals are bad. These patio shade projects are each under $300.

If you hop-skip like a rookie firewalker across your sun-drenched patio, then patio shade projects are probably a hot priority.

But there’s no reason to get burned on price; you’ll find plenty of low-cost shade-giving options to cool your tootsies.

If you’re looking for shade beyond the typical market umbrellas ($45) and freestanding gazebo kits (starting at $200 at home improvement centers), check out these other easy, affordable patio shade projects — all for under $300:

Tall order: vertical trellis

Even if you have overhead shade, low morning or late afternoon light can make your patio uncomfortably hot in summer. Filter low-flying rays with a vertical trellis for growing leafy climbing plants.

The taller the trellis (60 inches or more), the more time you enjoy in the shade. Plus, an attractive trellis adds structure, lush greenery, and home privacy to your outdoor getaway.

Trellises can be made of weather-resistant wood, metal, PVC, or a combination of materials. Build one from scratch in just a few hours for less than $100 using vertical posts and cross members that plants grip and climb.

Or, make a simple frame and add pre-made garden lattice, $20 for a 4-by-8-foot sheet.

Trellises also come in kits ($40-$250 and up) or ready-made ($15-$200 and up). In an hour or less, you’ll be ready to set the trellis in the ground.

For plants, choose climbing leafy or flowering vines, such as English ivy, golden hop, morning glory, clematis, bougainvillea, or roses. Prices range from $10 to $40 and up for climbers.

Or, start veggie climbers from seed ($1 or less per packet), such as pole beans or sweet peas, and harvest the rewards later.

Patio-dwelling trees

Add leafy shade by planting a sapling or ornamental tree in a container. A small (6-10 feet tall) tree will still throw plenty of shade — Japanese maples and dwarf red buckeyes are favorites. You’ll pay $40-$100 for a young tree.

Select a container large enough to stabilize the tree so wind won’t blow it over. Add a wheeled base for shade mobility. Fill out with these other ideas for container gardening.

A potted tree requires more care than one in the yard. Feed it monthly during the growing season and water regularly (once or twice a day in dry weather). As your trees grow, transplant them to larger pots. Winter over container trees indoors — anywhere with ample light and temperatures that won’t drop below 40 degrees.

Potted citrus trees are a beautiful, bountiful option. A lemon tree loves a sunny patio while offering shade and juicy fruits for squeezing. Other fruit-bearing trees include fig and semi-dwarf apple trees.

A potted palm transports your patio to the tropics with wide fronds for dappled shade and an island feel. Chinese windmill, or chusan palm (Trachycarpus), for example, can grow up to 7 feet tall in a container.

Sailing in the shade

Shade sails are triangular or square pieces of high-strength nylon that you suspend over your patio, adding color, pattern, and plenty of shade. The sails require connections to posts, trees, or rigid structural members of your house, such as exposed rafter ends.

A sail with 11-foot sides starts at $40. More expensive shade sails ($170 and up) include hardware (turnbuckles, eye bolts, and cable) for sturdy, wind-resistant installations.

As a frugal alternative, make your own shade sail using a canvas drop cloth ($15 for a 6-ounce, 9-by-12-foot piece). Install grommets ($10 for a kit) at the corners and loop clothesline ($5 for 50 feet) through the grommets.

Shade from the islands

Mix up a mai tai and enjoy a cool respite beneath these tropically inspired patio shade projects:

  • Top an existing structure, such as a pergola, with reed or bamboo fencing. A 6-by-16-foot roll of bamboo fencing starts at $22. Secure the fencing with galvanized staples or roofing nails.
  • Thatch panels ($200 for a 12 pack of 4-by-4-foot panels) are typically made from palm fronds cut into strips. Staple or nail the panels to the top of an existing pergola or awning frame for tiki-hut charm.


By: Jan Soults Walker© Copyright 2015 NATIONAL ASSOCIATION OF REALTORS®


Your Guide to Choosing Patio Stones

Your Guide to Choosing Patio Stones

Published: April 9, 2013

With so many patio stones on the market, it can be hard to choose. So we’ve done the research to help you make the right choice for your home.

Brick

Brick pavers are classic. They’ve got lots of character, and you can explore your creative chops by setting them in intricate patterns. Thinner than typical “builder bricks” used on home siding, they’re made to hold up under heavy foot traffic.

Brick pavers come in a variety of shapes, sizes, colors, and finishes, and can look old or new. Because they’re smaller than other pavers, they take a while to put in place, and installation costs can be higher.

You can do the job yourself for $3 to $5 per square foot. You’ll need to rent a brick saw — a heavy table-mounted saw that makes cutting masonry a snap. Cost: $60 to $95 per day. Don’t forget: You’ll need to figure out a way to get the brick saw to your house.

For a pro-installed brick patio, you’ll pay $12 to $18 per square foot, professionally installed.

Concrete
Concrete Pavers
Rubber Tiles
Flagstone, Slate, and Marble
Decomposed Granite and Pebble Surfaces
Finding Your Own Recycled Materials
Mixing Materials
Getting on Base

Concrete

Concrete can be finished off in lots of imaginative ways — brushed, acid washed, scored, and stamped — and lots of colors. Its long lifespan and relatively inexpensive installation make it a popular choice.

“For colder climates, consider adding $1 to $2 per square foot for a specialized base preparation and concrete additive,” says Chris Fenmore, principal with Garden Studio Landscape Design.

Stamped concrete can simulate flagstone, brick, cobbles, and other decorative patterns, but adds about $3 per square foot to installation costs.

Figure $6 to 12 per square foot, depending on finish and color.

Brick
Concrete Pavers
Rubber Tiles
Flagstone, Slate, and Marble
Decomposed Granite and Pebble Surfaces
Finding Your Own Recycled Materials
Mixing Materials
Getting on Base

Concrete Pavers

Concrete pavers offer an embarrassment of riches — there are shapes, sizes, textures, and colors galore. Some are plain; some look like real stone; others have intricate patterns embossed on their surfaces. They’re readily available at home improvement centers and are well-suited to DIY patio projects.

Interlocking concrete pavers have tabs and slots so they fit together like pieces of a very simple puzzle. They’re fairly inexpensive, have minimal maintenance, and install quickly.

Concrete pavers are $2 to $8 per square foot. If you’d rather have a pro do it, you’ll pay $7 to $15 per square foot, including materials.

Brick
Concrete
Rubber Tiles
Flagstone, Slate, and Marble
Decomposed Granite and Pebble Surfaces
Finding Your Own Recycled Materials
Mixing Materials
Getting on Base

Rubber Tiles

Rubber tiles are made from recycled tires. They’re designed to go over any surface, and their light weight means you can use them on decks. They look like concrete tiles, with finishes that resemble brick and terra cotta. They’re fairly new on the market, so the jury is still out on how they perform over time.

Rubber tiles are strictly a DIY material, and they snap together with connector clips. They’re good for quickly covering up old, cracked, worn patio surfaces. You’ll pay $3 to $5 per square foot.

Brick
Concrete
Concrete Pavers
Flagstone, Slate, and Marble
Decomposed Granite and Pebble Surfaces
Finding Your Own Recycled Materials
Mixing Materials
Getting on Base

Flagstone, Slate, and Marble

Almost any stone can work as a paver, but most are either sandstone, limestone, slate, or granite. The materials you select will be especially cost-efficient if they come from locally operated quarries; check your local stone supplier before looking at national home improvement chains.

Stone pavers are cut into modular shapes; 6-by-12, 12-by-12, and 18-by-18-inch sizes are standard. Uncut pavers have rough, irregular edges and come in various sizes.

When it comes to installing uncut stone, an experienced pro works quickly and is your best bet for a good-looking patio with even spaces between stones.

Pro installation is $12 to $28 per square foot, depending on the stone you choose.

Want to see some stone patios that really rock?

Brick
Concrete
Concrete Pavers
Rubber Tiles
Decomposed Granite and Pebble Surfaces
Finding Your Own Recycled Materials
Mixing Materials
Getting on Base

Decomposed Granite and Pebble Surfaces

Decomposed granite is made up of very small pieces of granite, ranging in size from 1/4-inch to the size of sand. It’s an affordable way to go, and some folks really love the slightly crunchy texture underfoot, and the way rain disappears — no puddles!

You’ll probably have to refresh and replenish the granite now and then, as the surface can erode with time, so there’s some preventative maintenance involved. Figure about $1 per square foot every three years for upkeep.

Also, decomposed granite isn’t solid and furniture legs tend to sink into the stones. Adding stabilizers that help bind particles together can strengthen the surface.

Cost: $1.50 per square foot without stabilizers, $2 with stabilizers.

Brick
Concrete
Concrete Pavers
Rubber Tiles
Flagstone, Slate, and Marble
Finding Your Own Recycled Materials
Mixing Materials
Getting on Base

Finding Your Own Recycled Materials

Like the idea of upcycling? A patio is a good way to reuse old building materials, and it’s a cost-effective and eco-friendly alternative to new materials. Plus, you’ll be building a one-of-a-kind creation. Tip: Look for materials that provide uniform thickness.

  • Cast-off concrete sections from a neighbor’s old driveway or sidewalk.
  • Check nearby construction sites for old materials — be sure to ask permission before hauling anything away.
  • Know of a building scheduled for demolition? See if there’s any old brick or stone is going to be discarded.

Although the materials are usually free, it’s a good idea to enlist some strong-backed helpers and the use of a pick-up truck. For a typical 12-by-12-foot patio, you’ll save $500 to $800 versus new pavers. Spend some of that on a patio party for your helpers.

(If you’re a salvaged materials aficionado, check out our slideshow on clever ways to use salvage in your home.)

Brick
Concrete
Concrete Pavers
Rubber Tiles
Flagstone, Slate, and Marble
Decomposed Granite and Pebble Surfaces
Mixing Materials
Getting on Base

Mixing Materials

Remember, you’re not stuck with one type of patio paver. Combining different materials — such as brick together with concrete, or stone with rock trim, can create a cool, customized look.

Southern California designer Chris Fenmore notes, “Too much hardscape can be tedious. I often like to use four-inch troughs separating masonry from concrete that can be filled with gravel, beach rocks, or ground cover. They provide a bit of relief from the hardscape and nice detail, adding to the custom look of the yard.”

Brick
Concrete
Concrete Pavers
Rubber Tiles
Flagstone, Slate, and Marble
Decomposed Granite and Pebble Surfaces
Finding Your Own Recycled Materials
Getting on Base

Getting on Base

Choosing paving materials begins with a basic: the base or foundation. The base supports your pavers, and it’s got to be firm, strong, and designed to stand up to years of wear and weather. A poorly installed base leads to shifting and settling that’ll crack concrete and make your patio pavers look like choppy seas.

A sand-and-gravel base is a good DIY project; leave a concrete slab base to the pros.

A gravel and sand base is a simple foundation that lets you “dry set” pavers — you put the pavers on top of the base, then sweep fine sand into the joints to hold them there. Building a gravel-and-sand base is an easy (but time-consuming) DIY project. You’ll pay $2 to $3 per square foot for a DIY job. If you’d rather have a pro do the work, figure $3 to $5 per square foot.

With a sand or gravel base, chances are there’ll be some settling over time. Every couple of years, plan on resetting individual pavers that have gotten out of whack because of settling.

A concrete base offers greater longevity and stability, with less potential for settling. On a concrete slab base, the paving materials are set permanently with mortar, and ongoing maintenance is minimal.

Working with concrete is a challenge for weekend warriors, so skip experimentation (mistakes in concrete are permanent) and go with a pro. You’ll pay $5 to $8 per square foot for a professionally installed concrete base.

If you’re a fan of concrete, check out these imaginative ways to use concrete inside your house.

Brick
Concrete
Concrete Pavers
Rubber Tiles
Flagstone, Slate, and Marble
Decomposed Granite and Pebble Surfaces
Finding Your Own Recycled Materials
Mixing Materials


By: Andrea Nordstrom Caughey© Copyright 2015 NATIONAL ASSOCIATION OF REALTORS®


7 Alternatives to a Reverse Mortgage

7 Alternatives to a Reverse Mortgage

Published: November 18, 2013

A reverse mortgage lets you cash in your home equity without selling your home. The catch? You’ll pay hefty fees. Maybe one of these alternatives would work better for you.

If you’re 62 or older, a reverse mortgage lets you keep your house and receive a lump sum or monthly payments that you don’t have to pay back until you move out or pass away.

Although that can be a blessing if you’re house-rich but cash-poor, the reverse mortgage’s biggest pro (you get cash) comes with cons. Closing costs are steep. And if you spend your home equity early in retirement, you might come up short later in life if you have high medical bills, have to pay for long-term care, or your living expenses outpace your investment income.

Before you commit to an expensive reverse mortgage, it pays to consider alternatives. Maybe one of these seven options will solve your problems.

Related: The Pros and Cons of Reverse Mortgages

1.  Rex Agreements

In a Rex agreement, you agree to sell the future increase or decrease in your home equity. The company buying your equity gives you a lump sum based on your home’s value, how much of your future equity you’re willing to sell, your financial history, and your home’s current condition. A typical Rex agreement would give you about 12.5% of your current home’s value.

With a Rex agreement you don’t have monthly payments or interest charges as you would with a reverse mortgage. When you sell your home, the Rex agreement company gets repaid by taking the agreed upon share of the increase or decrease in your home’s value.

Good option for: Paying off a one-time expense like an existing mortgage or a big medical bill.

Probably won’t work if: You have bad credit or a big mortgage. You’ll need a solid credit history and at least 25% equity in your home to qualify for a Rex agreement.

Cautions: Watch for low-ball appraisals, which can come back to haunt you when you sell and split the profits. Your Rex payment is tax-deferred, not tax free — you’ll need to pay Uncle Sam eventually so consult a tax adviser.

2.  Sell Your Home To Your Children

Planning to leave your home to your children? You could sell it to them now and have them pay you a monthly income or a lump sum. You could set it up like a Rex agreement, where you agree to pay your child a share of the profits when you sell your home in the future. Or, you could sell a portion of your home, say 49%, to your child for a lump sum or via a mortgage (if you want monthly income from your child).

A sale will have tax and estate planning ramifications; working with tax and legal advisers will be a must if this reverse mortgage alternative appeals to you.

Good option for: Parents whose children have high incomes.

Probably won’t work if: You don’t trust your children 100%, or don’t want to do business with family members.

Cautions: When selling your house to someone else, even a child, you may lose the right to live there. Put your agreement in writing and have a lawyer review it.

3.  Home Equity Line of Credit (HELOC)

A HELOC gives you money you can use for anything you want. With most HELOCs, you make interest-only payments the first 10 years, and you may even be able to write off the interest come tax time.

You don’t have to pay off your existing first mortgage to get a HELOC. Since the average life expectancy of a 65-year-old is 19 years, a HELOC might get you through half of the rest of your life.

Good option for: Seniors who want the security of knowing they can pay unexpected expenses in the future. Older homeowners whose life expectancy is 10 years or less.

Probably won’t work if: You have weak credit, can’t show enough income to cover the monthly payment, or you’re trying to get rid of all your monthly mortgage payments.

Caution: The lender can shut down your HELOC if your income or home value fall.

Related: The Risks of HELOCs

4.  Refinance Your Existing Mortgage

If you have an existing mortgage and the monthly payments are too high, consider refinancing or recasting to lower your payment. You’ll pay less each month, but more overall, if you refinance.

Thanks to the federal Home Affordable Refinance Program (HARP) you may be able to refinance even if you owe more than your home is currently worth. If you have plenty of assets, but little income, talk to a Fannie Mae lender. The secondary market giant has a program allowing borrowers who fail to meet income standards to refinance if they can show they have 12 months of payments in a bank or retirement account.

Good option for: Homeowners with relatively small outstanding mortgages and the ability to prove they have enough income or assets to repay their refinanced mortgage.

Probably won’t work if: You have no income and few assets.

5.  Rent Out Part of Your Home

Even though you love your home, if it becomes a financial burden, you may need to consider options other than borrowing. You could sell your house and downsize into something more affordable.

Want to stay where you are? How about renting a room in your house or having a child or other relative move in and share expenses? You pitch in with laundry or cooking. They pitch in with cash. The grandkids get to spend more time with you. Everyone wins.

Good option for: Homeowners with empty bedrooms and congenial attitudes.

Probably won’t work if: You’re particular about how people treat your things, or you don’t get along well with your family.

Caution: Have your new housemates purchase renters insurance. Even if they’re relatives, they might not be covered by your homeowners insurance. Do a credit and background check on unrelated potential housemates.

Related: More Ways to Make Money off Your Home

6.  Get a Job

You may not want to return to your career full time, but you can probably pick up extra cash by returning to work part time or seasonally. Use the money for current expenses or to pay off your existing mortgage.

Good option for: Healthy, mobile seniors.

Probably won’t work if: You can’t handle the stress of working.

Caution: Your Social Security benefits can be trimmed if you earn too much ($15,120 per year in 2013). Check to see how your retirement and health care benefits might be affected.

7.  Seek Public Assistance

You may qualify for public assistance and not realize it. The National Council on Aging’s BenefitsCheckUp will tell you if you’re a candidate for one of more than 2,000 federal, state, and private benefits programs.

Good option for: Everyone

Probably won’t work if: You don’t try it. Even wealthy seniors sometimes qualify for programs like property tax exemptions.

Seek Other Options to Pay Medical Bills

A good number of reverse mortgage borrowers take cash out of their homes to pay medical bills. If you’re one of them, consider these alternatives:

Try to find billing errors. Ask for an itemized bill, the pharmacy ledger, and your medical records from any healthcare provider sending you a large bill. Make sure each charge is for a medication, treatment, or service you actually got and that you were billed only once for each item.

Share your financial problems with your healthcare provider and ask for a payment plan you can afford, even if it’s only $10 a week.

If the bill comes from a healthcare facility, check to see if they’re required to provide free or reduced-price services under the Hill-Burton Act. If they’re still under Hill-Burton, you can apply for your costs to be covered.

Consult with an attorney to find solutions that keep creditors from seizing your home. Even if you owe a large amount, a state homestead exemption might prevent your creditors from foreclosing to get your home equity. An attorney will know if bankruptcy or a negotiated settlement are in your best interest.

Good option for: Low-income homeowners facing large medical bills.

Probably won’t work if: You have other assets you could tap to pay medical bills.

Caution: Don’t sign a “stipulated agreement” promising to make payments to a healthcare creditor without first consulting an attorney. Failing to make stipulated agreement payments could put your home at risk of foreclosure.


By: Barbara Eisner Bayer© Copyright 2015 NATIONAL ASSOCIATION OF REALTORS®


Want to Complain About Your Lousy Mortgage Closing?

Want to Complain About Your Lousy Mortgage Closing?

Published: January 15, 2014

A consumer watchdog wants homeowner feedback — by Feb. 7 — on hellish settlements to make the process better for all.

Think it took a long time to close your last purchase or refi mortgage? How about more than seven hours? That’s what happened to a couple of folks I know in Texas, and theirs is just one of many stories I’ve heard about things, ranging from interest rates that rise to mysterious appearance of random fees, that go way wrong at settlements.

I’ve heard many of these closing table stories from my husband, who used to be a loan officer, and my BFF, who’s a REALTOR®. Add to that a couple dozen closings where we bought or sold rental properties and you’ve probably got a reality TV show.

Do these stories sound familiar?

  • You were told you had to write a check for $20,000 because the loan officer “forgot” to mention that your loan was approved for only 80% of what you need to buy the house.
  • It took so long to get to closing that your interest rate lock expired. You had to pay a higher interest rate even though you promptly provided all the paperwork the lender asked for.
  • Fees show up on your settlement statement that weren’t on your loan estimate. You wanted to argue, but since you were getting a $50,000 check from your cash-out refinance, you closed anyway.
  • You found out at the settlement table about community covenants that restrict what you can do with your new property.

There’s no simple solution for these kinds of snafus. You can refuse to close the deal and walk away from settlement. Easy to do when you’re refinancing, but when you’re buying or selling a house, that could violate your sales contract.

CFPB Has a Plan to Fix Closing Problems

If you got shafted at the closing table, you have a unique chance to tell someone who can make sure that what happened to you doesn’t happen to other people. (It’s OK to share positive stories, too.)

The Consumer Financial Protection Bureau (CFPB) is collecting consumers’ closing table stories. “The stories and information you provide will be used to research and test solutions that address some of the biggest pain points associated with closing on a mortgage,” CFPB Policy Analyst Noerena Limon said in a CFPB blog post.

Get your comments in by Feb. 7, 2014.

Improvements Already in the Pipeline

Some of the work the CFPB has already done for consumers should eventually clean up some closing table issues. Starting in August 2015, you’ll get a new loan estimate when you apply for a mortgage and a comparative closing disclosure three days before closing.

That closing document is about a bazillion times easier to read than the current HUD-1 Settlement Sheet. And because both documents are very clear, you’ll be able to quickly tell when things like your interest rate or fees change between application and closing.

Related: How Your Money Management Practices Affect your Credit Score

Ways to Ensure a Smooth Closing

Until lenders start giving you the new disclosures:

Have your REALTOR® look over your settlement statement, even if you’re doing a refi. The title company can email or fax her your settlement sheet whenever you get it.

Call your title company ahead of the closing to see if everything is ready to go before you head over there. Be warned, though, your title company may tell you the paperwork is there even if it’s not, because they’d rather have you sit waiting for the closing package than wait for you to show up.

Bring the disclosures you got when you applied for the loan, so you know if any of the deal terms changed. If something seems wrong, ask about it and don’t sign if anything isn’t as promised.


By: Dona DeZube© Copyright 2015 NATIONAL ASSOCIATION OF REALTORS®


The owner of this website has made a commitment to accessibility and inclusion, please report any problems that you encounter using the contact form on this website. This site uses the WP ADA Compliance Check plugin to enhance accessibility.