How to Remove Old Caulk

How to Remove Old Caulk

How to Remove Old Caulk in 4 Easy Steps

Step 1. Apply a caulk remover, such as 3M caulk remover or McKanica silicone caulk remover gel. Then be patient. Very patient. The directions say to wait 2 or 3 hours, but the longer you wait, the easier it will come off. Overnight is good. If it’s a particularly tough job — such as very old, hardened caulk or multiple layers — wait 24 hours.

While you’re waiting for the caulk to soften, browse our pictures of home improvements gone bad. They’ll inspire you to do the job right while tickling your funny bone.

Step 2. Use a caulk remover tool to pry the caulk loose. (See video below.) Pros use a utility knife or blade, but don’t be tempted unless your hands are as steady as a surgeon’s. Otherwise, you could damage the tub, sink, shower, or wall you’re trying to improve. Most of the caulk should come off easily in long strips, although you might need to use needle-nose pliers or tweezers to pull out some bits.

By the way, did you know that the word “caulk” originated from boat builders who needed something to seal their boats? Today, most manufacturers label home-use caulk as “sealant.”

Step 3. Using a small putty knife, toothbrush, and/or the hook end of a 5-in-1 painter’s tool (see picture below), scrape any remaining bits of caulk lose (this step, too, requires a bit of patience).

Step 4. Clean the surface using alcohol. Then kill any mold or mildew with a mixture of 1/3 cup bleach to 1 gallon of water. Allow to completely air dry (again, patience) before applying new caulk.

TIP: If you’re planning to re-caulk a tiled shower or bathtub wall, deep clean the tile before you remove the old caulk. Soap scum and other surface grime can inhibit the caulk’s ability to adhere. You don’t want water to get behind the tile and into your wall, which can create a nasty mold and mildew problem.

By: Lara Edge: © Copyright 2015 NATIONAL ASSOCIATION OF REALTORS®

Remove Stains From Walls Before You Paint

Remove Stains From Walls Before You Paint

Dirt and Grime

Dirt and grime are part of everyday life. The oil from your hands gets onto walls, cabinets, doors, and door frames. A Mr. Clean Magic Eraser ($3 for 4 pads) easily cuts through these stains. Wet the sponge and rub gently to avoid taking bits of paint off with the stain.

Or try this: Mix 1 cup ammonia, 1/2 cup white distilled or apple cider vinegar, and 1/4 cup baking soda with one gallon of warm water. Wipe the solution over walls with a sponge or cloth, and rinse with clear water. The solution won’t dull the painted finish or leave streaks.

Grease

Grease is an occupational hazard of cooking; it covers cabinets and walls and attracts dirt and dust. Any good dish soap can remove grease stains on walls. For small stains, mix 1/4 teaspoon of soap in a cup of warm water, and wipe. Rinse with clean water, and blot until dry. Clean stubborn grease stains with solution of 1/3 cup of white household vinegar with 2/3 cup of water.

Crayons

Wall erasers work like a charm on crayon marks. If they don’t do the trick:

  • Rub marks with toothpaste (not gel).
  • Erase marks with an art gum or a pencil eraser; use a circular motion.
  • Swipe marks with baby wipes.
  • Sprinkle baking soda on a damp sponge and scrub marks.

Permanent Marker

Permanent markers are tough to remove from walls. Soak a cotton ball with rubbing alcohol and dab the stain. Or spray marks with hairspray, then wipe drips.

Ink

Ballpoint ink, which is oil-based, often succumbs to foaming shaving cream, dry-cleaning solvents such as Carbona, or nail polish remover. Make sure you open windows when using cleaning solvents and polish remover.

Mildew

Mildew is a fungus that eats soap scum and body oil. To remove from walls, spray with vinegar water: 1 tablespoon white vinegar to 1 quart water. Also, try an enzyme laundry detergent; follow the pre-treating directions on the label. Blot it on the stain, and then rinse thoroughly with water.

Water Stains

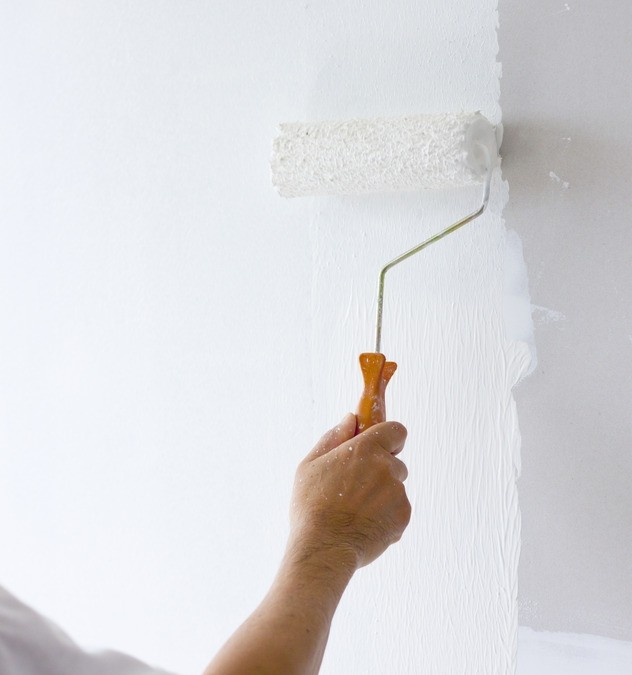
After you’ve solved the problem that caused the water stains, rinse with a solution of 1 cup bleach to 1 gallon of water to prevent mold and mildew from growing. Thoroughly dry with a hairdryer or fans. If bleaching doesn’t remove water stains, you’ll have to repaint. Prime the walls with a stain-killing primer, such as Kilz Paint.

Related:

  • 7 Things You Should Paint Instead of Replace to Save Money
  • Repair Walls to Give Rooms a Fresh Face


By: Pat Curry:© Copyright 2015 NATIONAL ASSOCIATION OF REALTORS®


Kitchen Countertop Triage: First Aid for Scratches

Kitchen Countertop Triage: First Aid for Scratches

Repair kitchen counters that show a history of wine spills, dropped pans, and unidentified sharp objects, and you’ll maintain the value of your kitchen and home. You can easily hide some counter mishaps, while only professional contractors can solve other surface problems. Here’s a look at counter cures and lost causes.

Granite

Even granite counters suffer kitchen wear and tear. But you can make them shine with a little time and know-how. After you fix them, don’t forget to reseal them.

Cracks, chips, scratches: Fill nicks in granite by building up layers of epoxy resin colored to match the stone. Clean the area first with acetone, which breaks down grease. Be sure to open a window for ventilation.

Stains: The type of stain — wine or ink, oil or bleach — determines the type of poultice you’ll need to suck it out. A paste of flour and hydrogen peroxide pulls out grease, oil, bleach, and ink stains; a mix of flour and bleach cleans wine stains. If you want to go commercial, check out Alpha, Aqua Mix, and StoneTech stone cleaners. Cost: $6 to $20.

Related: Can Granite Film Fool the Eye?

Solid-Surface Counters

Solid-surface countertops, such as Corian, are man-made from resin, acrylic, and other materials. They’re tough but not impervious to scratches and stains. To repair minor scratches, rub a white polishing compound on the area with a wool pad, then apply a countertop wax.

For deeper scratches or cuts, call a professional. Figure labor costs at about $15 to $35 an hour. If you need to replace portions of the counter, figure at least $35 to $65 per square foot.

Laminate

Fixing gouges or covering burns in laminate is tough for mortals, though repairing minor problems is doable.

  • Fix small chips with laminate repair paste that matches the color of the countertop.
  • Cover scratches with countertop polish or car wax.
  • Fix peeling laminate with contact cement applied to both surfaces and pressed back into place.
  • Remove coffee and tea stains with vinegar or a paste of baking soda and household cleaner.

Bigger problems will require replacing the damaged stretch. Laminate comes in a billion colors, but finding an exact match for an old counter could be difficult.

To get the look you want, replace the counter. Labor will cost $15 to $35 per hour; countertops range from $3 per linear foot for Plain Jane straight-edged laminates to $100 per linear foot for laminates with a beveled edge that look like granite.

Related: Why Laminate Countertops Deserve a Second Look

Tile

If you’ve planned ahead and stockpiled old tiles, then grab a few and replace cracked or scratched areas. If you don’t have extra tile, then attempt the following first aid:

  • Wipe away scratches with a dab of toothpaste on a clean cloth.
  • Work epoxy glue into cracks with a toothpick, then color with matching oil-based artist paint.
  • Remove old grout with a utility knife, then replace with a rubber trowel.

Stainless Steel

Stainless steel countertops become scratched, stained, and dull over time. Although you’ll never completely remove scratches, you can buff them into a warm patina by massaging with vegetable oil.

Remove stains with a paste of baking soda and dish soap. A sprinkle of Barkeeper’s Friend will remove stains without scratching.

Related: 99-Cent Store Solution for Scuffed Countertops


By: Jane Hoback:© Copyright 2015 NATIONAL ASSOCIATION OF REALTORS®


11 Ways to Create a Welcoming Front Entrance for Under $100

11 Ways to Create a Welcoming Front Entrance for Under $100

Wouldn’t it be nice to approach your home’s entrance with a grin instead of a grimace? Take our tips for beating a clear, safe, and stylish path to your front door.

First impressions count — not just for your friends, relatives, and the UPS guy, but for yourself. Whether it’s on an urban stoop or a Victorian front porch, your front door and the area leading up to it should extend a warm welcome to all comers — and needn’t cost a bundle.

Here’s what you can do to make welcoming happen on the cheap.

1. Clear the way for curb appeal. The path to your front door should be at least 3 feet wide so people can walk shoulder-to-shoulder, with an unobstructed view and no stumbling hazards. So get out those loppers and cut back any overhanging branches or encroaching shrubs.

2. Light the route. Landscape lighting makes it easy to get around at night. Solar-powered LED lights you can just stick in the ground, requiring no wiring, are suprisingly inexpensive. We found 8 packs for under $60 online.

3. Go glossy. Borrow inspiration from London’s lovely row houses, whose owners assert their individuality by painting their doors in high-gloss colors. The reflective sheen of a royal blue, deep green, crimson, or whatever color you like will ensure your house stands out from the pack.

Related: Pictures of 10 Great Value-Add Exterior Paint Jobs

4. Pretty up the view. A door with lots of glass is a plus for letting light into the front hall — but if you also want privacy and a bit of decor, check out decorative window film. It’s removable and re-positionable, and comes in innumerable styles and motifs. Pricing depends on size and design; many available for under $30.

A way to get the look of stained glass without doing custom work or buying a whole new door: Mount a decorative panel on the inside of the door behind an existing glass insert, $92 for an Arts and Crafts-style panel 20-inches-high by 11-inches-wide.

5. Replace door hardware. While you’re at it, polish up the handle on the big front door. Or better yet, replace it with a shiny new brass lockset with a secure deadbolt. Available for about $60.

6. Please knock. Doorbells may be the norm, but a hefty knocker is a classic that will never run out of battery life, and another opportunity to express yourself (whatever your favorite animal or insect is, there’s a door-knocker in its image).

7. Ever-greenery. Boxwoods are always tidy-looking, the definition of easy upkeep. A pair on either side of the door is traditional, but a singleton is good, too. About $25 at garden centers. In cold climates, make sure pots are frost-proof (polyethylene urns and boxes mimic terracotta and wood to perfection).

8. Numbers game. Is your house number clearly visible? That’s of prime importance if you want your guests to arrive and your pizza to be hot. Stick-on vinyl numbers in a variety of fonts make it easy, starting at about $4 per digit.

9. Foot traffic. A hardworking mat for wiping muddy feet is a must. A thick coir mat can be had at the hardware store for less than $20. Even fancier varieties can be found well under $50.

10. Go for the glow. Fumbling for keys in the dark isn’t fun. Consider doubling up on porch lights with a pair of lanterns, one on each side of the door, for symmetry and twice the illumination. Many mounted lights are available well under $100.

11. Snail mail. Mailboxes run the gamut from kitschy roadside novelties masquerading as dogs, fish, or what-have-you to sober black lockboxes mounted alongside the front door. Whichever way you go, make sure yours is standing or hanging straight, with a secure closure, and no dings or dents. The mail carrier will thank you.


By: Cara Greenberg:© Copyright 2015 NATIONAL ASSOCIATION OF REALTORS®


An Unlikely Place to Find Free Seeds for Your Garden

An Unlikely Place to Find Free Seeds for Your Garden

Want free seeds for your vegetable garden? Look no farther than your kitchen.

Free seeds and starter plants for your vegetable garden happily live in your refrigerator and pantry. Plant a potato and you’ll harvest a bagful; plant a single horseradish root, and you’ll grow a field of the eye-watering spice.

Theoretically, every fruit or vegetable seed in your kitchen can germinate and deliver baby produce. But some store-bought veggies are hybrids and produce offspring that look nothing like their parents. Others are irradiated to prevent insect infestation, or sprayed with anti-sprouting chemicals to prevent spoilage, which wrecks their ability to go forth and multiply.

Your best bet is to shop for produce in an organic market. Seeds (and tuberous roots) from chemical-free produce yield plants that sprout readily and look like their folks.

Here’s a look at some kitchen leftovers you can plant this spring.

Celery: The next time you chop celery, save the crown (the bottom), place it in a shallow bowl of water until the center leaves turn green and sprout, then transplant it into your garden. Or, just plant the crown straight from crisper into garden, keeping the top of the crown at soil level. Not only is celery a yummy vegetable, it attracts beneficial insects that keep unwanted bugs at bay.

Garlic: Separate cloves and plant the largest ones pointy-side up, under about 2 inches of rich, well-drained soil. Plant garlic around roses to reduce black spot and sooty mold.

Poppies: For a brilliant floral display, shake poppy seeds directly from the container onto well-drained soil. Lightly press into the ground and cover with a dusting of soil. Thin seedlings to about 10 inches apart.

Horseradish: In the fall, plant the tuberous horseradish roots horizontally under 2 inches of soil that’s been well-worked with compost. The plant is invasive and spreads quickly, so plant at the end of garden rows or in areas where they have room to wander. Harvest with a pitchfork in late fall.

Ginger: Select a plump ginger rhizome with many small, growing buds. Plant just under rich soil in a spot with filtered sunlight and wind protection. Avoid planting in low-lying areas, or in spots with poor drainage.

Sesame: These seeds grow into flowering plants that are resistant to heat, drought, and pests. Press seeds 1 inch into well-draining soil. Water lightly for 3-5 days after planting, then as needed. Be sure not to overwater, because sesame plants do not like to sit in wet soil. Harvest in about 150 days after seed pods open and seeds are thoroughly dry.

Beans and peas: It’s easy-peasy to plant any dried bean or pea. Just push the seed under 1-2 inches of loose, rich soil in a location that gets at least 6 hours of sun each day. If your soil is hard clay, grow beans and peas in a container.

Potatoes: If you’ve ever kept a potato too long in a bowl, you’ve seen the plants begin to sprout. Place the potato in a 10-inch-deep hole, and cover with rich soil. As the plant grows, continue to mound soil around its stem. Harvest potatoes in late fall.

Tomatoes: If you love heirloom tomatoes, cut them in half to scrape out their seeds. “Ferment” seeds in a glass jar with about a cup of water for 2-4 days. When a foamy mold appears, rinse and dry seeds on a paper plate. Start tomato plants indoors in containers, then transplant to a garden spot with full sun.


By: Lisa Kaplan Gordon:© Copyright 2015 NATIONAL ASSOCIATION OF REALTORS®

The owner of this website has made a commitment to accessibility and inclusion, please report any problems that you encounter using the contact form on this website. This site uses the WP ADA Compliance Check plugin to enhance accessibility.