Kitchen Countertop Triage: First Aid for Scratches

Kitchen Countertop Triage: First Aid for Scratches

Repair kitchen counters that show a history of wine spills, dropped pans, and unidentified sharp objects, and you’ll maintain the value of your kitchen and home. You can easily hide some counter mishaps, while only professional contractors can solve other surface problems. Here’s a look at counter cures and lost causes.

Granite

Even granite counters suffer kitchen wear and tear. But you can make them shine with a little time and know-how. After you fix them, don’t forget to reseal them.

Cracks, chips, scratches: Fill nicks in granite by building up layers of epoxy resin colored to match the stone. Clean the area first with acetone, which breaks down grease. Be sure to open a window for ventilation.

Stains: The type of stain — wine or ink, oil or bleach — determines the type of poultice you’ll need to suck it out. A paste of flour and hydrogen peroxide pulls out grease, oil, bleach, and ink stains; a mix of flour and bleach cleans wine stains. If you want to go commercial, check out Alpha, Aqua Mix, and StoneTech stone cleaners. Cost: $6 to $20.

Related: Can Granite Film Fool the Eye?

Solid-Surface Counters

Solid-surface countertops, such as Corian, are man-made from resin, acrylic, and other materials. They’re tough but not impervious to scratches and stains. To repair minor scratches, rub a white polishing compound on the area with a wool pad, then apply a countertop wax.

For deeper scratches or cuts, call a professional. Figure labor costs at about $15 to $35 an hour. If you need to replace portions of the counter, figure at least $35 to $65 per square foot.

Laminate

Fixing gouges or covering burns in laminate is tough for mortals, though repairing minor problems is doable.

  • Fix small chips with laminate repair paste that matches the color of the countertop.
  • Cover scratches with countertop polish or car wax.
  • Fix peeling laminate with contact cement applied to both surfaces and pressed back into place.
  • Remove coffee and tea stains with vinegar or a paste of baking soda and household cleaner.

Bigger problems will require replacing the damaged stretch. Laminate comes in a billion colors, but finding an exact match for an old counter could be difficult.

To get the look you want, replace the counter. Labor will cost $15 to $35 per hour; countertops range from $3 per linear foot for Plain Jane straight-edged laminates to $100 per linear foot for laminates with a beveled edge that look like granite.

Related: Why Laminate Countertops Deserve a Second Look

Tile

If you’ve planned ahead and stockpiled old tiles, then grab a few and replace cracked or scratched areas. If you don’t have extra tile, then attempt the following first aid:

  • Wipe away scratches with a dab of toothpaste on a clean cloth.
  • Work epoxy glue into cracks with a toothpick, then color with matching oil-based artist paint.
  • Remove old grout with a utility knife, then replace with a rubber trowel.

Stainless Steel

Stainless steel countertops become scratched, stained, and dull over time. Although you’ll never completely remove scratches, you can buff them into a warm patina by massaging with vegetable oil.

Remove stains with a paste of baking soda and dish soap. A sprinkle of Barkeeper’s Friend will remove stains without scratching.

Related: 99-Cent Store Solution for Scuffed Countertops


By: Jane Hoback:© Copyright 2015 NATIONAL ASSOCIATION OF REALTORS®


11 Ways to Create a Welcoming Front Entrance for Under $100

11 Ways to Create a Welcoming Front Entrance for Under $100

Wouldn’t it be nice to approach your home’s entrance with a grin instead of a grimace? Take our tips for beating a clear, safe, and stylish path to your front door.

First impressions count — not just for your friends, relatives, and the UPS guy, but for yourself. Whether it’s on an urban stoop or a Victorian front porch, your front door and the area leading up to it should extend a warm welcome to all comers — and needn’t cost a bundle.

Here’s what you can do to make welcoming happen on the cheap.

1. Clear the way for curb appeal. The path to your front door should be at least 3 feet wide so people can walk shoulder-to-shoulder, with an unobstructed view and no stumbling hazards. So get out those loppers and cut back any overhanging branches or encroaching shrubs.

2. Light the route. Landscape lighting makes it easy to get around at night. Solar-powered LED lights you can just stick in the ground, requiring no wiring, are suprisingly inexpensive. We found 8 packs for under $60 online.

3. Go glossy. Borrow inspiration from London’s lovely row houses, whose owners assert their individuality by painting their doors in high-gloss colors. The reflective sheen of a royal blue, deep green, crimson, or whatever color you like will ensure your house stands out from the pack.

Related: Pictures of 10 Great Value-Add Exterior Paint Jobs

4. Pretty up the view. A door with lots of glass is a plus for letting light into the front hall — but if you also want privacy and a bit of decor, check out decorative window film. It’s removable and re-positionable, and comes in innumerable styles and motifs. Pricing depends on size and design; many available for under $30.

A way to get the look of stained glass without doing custom work or buying a whole new door: Mount a decorative panel on the inside of the door behind an existing glass insert, $92 for an Arts and Crafts-style panel 20-inches-high by 11-inches-wide.

5. Replace door hardware. While you’re at it, polish up the handle on the big front door. Or better yet, replace it with a shiny new brass lockset with a secure deadbolt. Available for about $60.

6. Please knock. Doorbells may be the norm, but a hefty knocker is a classic that will never run out of battery life, and another opportunity to express yourself (whatever your favorite animal or insect is, there’s a door-knocker in its image).

7. Ever-greenery. Boxwoods are always tidy-looking, the definition of easy upkeep. A pair on either side of the door is traditional, but a singleton is good, too. About $25 at garden centers. In cold climates, make sure pots are frost-proof (polyethylene urns and boxes mimic terracotta and wood to perfection).

8. Numbers game. Is your house number clearly visible? That’s of prime importance if you want your guests to arrive and your pizza to be hot. Stick-on vinyl numbers in a variety of fonts make it easy, starting at about $4 per digit.

9. Foot traffic. A hardworking mat for wiping muddy feet is a must. A thick coir mat can be had at the hardware store for less than $20. Even fancier varieties can be found well under $50.

10. Go for the glow. Fumbling for keys in the dark isn’t fun. Consider doubling up on porch lights with a pair of lanterns, one on each side of the door, for symmetry and twice the illumination. Many mounted lights are available well under $100.

11. Snail mail. Mailboxes run the gamut from kitschy roadside novelties masquerading as dogs, fish, or what-have-you to sober black lockboxes mounted alongside the front door. Whichever way you go, make sure yours is standing or hanging straight, with a secure closure, and no dings or dents. The mail carrier will thank you.


By: Cara Greenberg:© Copyright 2015 NATIONAL ASSOCIATION OF REALTORS®


How to Prevent Weeds from Ever Sprouting

How to Prevent Weeds from Ever Sprouting

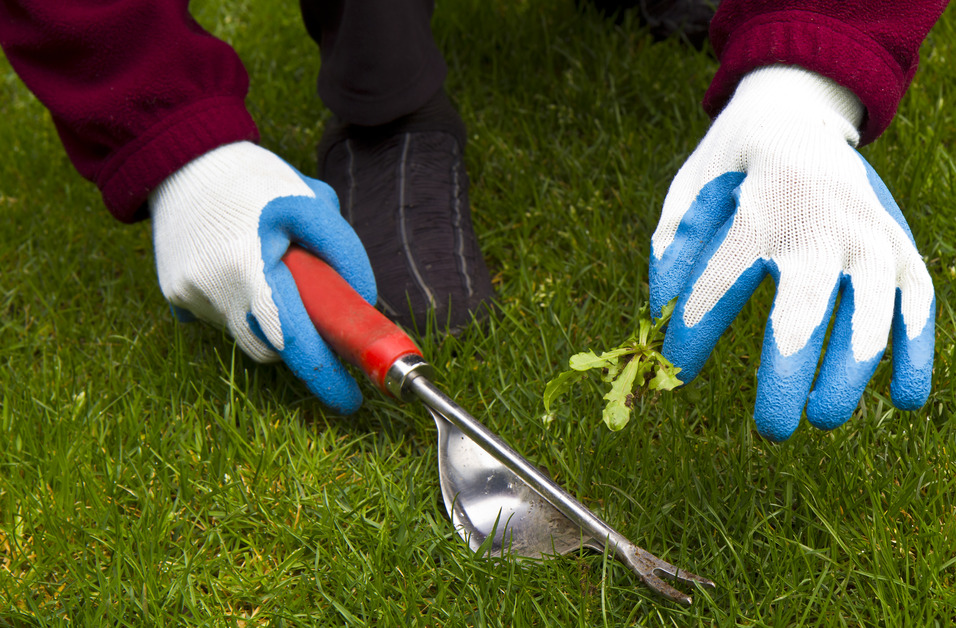
When it comes to weeds in your garden, an hour of prevention is better than a season of yanking.

Unlike seeds and plants you buy from catalogs and nurseries, indigenous common weeds are naturally suited to the sun, soil, and water conditions of your garden. That’s why it’s so hard to get rid of weeds after they’ve taken root.

But if you prevent weed seeds from germinating, your garden will be weed-free. Here are some surefire ways to keep weeds from growing in the first place.

Shhh! Don’t Disturb the Soil

Weed seeds “sleep” in your soil all the time, just waiting for sunshine to enable them to germinate. Left underground, many weed seeds remain dormant for years. So the less you disturb the soil, the more likely weed seeds will remain asleep.

Avoid high-powered tillers, and go easy on the hand cultivating. Sow your flower and vegetable seeds above the ground in mounds of compost, shredded leaves, or even in bags of topsoil. Better yet, plant seedlings and starts.

Smother Weed Seeds

Another way to keep seeds asleep is to cover your soil with sun-blocking organic or synthetic mulches.

Organic mulches — hardwood mulch, newspaper, cardboard, straw — degrade in a few months and improve soil structure and add nutrients. Synthetic mulches — landscaping paper, plastic — can last several seasons, but won’t help rebuild soil when they eventually degrade.

Heed these mulching tips:

  • Wet the ground before you lay down layers of paper, which will prevent the paper from blowing away while you work.
  • Scout yard sales for old carpet and wallpaper, efficient sun blocks that prevent weeds.
  • Spread mulch 2 to 4 inches deep to suppress weeds and retain moisture.
  • Always pick straw, not hay, to prevent weeds. Hay usually contains hayseeds, which will sprout where you’re trying to keep weeds out.

Learn more about mulching with our handy garden mulch guide.

Wage a Chemical Attack

Pre-emergent herbicides prevent weed seeds from germinating, but don’t kill existing plants and grasses.

The exact timing for applying a pre-emergent herbicide is hard to pinpoint because you must spread the herbicide before seeds germinate, which happens underground at different times.

Conventional gardening wisdom says spread pre-emergent herbicides when the daffodils pop or the forsythia wilts. But advance planning is the best way to determine when to spread. Log the date when you see the first weeds in your garden, then subtract three weeks to arrive at the date you should spread the pre-emergent herbicide next spring.

Grow Up Close and Personal

The closer together you plant your flowers and vegetables, the less space weed seeds will have to grow.

If you double-dig — loosen (don’t pulverize) soil at least 2 feet down — you can plant cheek-by-jowl, because plant roots can grow down, not out, to find water and nourishment. If you plant intensively in a diamond-shaped pattern — rather than rows — you’ll avoid barren spots where weeds will grow.

To keep weeds out of lawns, make sure your grass is lush and healthy so weeds have no room to grow. Reseed bald patches; fertilize if a soil test determines nutrient deficiencies; aerate in the fall.


By: Lisa Kaplan Gordon:© Copyright 2015 NATIONAL ASSOCIATION OF REALTORS®


Plant These Fun Veggies Your Kids Will Love to Eat

Plant These Fun Veggies Your Kids Will Love to Eat

Win the eternal battle between kids and veggies by letting your little ones plant these child-friendly varieties in your garden. The more invested they are in the growing process, the more they’ll want to eat the fruits (and veggies!) of their labor.

Heirlooms: Heirloom (non-hybrid) veggies can grow in surprising colors and wacky shapes. Try:

  • Chocolate peppers
  • Watermelon radishes
  • Italian rose beans

As an added bonus: Heirloom plants and seeds can trace their ancestry back hundreds of years, so you can slip in some history while you’re planting with your kids.

Popcorn: Your kids can grow their own popcorn — specialty kernels with tough hulls and starchy centers that produce the pop! when heated. Japanese White hull-less and Robust Yellow hybrid are popular varieties.

Grow in full sun and keep well-watered.

Leafy greens: Greens provide almost instant gratification for kids. Little hands can scatter lettuce seeds anywhere and see tiny sprouts in about a week. In a month, help them cut the tops for a salad. In hot weather, the plants will bolt (kids will love how they suddenly shoot up), flower, and go to seed, which kids can harvest for planting next year.

Pick mild, sweet varieties, such as iceberg, which are more likely to appeal to youngsters.

For some extra fun, plant leafy greens in an old wheelbarrow or unused wading pool that’s reserved as a garden space just for kids.

Climbing peas: Kids will enjoy watching these vines climb up trellises. Some popular pea seeds:

  • Super Sugar Snap
  • China Snow
  • Mammoth Melting Sugar

Plant in full sun as soon as the soil has thawed.

Cherry tomatoes: Kids will gladly pop these sweet mini-tomatoes into their mouths straight from the vine.

  • Sweet 100 and Matt’s Wild Cherry are particularly yummy and sweet.
  • Sungold produces a golden-orange fruit.
  • Snow White is a pale yellow, almost white.
  • Jolly Elf is oblong with sweet, red fruits.

Be prepared to stake or cage the plants, because they can grow 8 feet tall. And throw on some mulch so they don’t dry out.

Growing tomatoes can be tricky, so check out this helpful article, How to Grow Your Best Tomatoes Ever.

Pumpkins: What kid doesn’t love a pumpkin? Large seeds are easy for kids to plant in little hills surrounded by plenty of open growing space: a single vine can stretch 30 feet.

  • Connecticut Field is the traditional jack-o’-lantern pumpkin.
  • Rouge Vif d’Etampes is the Cinderella coach pumpkin.
  • Musquee de Provence is a flavorful, deep-brown pumpkin with orange flesh.
  • Cucurbita maxima is the giant pumpkin that can top 500 pounds.

Even if you can’t get your kids to eat roasted pumpkin, they’ll love the toasted and salted pumpkin seeds. Warning: never throw pumpkin pulp down the drain; it can wreck your disposal.

Potatoes: If your kids like treasure hunts, they’ll love to grow potatoes they can search for in late fall. As foliage grows, continue to add soil around the stems. Then, when the green parts die, let the kids get down and dirty digging up the spuds.

Pizza fixings: Kids can grow oregano, basil, and thyme to spice up their pizzas.

  • Basil likes hot weather and well-drained soil.
  • Oregano self-seeds, so thin plants annually.
  • Thyme seeds are hard to germinate, so avoid frustration and plant seedlings.

Want more veggie gardening tips?

You can find free seeds for your veggie garden right in your own kitchen.

Veggie gardening newbies will want to avoid making these rookie gardening mistakes.


By: Lisa Kaplan Gordon:© Copyright 2015 NATIONAL ASSOCIATION OF REALTORS®


How to Keep Your House Cool Without AC

How to Keep Your House Cool Without AC

You don’t have to switch on the air conditioner to get a big chill this summer. These tips will help you keep your house cool without AC, which will save energy (and avoid AC wars with your family).

Block that Sun!

When sunlight enters your house, it turns into heat. You’ll keep your house cooler if you reduce solar heat gain by keeping sunlight out.

  • Close the drapes: Line them with light-colored fabric that reflects the sun, and close them during the hottest part of the day. Let them pillow onto the floor to block air movement.
  • Add awnings: Install them on south- and west-facing windows to reduce solar heat gain by up to 77%, says the U.S. Department of Energy. Make your own by tacking up sheets outside your windows and draping the ends over a railing or lawn chair.
  • Install shutters: Interior and exterior shutters not only reduce heat gain and loss, but they also add security and protect against bad weather. Interior shutters with adjustable slats let you control how much sun you let in.
  • Apply high-reflectivity window film: Install energy-saving window films on east- and west-facing windows, which will keep you cool in summer, but let in warming sun in the winter. Mirror-like films are more effective than colored transparent films.

Here’s more information about energy-efficient window coverings.

Open Those Windows

Be sure to open windows when the outside temperature is lower than the inside. Cool air helps lower the temps of everything — walls, floors, furniture — that will absorb heat as temps rise, helping inside air say cooler longer.

To create cross-ventilation, open windows on opposite sides of the house. Good ventilation helps reduce VOCs and prevents mold.

Fire Up Fans

  • Portable fans: At night, place fans in open windows to move cool air. In the day, put fans where you feel their cooling breezes (moving air evaporates perspiration and lowers your body temperature). To get extra cool, place glasses or bowls of ice water in front of fans, which will chill the moving air.
  • Ceiling fans: For maximum cooling effect, make sure ceiling fans spin in the direction that pushes air down, rather than sucks it up. Be sure to turn off fans when you’re not in the room, because fan motors give off heat, too.
  • Whole house fans: A whole-house fan ($1,000 to $1,600, including install) exhausts hot inside air out through roof vents. Make sure your windows are open when you run a whole-house fan.

Power Down Appliances

You’ll save money and reduce heat output by turning off appliances you’re not using, particularly your computer and television. Powering down multiple appliances is easier if you connect them to the same power strip.

Don’t use heat- and steam-generating appliances — ranges, ovens, washers, dryers — during the hottest part of the day. In fact, take advantage of the heat by drying clothes outside on a line.

Plant Trees and Vines

These green house-coolers shade your home’s exterior and keep sunlight out of windows. Plant them by west-facing walls, where the sun is strongest.

Deciduous trees, which leaf out in spring and drop leaves in fall, are best because they provide shade in summer, then let in sun when temperatures drop in autumn. Select trees that are native to your area, which have a better chance of surviving. When planting, determine the height, canopy width, and root spread of the mature tree and plant accordingly.

Climbing vines, such as ivy and Virginia creeper, also are good outside insulators. To prevent vine rootlets or tendrils from compromising your siding, grow them on trellises or wires about 6 inches away from the house.

Speaking of shade, here are smart, inexpensive ideas for shading your patio.

Want more tips for staying cool this summer? Substitute CFL and LED bulbs for hotter incandescent lights.

Also, try insulating your garage door to prevent heat buildup.


By: Lisa Kaplan Gordon:© Copyright 2015 NATIONAL ASSOCIATION OF REALTORS®


Guide to Buying and Installing a Sprinkler System

Guide to Buying and Installing a Sprinkler System

An irrigation system saves water, keeps your lawn looking great, and helps maintain your curb appeal. We’ve gathered the info to get you started.

An underground irrigation system delivers water to your landscaping at the right time, and in just the right amount, so you don’t water too much or too little. It’s relatively easy to install and makes a good DIY project.

You’ll also save money doing it yourself. A professionally installed system for a typical ¼-acre lot is $3,000 to $4,000. You can DIY it for under $1,500.

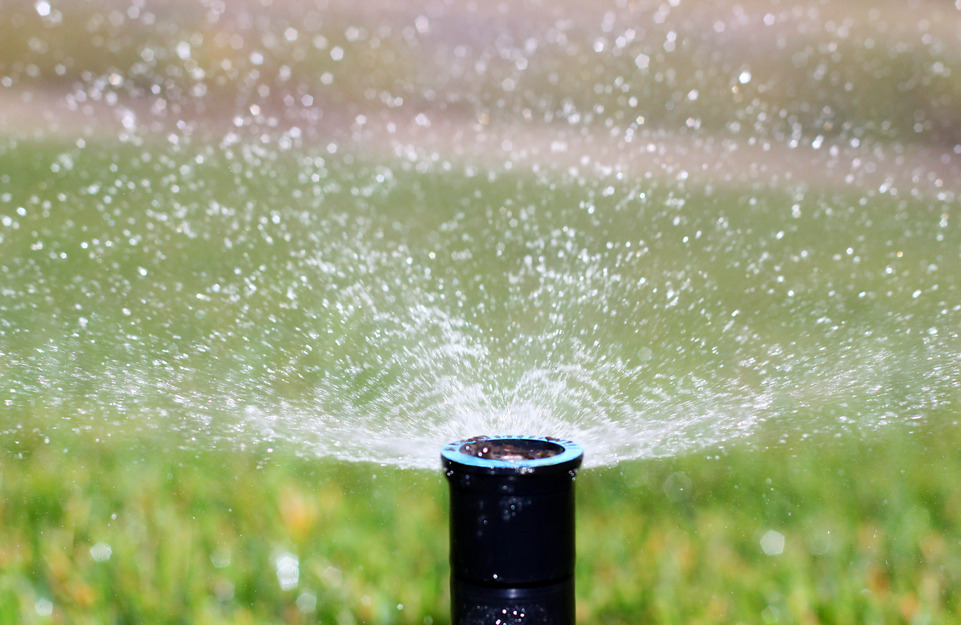
The heart of an underground system is pop-up sprinkler heads. When working, the heads raise up a few inches to spray water on your landscape. When not in use, they drop to ground level so you can mow or walk right over them.

Plus, today’s systems are pretty darn smart. Automated features decide when it’s been raining too much or too little, then adjust the amount of water your landscaping gets. That lowers the worry quotient for you, heads off costly over-watering, and makes the whole system almost maintenance-free.

Getting in the Zone

An irrigation system divides your property into zones. Each zone can be different in terms of the amount of water it gets, and at what time of day it’s watered. Examples of zones include:

  • Lawn zones have pop-up heads with just the right spray radius and range to cover a broad area of grass.
  • Landscaping zones have high-rise heads to water shrubs and ground cover.
  • Flower and vegetable zones may be equipped with bubblers and tiny spray heads that gently water plants without bruising edibles or knocking petals off blooms.

Everything functions on an automatic timer that controls water flow throughout the system. You can elect to include sensors that monitor rain and humidity — self-adjusting timers that prevent unnecessary watering.

Start with a Plan

Your irrigation journey starts with a plan that maps out:

  • Your yard, house location, and major landscaping features, such as trees.
  • Your irrigation zones.
  • The location of sprinkler heads and bubblers.
  • The location of underground water supply lines.
  • The location of a water-supply shutoff valve.
  • Any automatic sensors.

But planning is a challenge for first-timers. Manufacturers recognize this hurdle and go out of their way to provide planning help. After you give them some info on the size of your lot and your water supply system, they give you an irrigation plan tailored to your property.

You’d be crazy not to take advantage of their services. For one, they’re free. Second, they’re very thorough: downloadable guides and step-by-step videos take you through every part of creating a home irrigation system.

For example, Rainbird and Toro offer planning guides that show you how to make a scale drawing of your property, and how to easily gather information on your water pressure and water flow rate that’ll help determine the design of your system.

When you mail in the drawing and info, the manufacturer returns a custom plan with a materials list and detailed installation instructions, all designed specifically for your property. Replies take several weeks. For a small fee ($20-$30), you can have your plans arrive in a few days.

Orbit shows you how to use Google Maps to make a scaled plan of your lot without ever stepping outdoors. Plans are available instantly.

Get Ready to Dig

Your next job is trenching — digging channels in your yard for the water supply lines and sprinkler heads. With plan in hand, mark out the locations of the irrigation lines using string lines, powdered chalk, or lawn marking paint — it comes in a spray can specially designed to be used upside down ($5).

At this point comes a heads-up about your local building codes. You’ll need to ask a couple of questions of your local building and planning commission:

  • Do I need a permit?
  • Is a licensed plumber required to connect my irrigation system to my home’s water system?
  • How deep should the trenches be? (Most building codes require you to dig down 18 inches to protect the water lines from freezing — in colder climates the required depth is more.)

Unless you relish the idea of hand-digging several hundred feet of trench, rent a gas-powered trenching tool for $100–$160 per day. This walk-behind tool makes short work of deep, narrow trenches.

Very important! To prevent injury, be sure to have all utilities marked before you begin digging. Call your local utilities or dial 811.

Installing the System

With excavation complete, you’re ready to buy all the stuff you need. You’ll build your system from plastic pipe, either rigid or flexible PVC. Both are good choices and use the same methods of assembly.

  • Rigid PVC pipe is inexpensive — ¾-inch diameter pipe is about 25 cents per lineal foot.
  • Flex PVC costs more at about $1 per lineal foot of ¾-inch-diameter pipe, but it installs faster, there are fewer connections, and it’s more forgiving of trenches that aren’t perfectly straight.

There are lots of other components, including sprinkler heads and bubblers, and each type has different ranges and arcs — the size and shape of their spray. That’s another reason to check out the manufacturer’s guides — they’ll give you a complete materials list.

Unless you’re an accomplished DIY electrician and plumber, you’ll probably need a bit more professional help:

  • An electrician to extend a circuit to the automatic timer; figure 2-3 hours at $90-$110 per hour.
  • A plumber to tap into your household water system. Budget another $200-$300.

Ready to Call In the Pros?

If the DIY approach is more than you want to tackle, or your lot is larger than a third of an acre (14,500 sq. ft.), consider hiring a pro. Expect to pay $3,000-$4,000 to have an underground irrigation system installed on a ¼-acre lot.

Aside from saving you a lot of work, a pro is going to get the job done quickly and with minimal disruption. He’ll also come with knowledge of what design best suits local conditions.

Good Tips for Watering Your Landscape

  • Check out these low-cost, low-maintenance DIY watering systems.
  • Planning a trip this summer? Here’s how to water while you’re on vacation.
  • Dry spells are hard on your plants. Make sure you know how to water your plants during a drought.


By: Dave Toht:© Copyright 2015 NATIONAL ASSOCIATION OF REALTORS®


The owner of this website has made a commitment to accessibility and inclusion, please report any problems that you encounter using the contact form on this website. This site uses the WP ADA Compliance Check plugin to enhance accessibility.