9 Surprising Things That Add Value to Your House

9 Surprising Things That Add Value to Your House

Published: December 3, 2013

A home’s value is dependent on many things. Here are nine factors you might not have thought about.

What do surf breaks, Walmarts, and public transportation have in common? Being near any of them can add thousands to your home’s value.

At least that’s what various university researchers have found based on their evaluation of variables that could be influencing home prices. Their conclusions might surprise you. Here’s what they found:

1. Surf Breaks

Being within a mile of a surf break (a spot where surf-able waves happen) adds about $106,000 to a home’s value, according to surfonomics experts at the Monterey Institute of International Studies.

Reality check: Mother Nature makes surf breaks, so it’s not like you could build your own DIY break to boost your home’s value.

2. Parks and Open Spaces

A desirable public park or other recreational open space boosts the property value of nearby homes by 8%-20%.

One study looked at 16,400 home sales within 1,500 feet of 193 public parks in Portland, Ore., and found these boosts to home values:

  • Natural areas: $10,648
  • Golf courses: $8,849
  • Specialty parks: $5,657
  • Urban parks: $1,214

Reality check: A park that’s not maintained and overcrowded can drag down nearby home values.

3. Living Near a Walmart

Along with making it easier to run out for a gallon of milk at midnight, researchers at the University of Chicago concluded that living within a mile of a Walmart store could raise your home’s value by 1%-2%, and living within half a mile could boost your property value by an additional 1%.

For an average-size home, that’s an uptick of $4,000-$7,000.

Realty check: What you gain in home value, you may end up spending at Walmart.

4. Solar Photovoltaic Systems

California homes with solar photovoltaic (PV) systems sell for a $17,000 premium over homes without solar systems, according to research from the U.S. Department of Energy’s Lawrence Berkeley National Laboratory.

Reality check: Although costs for residential solar power systems are falling, they’re still rather pricey at $15,000-$40,000, depending on the size of your house.

Related: Tax Credits for Installing Solar Panels

5. Walkability

Being able to stroll to schools, parks, stores, and restaurants will raise your property value anywhere from $4,000-$34,000, says a 2009 study from CEOs for Cities.

Reality check: The biggest boost in walkability values occurred in large, dense cities.

Related: Boost Your Neighborhood’s Walkability

6. Accessory Dwelling Units

Whether it’s a granny flat, an in-law apartment, or a carriage house, having a separate unit can increase your home’s value by 25%-34%, according to a study of 14 properties with accessory dwelling units in Portland, Ore. You can also get a steady stream of income from a second unit.

Reality check: Local governments often ban accessory dwelling units, so check zoning laws, building codes, and homeowners association rules before you add a unit.

7. Professional Sports Arenas

A new pro sports stadium can raise property values in a 2.5-mile radius by an average of $2,214. The closer you are to the new facility, the larger the increase in home value. Researchers from the University of Illinois at Urbana-Champaign and the University of Alberta examined house sales in Columbus, Ohio, before and after the city added two sports stadiums.

Reality check: If a stadium is proposed, home values can decline a bit until the project is complete. And if you live really close to a stadium, you may encounter traffic and parking issues.

8. Community Gardens

Planting a community garden raises the value of homes within a 1,000-foot radius by 9.4% within five years, according to research by the Office of the Comptroller of the Currency and New York University School of Law.

The impact increases over time, and high-quality community gardens have the greatest positive influence. Poor neighborhoods saw the biggest gains in home values.

Reality check: Gardens on privately owned land and in higher-income neighborhoods don’t have the same beneficial influence.

9. Trees

No real surprise here — whether trees are in your yard or just on your street, they’re a valuable asset you should be aware of. Here’s a gauge of how much trees are worth to your home value according to a University of Washington research survey:

  • Mature trees anywhere in your yard: 2%.
  • Mature trees on your street: 3%.
  • Trees in your front yard: 3%-5%.
  • Mature trees in high income neighborhoods: 10%-15%.

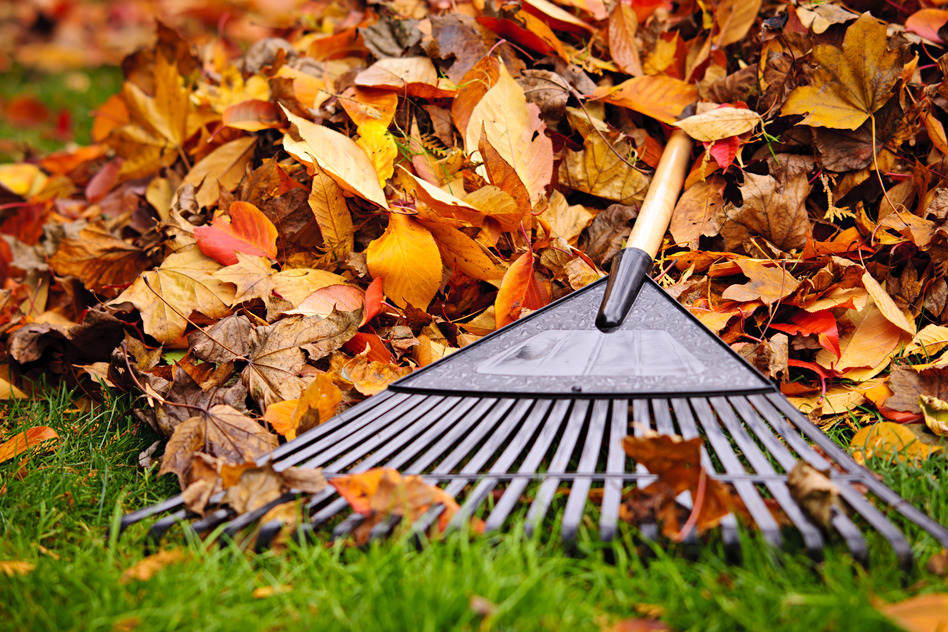
Reality check: Trees usually mean work — raking leaves, trimming branches, and keeping roots out of sewer lines.




By: Dona DeZube:Copyright 2015 NATIONAL ASSOCIATION OF REALTORS®
Do Your Windows Have the Power to Melt the House Next Door?

Do Your Windows Have the Power to Melt the House Next Door?


If neighbors’ vinyl siding has mysteriously warped, energy-efficient windows might be the culprit.

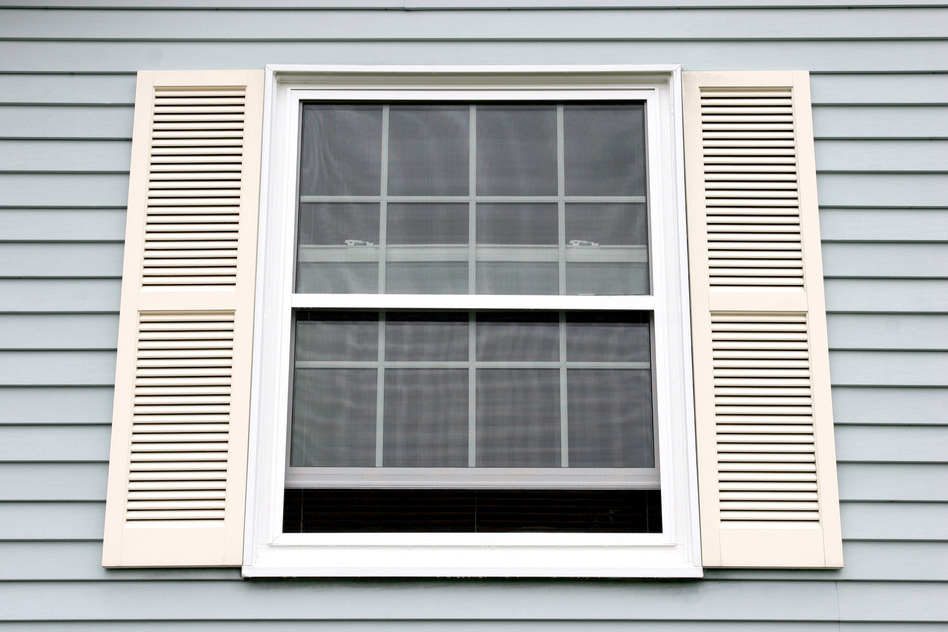
With a fair amount of buzz recently about how some energy-efficient windows can create a laser-beam effect that warps siding on a neighboring house, we thought we’d check into the hubbub.

Bottom-line: It doesn’t mean you should abandon your decision to invest in low-e (low-emissive) windows, which limit heat transfer so that your house stays cool or warm. In fact, some areas require low-e windows on new homes or in retrofits.

Anyway, the melting tends to occur under a perfect storm of conditions — so not very often.

Still, we’ve got some tips for you, below, in case your window or your neighbor’s window has turned into a ray gun.

Probably a more important issue is whether you need to replace your windows at all. Our guide can help you make that decision.

What Causes the Laser Beam?

Here’s one theory from the National Association of Home Builders (NAHB): Changes in barometric pressure can sometimes cause low-e windows to bow inwards and magnify reflected sunlight. It’s like training a magnifying glass on an ant; the heat beam toasts anything in its path to more than 200 degrees Fahrenheit. Vinyl siding starts to warp at around 165 degrees.

But a white paper published by the Lawrence Berkeley National Laboratory says there’s been no extensive study on the topic, so whatever is causing the melting isn’t fully understood. Here’s what is known:

  • Warping could happen any time of year.
  • South-facing low-e windows appear to be responsible for a large number of incidents.
  • Damage to neighboring homes happens where houses are close together — up to 20 feet, according to the International Association of Certified Home Inspectors.

What are Industry Insiders Saying?

The Vinyl Siding Institute acknowledges the problem, but claims that heat distortion from low-e windows is rare. However, the NAHB says that as low-e windows have become more prevalent, melted vinyl siding has become more common. So much so that major vinyl siding manufacturers have updated their warranties to exclude heat damage caused by windows.

How Do I Stop the Laser Beam Effect?

To keep a window from cooking stuff in its path, including your deck furniture or car:

  • Install windows screens over the outer window. This will diffuse the reflected sunlight.
  • Block the sun from hitting low-e windows by adding window awnings.
  • Add a living privacy screen that will block the reflected rays from hitting your home.

Related: Well-placed trees and shrubs are natural energy-efficiency boosters.

To protect vinyl siding:

  • Add a privacy screen.
  • Replace damaged siding with heat-resistant vinyl siding.

Note: Heat-resistant siding can only withstand temps of up to 220 degrees. Plus, it costs up to three times the price of the regular siding.

Published: November 13, 2013

By: Deirdre Sullivan:© Copyright 2015 NATIONAL ASSOCIATION OF REALTORS®

 
What Not to Do as a New Homeowner

What Not to Do as a New Homeowner

If you’re new to homeownership, you’ll definitely want to avoid these easy-to-prevent mistakes that could cost you big time.

We know so well the thrill of owning your own house — but don’t let the excitement cause you to overlook the basics. We’ve gathered up a half dozen classic boo-boos new homeowners often commit — and give you some insight on why each is critically important to avoid.

1. Not Knowing Where the Main Water Shutoff Valve Is

Water from a burst or broken plumbing pipe can spew dozens of gallons into your home’s interior in a matter of minutes, soaking everything in sight — including drywall, flooring, and valuables. In fact, water damage is one of the most common of all household insurance claims.

Quick-twitch reaction is needed to stave off a major bummer. Before disaster hits, find your water shutoff valve, which will be located where a water main enters your house. Make sure everyone knows where it’s located and how to close the valve. A little penetrating oil on the valve stem makes sure it’ll work when you need it to.

2. Not Calling 811 Before Digging a Hole

Ah, spring! You’re so ready to dig into your new yard and plant bushes and build that fence. But don’t — not until you’ve dialed 811, the national dig-safely hotline. The hotline will contact all your local utilities who will then come to your property — often within a day — to mark the location of underground pipes, cables, and wires.

This free service keeps you safe and helps avoid costly repairs. In many states, calling 811 is the law, so you’ll also avoid fines.

3. Not Checking the Slope of Foundation Soil

The ground around your foundation should slope away from your house at least 6 inches over 10 feet. Why? To make sure that water from rain and melting snow doesn’t soak the soil around your foundation walls, building up pressure that can cause leaks and crack your foundation, leading to mega-expensive repairs.

This kind of water damage doesn’t happen overnight — it’s accumulative — so the sooner you get after it, the better (and smarter) you’ll be. While you’re at it, make sure downspouts extend at least 5 feet away from your house.

Related: How to Prevent Water Damage

4. Not Knowing the Depth of Attic Insulation

This goes hand-in-hand with not knowing where your attic access is located, so let’s start there. Find the ceiling hatch, typically a square area framed with molding in a hallway or closet ceiling. Push the hatch cover straight up. Get a ladder and check out the depth of the insulation. If you can see the tops of joists, you definitely don’t have enough.

The recommended insulation for most attics is about R-38 or 10 to 14 inches deep, depending on the type of insulation you choose. BTW, is your hatch insulated, too? Use 4-inch-thick foam board glued to the top.

Related: Attic Air Leaks: How to Find and Seal Them

5. Carelessly Drilling into Walls

Hanging shelves, closet systems, and artwork means drilling into your walls — but do you know what’s back there? Hidden inside your walls are plumbing pipes, ductwork, wires, and cables.

You can check for some stuff with a stud sensor — a $25 battery-operated tool that detects changes in density to sniff out studs, cables, and ducts.

But stud sensors aren’t foolproof. Protect yourself by drilling only 1¼ inches deep max — enough to clear drywall and plaster but not deep enough to reach most wires and pipes.

Household wiring runs horizontally from outlet to outlet about 8 inches to 2 feet from the floor, so that’s a no-drill zone. Stay clear of vertical locations above and below wall switches — wiring runs along studs to reach switches.

6. Cutting Down a Tree

The risk isn’t worth it. Even small trees can fall awkwardly, damaging your house, property, or your neighbor’s property. In some locales, you have to obtain a permit first. Cutting down a tree is an art that’s best left to a professional tree service.

Plus, trees help preserve property values and provide shade that cuts energy bills. So think twice before going all Paul Bunyan.

 
By: John Riha:© Copyright 2015 NATIONAL ASSOCIATION OF REALTORS®

The 7 Most-Needed Repair Tips Every Homeowner Should Know

The 7 Most-Needed Repair Tips Every Homeowner Should Know

Published: February 18, 2015

Relax. Here’s how to make short work of every common repair annoyance from a leaky toilet to a sticky window.

1. Fix a leaky toilet.

Running toilets not only rob sleep, they waste water and jack up your bill. Here’s how to change a flapper — the usual suspect — and solve other likely problems.

Related: How to Fix a Sweaty Toilet

2. Repair drywall holes.

The hardest part of drywall repair is making the patch flush with the existing wall. A “pumpkin patch” is an easy repair that cuts down on sanding.

Related: Another Clever Way to Fix Drywall — with Makeup Sponges!

3. Adjust cabinet doors.

Changes in humidity can make cabinet doors rub, refuse to close, or just look cockeyed. Adjusting them is easy and generally requires only a screwdriver.

4. Open a stuck window.

Windows stick when paint, dust, or moisture builds. Use a utility knife (or a pizza cutter) to remove old paint. Be careful not to gouge the wood sash. If high humidity is making windows hard to move, run a humidifier that sucks moisture out of air.

Related: Save Money with Window Repair Tips

5. Stop a leaking faucet.

A dripping faucet can waste 5 gallons of water per day. If you can’t replace the faulty part immediately, tie a string around the faucet and let it fall into the drain: Dripping water will silently flow down the string.

6. Silence door squeaks.

Take the squeak out of doors by lubricating top and bottom hinges with a little WD-40 or white lithium grease. If you don’t have any on hand, olive oil is a quick but temporary fix.

7. Turn off the main water line.

Don’t wait until water gushes into your house to search for the main water line. When things


By: Lisa Kaplan Gordon: Copyright 2015 NATIONAL ASSOCIATION OF REALTORS®

6 Things Everyone Should Do When Moving Into a New House

6 Things Everyone Should Do When Moving Into a New House

Published: February 18, 2015

Moving into your first home is exciting! But it also means you’ve got work to do.

When I bought my first house, my timing couldn’t have been better: The house closing was two weeks before the lease was up on my apartment. That meant I could take my time packing and moving, and I could get to know the new place before moving in.

I recruited family and friends to help me move (in exchange for a beer-and-pizza picnic on the floor) and, as a bonus, I got to pick their brains about what first-time homeowners should know.

Their help was one of the best housewarming presents I could have gotten. And thanks to their expertise and a little Googling, here’s what I learned about what to do before moving in.

1. Change the locks. You really don’t know who else has keys to your home, so change the locks. That ensures you’re the only person who has access. Install new deadbolts yourself for as little as $10 per lock, or call a locksmith — if you supply the new locks, they typically charge about $20-$30 per lock for labor.

2. Check for plumbing leaks. Your home inspector should do this for you before closing, but it never hurts to double-check. I didn’t have any leaks to fix, but when checking my kitchen sink, I did discover the sink sprayer was broken. I replaced it for under $20.

Keep an eye out for dripping faucets and running toilets, and check your water heater for signs of a leak.

Here’s a neat trick: Check your water meter at the beginning and end of a two-hour window in which no water is being used in your house. If the reading is different, you have a leak.

3. Steam clean carpets. Do this before you move your furniture in, and your new home life will be off to a fresh start. You can pay a professional carpet cleaning service — you’ll pay about $50 per room; most services require a minimum of about $100 before they’ll come out — or you can rent a steam cleaner for about $30 per day and do the work yourself. I was able to save some money by borrowing a steam cleaner from a friend.

4. Wipe out your cabinets. Another no-brainer before you move in your dishes and bathroom supplies. Make sure to wipe inside and out, preferably with a non-toxic cleaner, and replace contact paper if necessary.

When I cleaned my kitchen cabinets, I found an unpleasant surprise: Mouse poop. Which leads me to my next tip . . .

5. Give critters the heave-ho. That includes mice, rats, bats, termites, roaches, and any other uninvited guests. There are any number of DIY ways to get rid of pests, but if you need to bring out the big guns, an initial visit from a pest removal service will run you $100-$300, followed by monthly or quarterly visits at about $50 each time.

For my mousy enemies, I strategically placed poison packets around the kitchen, and I haven’t found any carcasses or any more poop, so the droppings I found must have been old. I might owe a debt of gratitude to the snake that lives under my back deck, but I prefer not to think about him.

6. Introduce yourself to your circuit breaker box and main water valve. My first experience with electrical wiring was replacing a broken light fixture in a bathroom. After locating the breaker box, which is in my garage, I turned off the power to that bathroom so I wouldn’t electrocute myself.

It’s a good idea to figure out which fuses control what parts of your house and label them accordingly. This will take two people: One to stand in the room where the power is supposed to go off, the other to trip the fuses and yell, “Did that work? How about now?”

You’ll want to know how to turn off your main water valve if you have a plumbing emergency, if a hurricane or tornado is headed your way, or if you’re going out of town. Just locate the valve — it could be inside or outside your house — and turn the knob until it’s off. Test it by turning on any faucet in the house; no water should come out.

By: Courtney Craig:© Copyright 2015 NATIONAL ASSOCIATION OF REALTORS®

Early Spring Lawn Care Tips to Revive Your Frozen Turf

Early Spring Lawn Care Tips to Revive Your Frozen Turf

Has the polar vortex wrecked your lawn? These tips for early spring lawn care will green up your lawn in no time.

A polar vortex has pounded lawns this winter with ridiculous sub-zero temperatures and record snowfalls. So don’t be surprised if parts of your lawn — especially in low-lying areas — are dead on arrival in spring.

“Snow acts like a cover, but ice is bad for turf,” says Chris Lemcke, technical director of Weed Man USA lawn care. “Ice freezes plant cells and crushes blades and leads to death.”

Freeze-thaw-freeze conditions are even worse for turf roots, which can become brittle and die.  Road salt also is bad for lawns. The turf near streets and along driveways and paths may need resuscitation or replacement when spring grass should be greening up.

Dead or Sleeping?

When snow and ice melt, your late-winter turf starts awakening from hibernation and changes from brown grass to green; if your lawn died, it won’t change color.

The best way to see if your lawn is dead or sleeping is to tug the brown areas. If the turf comes up easily, the roots have failed and the grass is dead. If there’s resistance, then there’s hope.

How to Bring Lawns Back

When is the right time to bury your dead lawn — grass, roots, clinging soil — in a compost pile and start growing new grass?

  • After the last chance of frost
  • When night temperatures top 35 degrees
  • When soil temps reach 50-65 degrees

Dead patches of lawn are easy to pull up because no roots bind the turf to the soil. Cut around dead areas with a spade, then yank up the patch.

Then it’s time to reseed.

1.  Scatter seed on soil and lightly rake it in.

2.  Water daily with a light mist for 15 minutes to keep soil moist. If the soil dries out, seed will not germinate.

3.  When seed germinates, water deeply.

4.  Feed young blades a high-phosphorous fertilizer.

5.  Let grass grow at least 3 inches before its first cut.

If you can afford sod — 8-30 cents/sq. ft. compared with $28 for a 5-pound bag of seed that’ll cover 2,000 sq. ft. — Lemcke recommends laying sod on dead patches instead of seeding. Sod is more forgiving when it comes to watering and resists weeds better than seed.

An Ounce of Prevention

You can’t control the weather, but you can mitigate winter’s affect on your lawn.

  • Add topsoil to low areas of your yard to reduce the impact of ice. Then reseed or sod.
  • If you notice dead turf where you piled shoveled snow, spread out your snow pile next year.
  • To reduce salt damage, apply deicers after you shovel snow, so salt doesn’t seep into your grass. Also, use calcium chloride-based deicers, which do less damage than sodium chloride-based salts.


By: Lisa Kaplan Gordon:© Copyright 2015 NATIONAL ASSOCIATION OF REALTORS®

The owner of this website has made a commitment to accessibility and inclusion, please report any problems that you encounter using the contact form on this website. This site uses the WP ADA Compliance Check plugin to enhance accessibility.