Are You Ready for Glow-in-the-Dark Trees?

Are You Ready for Glow-in-the-Dark Trees?


Published: April 16, 2014

They’re no longer science fiction. A team of California biologists has already created glowing plants, and now they’re working on glowing trees.

We’re big proponents of trees as energy savers — they create shade and wind breaks for your home. So how would you like a tree that actually illuminates your landscaping at night for free?

Glow-in-the-dark trees are more than a glimmer now that a California biologist, Antony Evans, and his colleagues have inserted genes from bioluminescent bacteria into plants. They’ve found that the bioengineered flora grows and glows. It’s the first step to growing glowing trees that can light streets and your front yard, and save energy.

Backers loved the idea of glow-in-the-dark plants. Evans had hoped to raise $65,000 through a Kickstarter campaign. But the Kickstarters pledged over $484,000.

What does this mean to homeowners who want to substitute a glowing tree or rosebush for their porch light? Nothing, yet. Trees take a long time to grow and to demonstrate which bioengineering techniques work and which fizzle. So don’t expect a glowing elm anytime soon.


By: Lisa Kaplan Gordon:© Copyright 2015 NATIONAL ASSOCIATION OF REALTORS®

5 Good Reasons to Amend Your Tax Return — and How

5 Good Reasons to Amend Your Tax Return — and How

Published: January 9, 2015

Missed tax deduction? Overlooked tax credit? Get what’s coming to you by amending your return.

Your home is a great source of tax savings if you know what qualifies and don’t forget to claim deductions and credits. If you missed any of these five, you can go back in time — roughly two to three years — by amending your tax return. (Read more nitpicky details in How to Amend Your Tax Return.)

1. Home Office Deduction

If your home is your principal place of business, you can take a standard deduction or deduct a percentage of eligible home expenses like:

  • Utilities
  • Mortgage interest for the proportion of the house used as your office
  • Home repairs and maintenance

Forms you’ll need to file an amendment:

  • 1040X
  • Form 8829 and Schedule A (if you’re employed by someone else) for the year you’re amending
  • Schedule C (if you’re self-employed) for the year you’re amending

2. Energy Tax Credit

If you installed energy-efficiency improvements (like HVAC systems, insulation, a roof, windows) in 2012 and 2013 and didn’t take a tax credit for those upgrades, you may have missed out on up to $500.

My husband and I didn’t claim the energy tax credit for insulation we installed one year because we thought we’d get a better deal if we claimed the credit the next year when we planned to replace windows. But we never got around to replacing the windows. So we amended our return to claim the tax credit for the insulation and got a $500 tax credit.

If you want to amend your 2012 return, you have until 2015.

Forms you need:

  • 1040X
  • Form 5695 for the year you’re amending

Note: Unless Congress extends it, the $500 lifetime residential energy tax credit ended in 2014.

3. Home Improvement Sales Tax Deduction

If your state and local town doesn’t tax income, you can amend Schedule A to deduct state and local sales tax you paid. Say you added new siding for $10,000 and your state charged 6% in sales tax. That’s potentially a $600 deduction.

Use the IRS’s online sales tax calculator to figure out the total sales tax you can deduct. Have the receipts to prove you paid the sales taxes.

Forms you need:

  • 1040x
  • Schedule A for the year you’re amending

4. Property Tax Deduction

Get a copy of your tax bill payment from the local tax office that collects the bill. Make sure you deduct the property tax expense on your amended return for the year you paid it, which could be different than the year it was due.

Forms you need:

  • 1040x
  • Schedule A for the year you’re amending

5. Home Repair Deduction

Red alert: You can’t claim deductions for any old home repair. There are only two narrow, possible ways to claim home repairs, and it’s always best to check with a tax pro for your particular situation:

If part of your home is used for business and you aren’t taking the standard deduction for your home office. You can only claim repairs made to your home office or claim a percentage of the repairs you make to the house as a whole, like repainting or patching a roof leak. If 10% of your home is office, you can deduct 10% of the repainting or patching. If the repair is to the office itself only, then the percentage generally does not apply.

Forms you need:

  • 1040X
  • Form 8829 and Schedule A (if you’re employed by someone else) for the year you’re amending
  • Schedule C (if you’re self-employed) for the year you’re amending

For casualty losses. Calculating and deducting casualty losses (disaster, damages, robbery) is complex. Everything from your income level to how you value your property can affect overlooked deductions. Besides placing a value on your personal property, you have to subtract a number of things from that, including insurance reimbursement and a percentage of your adjusted gross income. Read IRS Publication 547 and consult a tax adviser. Note that you can claim losses from federally declared disasters either in the year they occur or, if it’s more favorable, on the preceding year’s taxes.

Forms you need:

  • 1040X
  • Form 4684 for casualty and theft for the year you’re amending
  • Schedule A for the year you’re amending

By: Reyna Gobel:© Copyright 2015 NATIONAL ASSOCIATION OF REALTORS®

9 Easy Mistakes Homeowners Make on Their Taxes

9 Easy Mistakes Homeowners Make on Their Taxes

Published: January 5, 2015

Don’t rouse the IRS or pay more taxes than necessary — know the score on each home tax deduction and credit.

As you calculate your tax returns, be careful not to commit any of these nine home-related tax mistakes, which tax pros say are especially common and can cost you money or draw the IRS to your doorstep.

Sin #1: Deducting the wrong year for property taxes

You take a tax deduction for property taxes in the year you (or the holder of your escrow account) actually paid them. Some taxing authorities work a year behind — that is, you’re not billed for 2013 property taxes until 2014. But that’s irrelevant to the feds.

Enter on your federal forms whatever amount you actually paid in that tax year, no matter what the date is on your tax bill. Dave Hampton, CPA, a tax department manager at the Cincinnati accounting firm of Burke & Schindler, has seen homeowners confuse payments for different years and claim the incorrect amount.

Sin #2: Confusing escrow amount for actual taxes paid

If your lender escrows funds to pay your property taxes, don’t just deduct the amount escrowed. The regular amount you pay into your escrow account each month to cover property taxes is probably a little more or a little less than your property tax bill. Your lender will adjust the amount every year or so to realign the two.

For example, your tax bill might be $1,200, but your lender may have collected $1,100 or $1,300 in escrow over the year. Deduct only $1,200 or the amount of property taxes noted on the Form 1098 that your lender sends. If you don’t receive Form 1098, contact the agency that collects property tax to find out how much you paid.

Sin #3: Deducting points paid to refinance

Deduct points you paid your lender to secure your mortgage in full for the year you bought your home. However, when you refinance, you must deduct points over the life of your new loan.

For example, if you paid $2,000 in points to refinance into a 15-year mortgage, your tax deduction is $2,000 divided by 15 years, or $133 per year.

Related: How to Deduct Mortgage Points When You Buy a Home

Sin #4: Misjudging the home office tax deduction

The deduction is complicated, often doesn’t amount to much of a deduction, has to be recaptured if you turn a profit when you sell your home, and can pique the IRS’s interest in your return.

But there’s good news. There’s a new simplified home office deduction option if you don’t want to claim actual costs. If you’re eligible, you can deduct $5 per square foot up to 300 feet of office space, or up to $1,500 per year.

Sin #5: Failing to repay the first-time homebuyer tax credit

If you used the original homebuyer tax credit in 2008, you must repay 1/15th of the credit over 15 years.

If you used the tax credit in 2009 or 2010 and then within 36 months you sold your house or stopped using it as your primary residence, you also have to pay back the credit.

The IRS has a tool you can use to help figure out what you owe.

Sin #6: Failing to track home-related expenses

If the IRS comes a-knockin’, don’t be scrambling to compile your records. File or scan and store home office and home improvement expense receipts and other home-related documents as you go.

Sin #7: Forgetting to keep track of capital gains

If you sold your main home last year, don’t forget to pay capital gains taxes on any profit. You can typically exclude $250,000 of any profits from taxes (or $500,000 if you’re married filing jointly).

So if your cost basis for your home is $100,000 (what you paid for it plus any improvements) and you sold it for $400,000, your capital gains are $300,000. If you’re single, you owe taxes on $50,000 of gains.

However, there are minimum time limits for holding property to take advantage of the exclusions, and other details. Consult IRS Publication 523. And high-income earners could get hit with an additional tax.

Sin #8: Filing incorrectly for energy tax credits

If you made any eligible improvements in 2014, such as installing energy-efficient windows and doors, you may be able to take a 10% tax credit (up to $500; with some systems your cap is even lower than $500). But keep in mind, it’s a lifetime credit. If you claimed the credit in any recent years, you’re done.

Installing a solar electric, solar water heater, geothermal, or small wind energy system can also make you eligible to take the Residential Energy Efficient Property Credit.

To claim the deduction, you have to use the complicated Form 5695, which can mean cross-checking with half a dozen other IRS forms. Read the instructions carefully.

Sin #9: Claiming too much for the mortgage interest tax deduction

Taxpayers are allowed to deduct mortgage interest on home acquisition debt up to $1 million, plus they can also deduct up to $100,000 in home equity debt.


By: G. M. Filisko:© Copyright 2015 NATIONAL ASSOCIATION OF REALTORS®

Winter Lawn Care: 4 Steps to Protect Your Turf

Winter Lawn Care: 4 Steps to Protect Your Turf

Cold weather on the way means winter lawn care for your backyard.

Although spring lawn care gets all the attention, fall lawn care is the make-it or break-it season for grass.

“I’m already thinking about next year,” says John Dillon, who takes care of New York City’s Central Park, which features 200 acres of lawn in the middle of Manhattan. “The grass I grow this fall is what will be there next spring.”

Fall lawn care is no walk in the park. It’s hard work, and Dillon guides you through the four basic steps.

1. Aeration

Aeration gives your lawn a breather in autumn and provides room for new grass to spread without competition from spring weeds. Aeration tools pull up plugs of grass and soil, breaking up compacted turf. That allows water, oxygen, and nutrients to reach roots, and gives seeds room to sprout.

If kids frequently play on your lawn, plan to aerate twice a year — fall and spring. If your lawn is just for show, then aerate once a year — and maybe even once every other year.

A hand-aerating tool ($20), which looks like a pitchfork with hollow tines, is labor-intensive and meant for unplugging small sections of grass. Gas-powered aerating machines (rental, $20/hour) are about the size of a big lawn mower, and are good for working entire lawns. Bring some muscle when you pick up your rental: Aerating machines are heavy and can be hard to lift into your truck or SUV.

Depending on the size of your property, professional aeration costs about $150.

2. Seeding

Fall, when the soil temperature is about 55 degrees, is the best time to seed your lawn because turf roots grow vigorously in fall and winter. If you want a lush lawn, don’t cheap out on the seed.

Bags of inexpensive seed ($35 for 15 pounds) often contain hollow husks, weed seed, and annual rye grass seed, which grows until the first frost then drops dead. Splurge on the good stuff ($55 for 15 pounds of Kentucky Bluegrass seed), which resists drought, disease, and insects.

Water your new seed every day for 10 to 20 days until it germinates.

3. Fertilizing

A late fall fertilization — before the first frost — helps your grass survive a harsh winter and encourages it to grow green and lush in spring. Make your last fertilization of the year count by choosing a product high (10% to 15%) in phosphorous, which is critical for root growth, Dillon says.

Note: Some states are banning phosphorous-rich fertilizers, which are harmful to the watershed. In those places, look for nitrogen-rich fertilizers, which promote shoot and root growth. Check with your local extension service to see what regulations apply in your area.

4. Mulching

Instead of raking leaves, run over them a couple of times with your mower to grind them into mulch. The shredded leaves protect grass from winter wind and desiccation. An added bonus — shredded leaves decompose into yummy organic matter to feed grass roots.

A mulching blade ($10) that attaches to your mower will grind the leave


By: Lisa Kaplan Gordon:© Copyright 2015 NATIONAL ASSOCIATION OF REALTORS®


Solar Tubes Beat Traditional Skylights for Low-Cost Daylighting

Solar Tubes Beat Traditional Skylights for Low-Cost Daylighting

By installing solar tubes, you’ll get the natural light that skylights provide — but with less cost and less hassle.

If you’ve been thinking of adding more daylight to a kitchen or dark hallway, a solar tube may be the way to go. At a fraction of the cost of a skylight, a solar tube provides plenty of warm, indirect light.

How It Works

Known variously as a sun tube, sun tunnel, light tube, or tubular skylight, a solar tube is a 10- or 14-inch-diameter sheet-metal tube with a polished interior. The interior acts like a continuous mirror, channeling light along its entire length while preserving the light’s intensity. It captures daylight at the roof and delivers it inside your home.

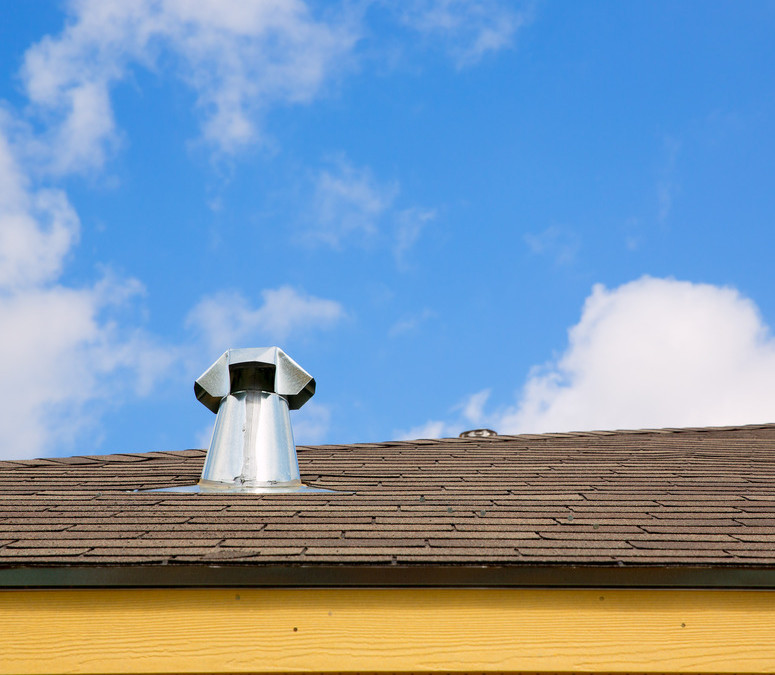
On your roof, a solar tube is capped by a weather-proof plastic globe. The tube ends in a porthole-like diffuser in the ceiling of a room below. The globe gathers light from outside; the diffuser spreads the light in a pure white glow. The effect is dramatic: New installations often have homeowners reaching for the light switch as they leave a room.

Cost

A light tube costs about $500 to $1,000 when professionally installed, compared with more than $2,000 for a skylight. If you’re reasonably handy and comfortable working on a roof, install a light tube yourself using a kit that costs about $200 to $400. Unlike a skylight, a light tube doesn’t require new drywall, paint, and alterations to framing members.

How Much Light?

A 10-inch tube, the smallest option, is the equivalent of three 100-watt bulbs, enough to illuminate up to 200 square feet of floor area; 14-inch tubes can brighten as much as 300 square feet.

Popular locations for a light tube include any areas where constant indirect light is handy:

  • Hallways
  • Stairways
  • Walk-in closets
  • Kitchens
  • Bathrooms
  • Laundry rooms

The only place you don’t want a light tube is above a TV or computer screen where it might create uncomfortable glare.

Bringing a Light Tube Through Multiple Levels

Channeling light down to the first floor of a two-story house is feasible if you have a closet or mechanical chase through which you can run the tube. The job can quickly become more complicated if there’s flooring to cut through, or if you encounter wiring, plumbing, and HVAC ducts.

Is Your House Right for a Light Tube?

Because installation requires no framing alteration, there are few limitations to where you can locate a light tube. Check the attic space above to see if there is room for a straight run. If you find an obstruction, elbows or flexible tubing may get around it. It’s relatively easy to install a light tube in a vaulted ceiling because only a foot or so of tubing is required.

Make these evaluations in advance:

  • Roof slope: Most light tube kits include flashing that can be installed on roofs with slopes between 15 degrees (a 3-in-12 pitch) and 60 degrees (a 20-in-12 pitch).
  • Roofing material: Kits are designed with asphalt shingles in mind, but also work with wood shingles or shakes. Flashing adapters for metal or tile roofs are available.
  • Roof framing spacing: Standard rafters are spaced 16 inches on-center; gap enough for 10- or 14-inch tubes. If your home has rafters positioned 24 inches on-center, you can special order a 21-inch tube for light coverage up to 600 square feet.
  • Location: A globe mounted on a southwest roof gives the best results. Choose a spot requiring a run of tubing that’s 14 feet or less. A globe positioned directly above your target room can convey as much as 98% of exterior light. A tube that twists and turns minimally reduces the light.
  • Weather: If you live in a locale with high humidity, condensation on the interior of the tube can be a problem. Wrapping the tube with R-15 or R-19 insulation greatly cuts condensation. Some manufacturers offer sections of tubing with small fans built in to remove moist air. If you live in a hurricane-prone area, opt for an extra-hardy polycarbonate dome.


By: Dave Toht:© Copyright 2015 NATIONAL ASSOCIATION OF REALTORS®

Choosing Light Bulbs Based on Your Fixtures

Choosing Light Bulbs Based on Your Fixtures

In the brave new world of light bulb choices, let your fixture be your guide.

Light bulb shopping used to be as simple as turning on a light switch. Today, it means weighing priorities for cost, energy efficiency, and aesthetics. Since you’re probably replacing bulbs one fixture at a time, here are some best-bet picks for each type.

Table and Floor Lamps: Halogen Incandescent

  • Light shines in all directions, providing a warm glow.
  • Dimmable.
  • Looks most similar to the traditional incandescent.
  • Uses 25% to 30% less energy than the incandescent.

Table and floor lamps look best with omnidirectional light. “You probably don’t want a big bright spot in the middle of your lampshade,” says Jeff Harris of the nonprofit think tank Alliance to Save Energy. “You’re looking for a nice, warm glow.”

Halogen incandescents provide that, and are good with dimmers. You may be able to find a dimmable CFL, but it’s common to experience humming or flickering at low light levels.

For non-dimming lamps, CFLs are great if you can find a color temperature you like.

  • Color temperature is measured on a warmness (candlelight) and coolness (blue sky) scale. LEDs, CFLs, and halogen incandescents all come in a wide range of color temperatures.
  • Buy covered globes or A-lamps — bulbs shaped like old-fashioned incandescents — rather than spirals if you can see the bulb and aren’t a fan of the spiral look.
  • Otherwise, just go with halogen incandescents and don’t sweat the fact that CFLs are more energy-efficient than halogens. Your still saving over a traditional incandescent and the glow is pretty.

So why not LEDs? LEDs point light in a single direction, although new LED-containing A-lamps are designed to compensate for that by using prisms or special coatings. But all that extra technology makes them expensive — probably not worth it for your bedside lamp, which isn’t a big energy hog anyway.

Recessed Ceiling Lights (Kitchens, Family Rooms): LEDs

  • Energy efficiency is key in high-use areas.
  • 80% energy savings over incandescents.
  • Bulb life (up to 50,000 hours) much longer than CFLs.
  • Shine light a single direction — rather than glowing.
  • Brighter than halogens or CFLs.

Overhead recessed lighting in the kitchen or family room gets lots of use, so energy efficiency is a big consideration; plus, you need bulbs that point light in a single direction so the light actually escapes the can or fixture.

LED reflector lamps, the flat-topped bulbs typically used as floodlights or spotlights, are designed to shine light in a single direction. And that means you’ll get a brighter look with less energy output than CFLs or halogens.

New conversion kits let you put LEDs into your old can fixtures designed for screw-in bulbs.

A word of caution: LEDs don’t dim well unless they’re connected to a wall dimming switch specifically designed for them. You can get LED-compatible dimmers at big-box stores starting at around $30. Same goes for CFLs.

If you do decide on CFLs or halogen incandescents for a warmer quality of light:

  • Buy reflector-lamp style bulbs, not A-lamps or globes, so the light isn’t trapped inside the can.
  • If you have multiple cans, you can probably get away with a lower-wattage halogen incandescent reflector bulb and save energy while still having plenty of light.

Bathroom Vanity Fixture: Halogen Incandescents

  • Better for showing color and texture than CFLs or LEDs.

Lighting over the bathroom vanity is a highly personal lighting choice, especially when there are women in the house. If the light isn’t flattering to your skin tone or makes it hard to apply makeup, you’ll be dissatisfied.

That’s why halogen incandescents, with their pleasing light, are a good bet.

However, if the bathroom where you primp is a high-traffic area and you’re concerned about energy use, experiment with CFLs in a warm color temperature and get a separate lighted mirror for your beauty routine.

Stairwell Light: LEDs

  • Inconvenient fixtures are a good place to use long-lasting LEDs.

How many times are you willing to drag out a ladder and change the bulb in a tough-to-reach fixture? Take advantage of LEDs’ long life by putting them in spots you don’t want to revisit often:

  • Fixtures hanging in stairwells
  • Track lighting suspended from a cathedral ceiling
  • Cabinets
  • Ledges
  • Tray ceilings
  • Recessed areas

Outdoor Floodlight: Halogen Incandescent

  • For security and efficiency, use fixtures with daylight/occupancy sensors.
  • Since outdoor lights aren’t used often, not worth investing in LEDs.
  • CFLs don’t come on easily in cold weather.
  • CFLs don’t last as long as advertised when turned on and off frequently.

If you don’t want to get new fixtures with sensors, you can buy a sensor attachment that screws into each socket.

Rarely Used Fixtures: Low-Cost Bulbs

  • Opt for what’s easy on your wallet.
  • Use the most energy-efficient bulbs, such as LEDs, in most-used fixtures.

If the total yearly hours for the fixtures in your closets, dining room chandeliers, and the naked bulb in your attic are low, go cheap.


By: Karin Beuerlein:© Copyright 2015 NATIONAL ASSOCIATION OF REALTORS®


The owner of this website has made a commitment to accessibility and inclusion, please report any problems that you encounter using the contact form on this website. This site uses the WP ADA Compliance Check plugin to enhance accessibility.