What’s the No. 1 Thing People Want in Their Bathroom?

What’s the No. 1 Thing People Want in Their Bathroom?

Bathroom exhaust fans make air smell (much!) sweeter, paint last longer, and mold grow slower — or not at all. Learn how to do a bathroom exhaust fan installation.

Return to the Best Bath Ideas for Love & Money

A bathroom exhaust fan is an inexpensive upgrade that packs a value punch. The shoe-box-size fan clears obnoxious bathroom odors (priceless!) and removes moisture, which protects your home and health, and reduces maintenance costs.

And, it turns out, everyone wants one. Exhaust fans are the No. 1 feature homebuyers want in a bathroom, says a National Association of Home Builders report. Ninety percent ranked exhaust fan as No. 1, with linen closet second, and a separate tub and shower as third. Who knew?

Still, many homes don’t have a bathroom fan. Although the fans are required by building code in many places, older homes — pre-1960s — didn’t routinely install them. And homeowners today may be reluctant to retrofit bathrooms with an appliance that requires venting to snake through attics, joists, soffits, and ultimately punctures an exterior wall or roof.

We feel your fear, and we’re here to help. Below, we break down everything you need to know about selecting and installing a bathroom exhaust fan.

What Does a Bathroom Exhaust Fan Do?

A bathroom exhaust fan is a small, ceiling- or wall-mounted fan that pulls air from the bathroom, sends it through venting (4-inch is preferable), and deposits it outside.

This helps you and your home by:

  • Improving indoor air quality, especially by removing bathroom smells.
  • Removing shower and bath humidity.
  • De-fogging mirrors.
  • Thwarting mold growth.
  • Preventing door and window warp.
  • Slowing fixture rust.
  • Retarding paint blister and wallpaper peel.

Related: How To Kill and Prevent Household Mold

How Are Fans Rated?

Exhaust fans are measured by two factors found on the fan’s box:

  • CFM (cubic feet per minute): Indicates the strength of the fan’s draw. CFM’s can range from 50 to 1,000-plus, although most bathrooms typically require fans with less than 200 CFM.
  • Sone: Measures of the sound the fan makes, typically from 0.5 (almost silent) to 4.0 (sounds like a normal television) — loud for a fan, but it does provide privacy against toilet sounds, especially nice for powder rooms often located near public areas of your home.

Most people choose a 1- or 2-sone fan — quiet enough keep your teeth from rattling, but not so quiet that you’ll forget it’s on.

CFM and sone are related, because stronger fans — with higher CFMs — usually create more noise; quieter fans — lower sone — often can’t adequately clear air from bigger areas.

The important thing is to pick a fan that’s right for your space, ears, and budget.

Sizing Your Fan

The Home Ventilating Institute, which tests and certifies manufacture claims, suggests that homeowners follow these formulas when sizing a fan:

For bathrooms less than 100 sq. ft.
: Calculate your bathroom’s square footage (length x width), and pick a fan with at least that number of CFMs. For example: If your bathroom is 6 feet by 8 feet, you should buy a fan that’s at least 48 CFM. A 50-CFM model comes closest and is the minimum size suggested for small bathrooms.

Size a fan for a ginormous bathroom: If your bathroom is bigger than 100 sq. ft., forget about the square footage figure; instead assign a CFM capacity for each fixture:

  • 50 CFM — toilet.
  • 50 CFM —  bathtub.
  • 100 CFM — jetted whirlpool tub.
  • 50 CFM — shower.

If you have a completely tricked-out bathroom, you may need at least 200 CFM of draw, which you can accomplish with several 50-CFM fans (one fan should be in separate toilet enclosure), or one big, 200-CFM fan.

How To Install Your Fan

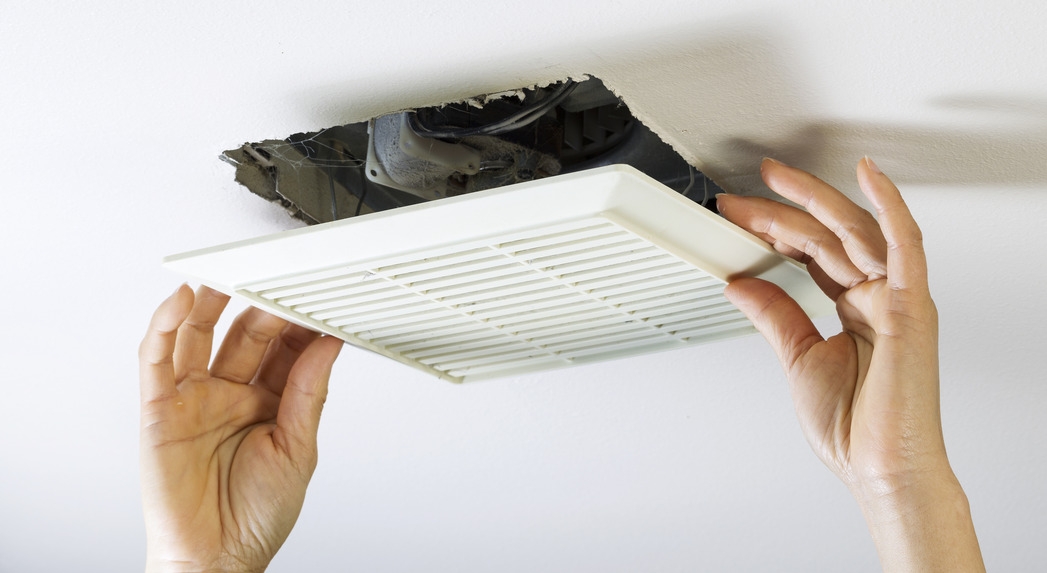
Bathroom fan installation isn’t brain surgery — collect air here; exhaust air out there. But it’s not for beginners either, because the project includes removing drywall, perhaps drilling through joists, certainly busting through an exterior wall or roof.

We suggest hiring an HVAC pro, who will charge $150-$700.

If you decide to install a fan yourself, here are some decisions you’ll have to make:

Location: If you have a separate WC, put a small fan there. If your toilet is part of the bathroom, locate the fan between the toilet and tub/shower.

Venting: Exhaust flows through venting attached to the fan and out an exterior wall or roof. Never vent smelly, damp air into an attic or crawl space, which will warp rafters and promote mold growth.

The idea is to run venting the shortest, straightest path from the bathroom to outside. Every extra foot and bend the venting makes increases friction and decreases air draw and fan efficiency.

Appropriate venting runs up into your attic, then along or through floor joists until it reaches the eaves. From there, it can be exhausted out a soffit.

In some instances it may be more practical (and less expensive) to run the vent directly out a wall, or through a vent stack in your roof.

Door clearance: During installation, make sure your bathroom door has at least ¾-inch clearance from the floor, so “makeup air” can easily replace the sucked-out air, putting less stress on the fan.

Related: A Replacement Fan That’s Easy to Install

Fan Options

Bathroom exhaust fans come in custom styles and colors, but most of us would rather spend our decor budget elsewhere and will choose an off-the-rack fan with one or more of the following options:

Fan only: If you’re retrofitting a small bathroom that already has a ceiling fixture, select a basic fan, 50-70 CFM. Cost: $15-$50.

Fan-and-light combo: Good for small bathrooms or WCs. Choose a combo with enough wattage to sufficiently light the area, typically upwards of 60 watts. Cost: $30-$150.

Deluxe combo: All the bells and whistles — fan, light, heater, nightlight, timer (necessary for super-quiet fans you won’t remember are on), humidistat (automatically turns on fan when air moisture rises). Cost: $150-$600.

 

By: Lisa Kaplan Gordon © Copyright 2015 NATIONAL ASSOCIATION OF REALTORS®


Think Your AC Won’t Make it Through the Summer? We’ve Got the Fixes

Think Your AC Won’t Make it Through the Summer? We’ve Got the Fixes

Is your AC making ominous noises? Maybe it sounds fine but isn’t cooling. Here’s a list of common air conditioning warning signs and their likely causes and fixes.

“Let comfort be your guide,” says Tom Hutchinson of Hutchinson Plumbing Heating Cooling. Air conditioning is all about comfort, so the simplest way to evaluate your system is to ask: Am I comfortable?

Air conditioning and HVAC units don’t last forever — 12 years is an average lifespan — and the moment they fail is usually when you need them the most.

The good news is that not every system malfunction spells total doom. Many nuisances are so cheap and easy to fix, you’ll kick yourself for not doing them sooner.

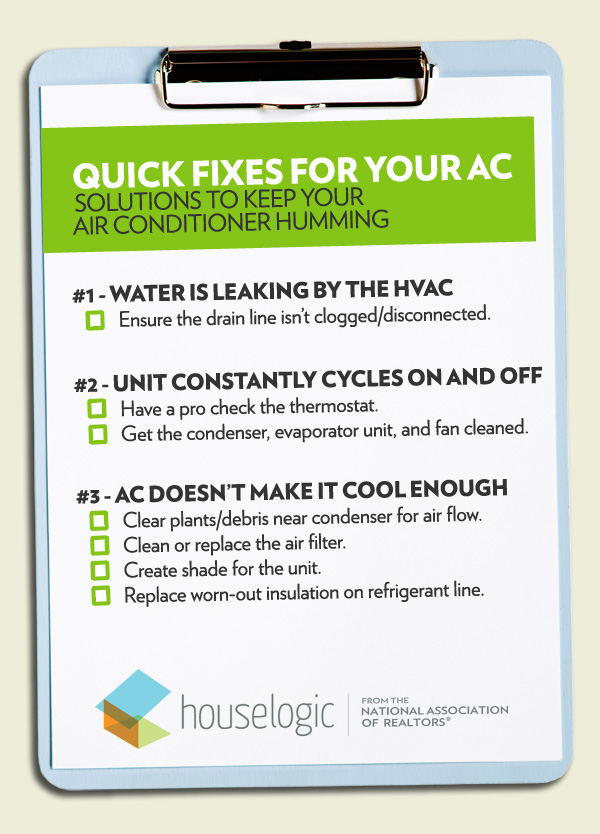
Quick fixes for your AC checklist on HouseLogic
Warning Sign #1: My Air Conditioning Won’t Turn On

Possible cause: Often, the most likely culprit is the easiest to remedy: The thermostat isn’t set correctly, or power isn’t reaching the AC unit.

The fix: Make sure that the thermostat is set to AC or “cool,” that the temperature setting is correct, and that the battery is fresh. Second, check the circuit breaker: It could simply be a tripped fuse.

Cost: Free

Warning Sign #2: I’m Not as Comfortable as I was Last Year

Possible cause: “Airflow is paramount to comfort,” notes Hutchinson. If you aren’t comfortable, the problem usually can be traced to issues with airflow.

The fix: Change the filter. (You should do this as part of regular HVAC maintenance anyway.) Depending on the quality of the filter, the amount of people living in the house, and if there are pets, the filter should be changed every 30-60 days.

Outdoors, make sure there’s at least 24 inches of clearance on the sides and 5 feet on top of the unit. Also, check to make sure there are no obstructions to the home’s cold air returns and registers.

Cost:
$5 to $20, depending on the filter.

Warning Sign #3: My Utility Bills are Abnormally High

Possible cause: A spike in operating costs typically signals inefficient operation. After a dirty filter (warning sign #2), the most likely culprit is a choked condensing coil. Located within the outdoor unit, the coil has countless cooling fins — much like a car radiator — that can accumulate dust and debris.

The fix: Call out a pro for a spring tune-up.

Cost: $75 to $150

Warning Sign #4: Weird Noises During Startup and Operation

Possible cause: Rattling, buzzing, or ticking? The good news is that the cause might be little more than a loose screw. The bad news is that it could be caused by a bum blower motor (indoors) or bent fan blade (outdoors).

The fix: If you’re lucky, a simple tightening here and lubricating there will fix the problem. If not, you might require a new fan motor or fan blade.

Cost:
$75 to $150 for an inspection and tune-up; $150 to $750 for a new blower motor.

Warning Sign #5: The AC Shuts Off Before or Long After I’m Comfortable

Possible cause: Improper placement of the thermostat can wreak havoc on one’s comfort. The unit might be in direct sun, too close to a register, or near a hot oven. Also, a remodel might have you spending more time where the thermostat is not.

The fix:
Relocate the thermostat.

Cost: Free if you’re handy (and plan on reusing the same unit); up to $250 for a new programmable unit, plus another $90 for an electrician to install it.

Warning Sign #6: There’s a Puddle of Water Next to my Furnace

Possible cause: During normal operation, the system generates moisture in the form of condensate. That water collects in a pan and flows out a line either into a floor drain or condensate sump basin. An accumulation of water signals a blockage or disconnection of the tube.

The fix: Inspect the tube for crimps, clogs, and disconnections. Also, if the water flows into a sump basin, ensure that the sump pump is in good working order.

Cost: Free to clean out blockage; $20 to replace the tube; $40 to $110 for a new condensate sump pump.

Warning Sign #7: The Air Coming Out of the Registers Doesn’t Feel as Cold as it Used to

Possible cause: The refrigerant lines aren’t insulated.

The fix: The outdoor unit is connected to the indoor system by two copper refrigerant lines, which should be covered with insulating sleeves. Make sure that they are. Also, the system may need its refrigerant re-charged.

Cost:
$5 for insulating sleeves; up to $150 for a system re-charge.

Warning Sign #8: My AC Unit Refuses to Kick On at All

Possible cause:
Burnt-out compressor

The fix: If the compressor fails, the unit won’t run. The only fix for this is a costly replacement of the equipment, which includes various small parts, new Freon, and labor.

Cost:
$600 to $1,900. It might be wise to replace your air conditioner if it’s more than eight years old, or if the estimated cost of repair is more than 50% of the cost of a new unit.


By: Douglas Trattner© Copyright 2015 NATIONAL ASSOCIATION OF REALTORS®


Which Way Should Your Ceiling Fan Turn in Summer? The Cool Way!

Which Way Should Your Ceiling Fan Turn in Summer? The Cool Way!

Published: June 28, 2012

Make sure your ceiling fans rotate in the correct direction to cool you in summer.

We’re having a heat wave; so make sure your ceiling fans are spinning in the right direction to move air around the room.

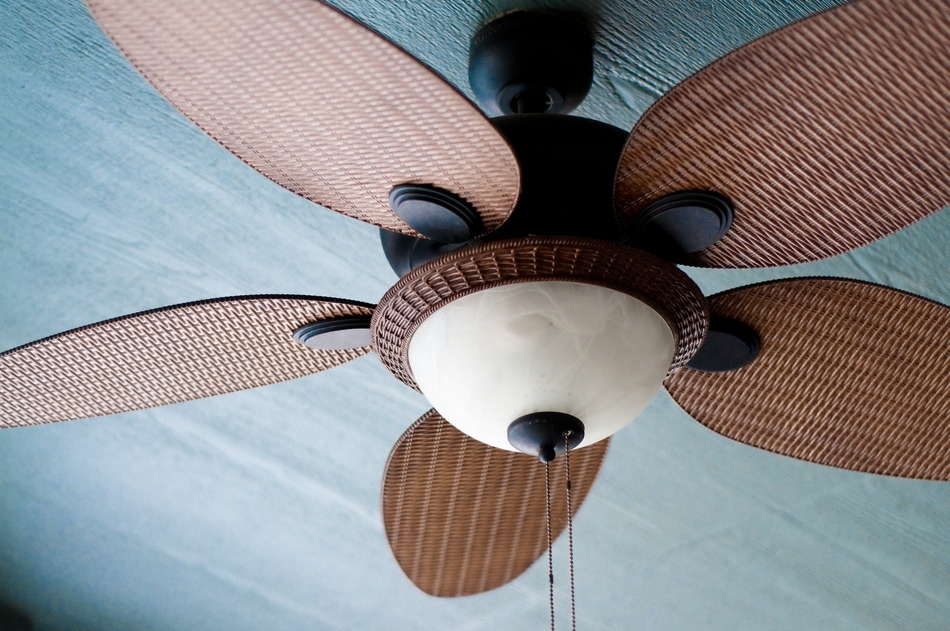
Most fans are reversible: One direction pushes air down, creating a nice summer breeze; the other direction sucks air up, helping you distribute heat in winter. There’s normally a switch on the motor to change the fan’s direction.

Is your fan turning in the right direction for summer?

  • Stand beneath the running fan, and if you feel a cooling breeze, it’s turning correctly.
  • If not, change directions, usually by flicking a switch on the fan’s base.

Typically, it’s counterclockwise or left for summer and clockwise for winter, but the best method is to follow the steps above.

Funny note: We read on Yahoo! that one clever person used bubbles to see which direction his fan was blowing.


By: Lisa Kaplan Gordon© Copyright 2015 NATIONAL ASSOCIATION OF REALTORS®

Quick Ways to Make Some Shade, But Don’t Forget: Trees Are Best

Quick Ways to Make Some Shade, But Don’t Forget: Trees Are Best

Published: May 24, 2011

If you prefer a drier cool, as opposed to the misters we mentioned yesterday, read on to find some quick ways to make some shade. Plus, get some tips on getting shade with some quick-growing trees.

Immediate relief

Umbrellas, awnings, and quick-assembly patio tents are quick, although sometimes costly, methods of creating shade instantly.

The ubiquitous patio umbrella—found even in grocery stores for $30—can either stand alone upright or offset, or slip into a hole in your patio table.

Choose an umbrella that tilts, so you can block the sun at any angle. Or get one that’s fabulous, like Frontgate’s Rimbou Lotus Shade, which looks like a giant palm frond. (Cost: $1,795.)

Retractable awnings, a permanent feature of older southern homes, are traditional shade makers for outdoor areas up to 12 feet from your house. Motorized awnings take the fuss out of opening and closing. Depending on size and what kind of bells and whistles they come with, awnings typically cost from $400 to $3,000.

Portable awnings are my favorite, because they make shade wherever, not just areas close to the house. SunSetter’s Large Oasis Freestanding Awning, measuring 16 ft. by 10 ft., can provide 160 sq. ft. of shade. (Cost: $1,549 manual; $2,099 motorized.)

A cloth gazebo (aka patio tent or canopy) is another option that’s great for entertaining. You can go simple and inexpensive ($50 for Target’s Outdoor Patio Pariesienne Gazebo Canopy, though online reviews indicate you get what you pay for). Or you can step it up with the Garden Oasis Lighted Gazebo, complete with lights and netting for $700 at Sears.

Long-term re-leaf

Growing shade trees is the greenest—and slowest—way to block the sun on patios and decks. There’s nothing as cool as sitting under the shade of an old oak tree.

If you can’t wait 20 years for a little shade, plant a quick-growing variety which, in tree language, means it grows a couple of feet or more each year. You can rush the process by paying more and buying big trees, and you’ll see a return on your investment. Here are some species to consider.

  • American Elm: (Zones 2-9) Grows rapidly up to 100 feet tall and 120 feet wide. Adapts to varied climates and soil conditions.
  • October Glory Red Maple: (Zones 4-9) Provides a 35-foot spread and grows to 40 feet high.
  • Sawtooth Oak: (Zones 4-9) Dark green summer foliage turns yellow to brown in fall. Wildlife will love its acorns.
  • Chinese Pistache: (Zones 6-9) Wonderful wide canopy and grows in all but the coldest zones.
  • Natchez Crape Myrtle: (Zones 7-10) Lots of long-blooming white flowers and cinnamon-colored bark.

How do you block the sun from baking your patio or deck in summer? Did you plant a tree a few years back that is now rewarding you with lots of shade? We’d love to know!


By: Lisa Kaplan Gordon© Copyright 2015 NATIONAL ASSOCIATION OF REALTORS®


Your Guide to Choosing Patio Stones

Your Guide to Choosing Patio Stones

Published: April 9, 2013

With so many patio stones on the market, it can be hard to choose. So we’ve done the research to help you make the right choice for your home.

Brick

Brick pavers are classic. They’ve got lots of character, and you can explore your creative chops by setting them in intricate patterns. Thinner than typical “builder bricks” used on home siding, they’re made to hold up under heavy foot traffic.

Brick pavers come in a variety of shapes, sizes, colors, and finishes, and can look old or new. Because they’re smaller than other pavers, they take a while to put in place, and installation costs can be higher.

You can do the job yourself for $3 to $5 per square foot. You’ll need to rent a brick saw — a heavy table-mounted saw that makes cutting masonry a snap. Cost: $60 to $95 per day. Don’t forget: You’ll need to figure out a way to get the brick saw to your house.

For a pro-installed brick patio, you’ll pay $12 to $18 per square foot, professionally installed.

Concrete
Concrete Pavers
Rubber Tiles
Flagstone, Slate, and Marble
Decomposed Granite and Pebble Surfaces
Finding Your Own Recycled Materials
Mixing Materials
Getting on Base

Concrete

Concrete can be finished off in lots of imaginative ways — brushed, acid washed, scored, and stamped — and lots of colors. Its long lifespan and relatively inexpensive installation make it a popular choice.

“For colder climates, consider adding $1 to $2 per square foot for a specialized base preparation and concrete additive,” says Chris Fenmore, principal with Garden Studio Landscape Design.

Stamped concrete can simulate flagstone, brick, cobbles, and other decorative patterns, but adds about $3 per square foot to installation costs.

Figure $6 to 12 per square foot, depending on finish and color.

Brick
Concrete Pavers
Rubber Tiles
Flagstone, Slate, and Marble
Decomposed Granite and Pebble Surfaces
Finding Your Own Recycled Materials
Mixing Materials
Getting on Base

Concrete Pavers

Concrete pavers offer an embarrassment of riches — there are shapes, sizes, textures, and colors galore. Some are plain; some look like real stone; others have intricate patterns embossed on their surfaces. They’re readily available at home improvement centers and are well-suited to DIY patio projects.

Interlocking concrete pavers have tabs and slots so they fit together like pieces of a very simple puzzle. They’re fairly inexpensive, have minimal maintenance, and install quickly.

Concrete pavers are $2 to $8 per square foot. If you’d rather have a pro do it, you’ll pay $7 to $15 per square foot, including materials.

Brick
Concrete
Rubber Tiles
Flagstone, Slate, and Marble
Decomposed Granite and Pebble Surfaces
Finding Your Own Recycled Materials
Mixing Materials
Getting on Base

Rubber Tiles

Rubber tiles are made from recycled tires. They’re designed to go over any surface, and their light weight means you can use them on decks. They look like concrete tiles, with finishes that resemble brick and terra cotta. They’re fairly new on the market, so the jury is still out on how they perform over time.

Rubber tiles are strictly a DIY material, and they snap together with connector clips. They’re good for quickly covering up old, cracked, worn patio surfaces. You’ll pay $3 to $5 per square foot.

Brick
Concrete
Concrete Pavers
Flagstone, Slate, and Marble
Decomposed Granite and Pebble Surfaces
Finding Your Own Recycled Materials
Mixing Materials
Getting on Base

Flagstone, Slate, and Marble

Almost any stone can work as a paver, but most are either sandstone, limestone, slate, or granite. The materials you select will be especially cost-efficient if they come from locally operated quarries; check your local stone supplier before looking at national home improvement chains.

Stone pavers are cut into modular shapes; 6-by-12, 12-by-12, and 18-by-18-inch sizes are standard. Uncut pavers have rough, irregular edges and come in various sizes.

When it comes to installing uncut stone, an experienced pro works quickly and is your best bet for a good-looking patio with even spaces between stones.

Pro installation is $12 to $28 per square foot, depending on the stone you choose.

Want to see some stone patios that really rock?

Brick
Concrete
Concrete Pavers
Rubber Tiles
Decomposed Granite and Pebble Surfaces
Finding Your Own Recycled Materials
Mixing Materials
Getting on Base

Decomposed Granite and Pebble Surfaces

Decomposed granite is made up of very small pieces of granite, ranging in size from 1/4-inch to the size of sand. It’s an affordable way to go, and some folks really love the slightly crunchy texture underfoot, and the way rain disappears — no puddles!

You’ll probably have to refresh and replenish the granite now and then, as the surface can erode with time, so there’s some preventative maintenance involved. Figure about $1 per square foot every three years for upkeep.

Also, decomposed granite isn’t solid and furniture legs tend to sink into the stones. Adding stabilizers that help bind particles together can strengthen the surface.

Cost: $1.50 per square foot without stabilizers, $2 with stabilizers.

Brick
Concrete
Concrete Pavers
Rubber Tiles
Flagstone, Slate, and Marble
Finding Your Own Recycled Materials
Mixing Materials
Getting on Base

Finding Your Own Recycled Materials

Like the idea of upcycling? A patio is a good way to reuse old building materials, and it’s a cost-effective and eco-friendly alternative to new materials. Plus, you’ll be building a one-of-a-kind creation. Tip: Look for materials that provide uniform thickness.

  • Cast-off concrete sections from a neighbor’s old driveway or sidewalk.
  • Check nearby construction sites for old materials — be sure to ask permission before hauling anything away.
  • Know of a building scheduled for demolition? See if there’s any old brick or stone is going to be discarded.

Although the materials are usually free, it’s a good idea to enlist some strong-backed helpers and the use of a pick-up truck. For a typical 12-by-12-foot patio, you’ll save $500 to $800 versus new pavers. Spend some of that on a patio party for your helpers.

(If you’re a salvaged materials aficionado, check out our slideshow on clever ways to use salvage in your home.)

Brick
Concrete
Concrete Pavers
Rubber Tiles
Flagstone, Slate, and Marble
Decomposed Granite and Pebble Surfaces
Mixing Materials
Getting on Base

Mixing Materials

Remember, you’re not stuck with one type of patio paver. Combining different materials — such as brick together with concrete, or stone with rock trim, can create a cool, customized look.

Southern California designer Chris Fenmore notes, “Too much hardscape can be tedious. I often like to use four-inch troughs separating masonry from concrete that can be filled with gravel, beach rocks, or ground cover. They provide a bit of relief from the hardscape and nice detail, adding to the custom look of the yard.”

Brick
Concrete
Concrete Pavers
Rubber Tiles
Flagstone, Slate, and Marble
Decomposed Granite and Pebble Surfaces
Finding Your Own Recycled Materials
Getting on Base

Getting on Base

Choosing paving materials begins with a basic: the base or foundation. The base supports your pavers, and it’s got to be firm, strong, and designed to stand up to years of wear and weather. A poorly installed base leads to shifting and settling that’ll crack concrete and make your patio pavers look like choppy seas.

A sand-and-gravel base is a good DIY project; leave a concrete slab base to the pros.

A gravel and sand base is a simple foundation that lets you “dry set” pavers — you put the pavers on top of the base, then sweep fine sand into the joints to hold them there. Building a gravel-and-sand base is an easy (but time-consuming) DIY project. You’ll pay $2 to $3 per square foot for a DIY job. If you’d rather have a pro do the work, figure $3 to $5 per square foot.

With a sand or gravel base, chances are there’ll be some settling over time. Every couple of years, plan on resetting individual pavers that have gotten out of whack because of settling.

A concrete base offers greater longevity and stability, with less potential for settling. On a concrete slab base, the paving materials are set permanently with mortar, and ongoing maintenance is minimal.

Working with concrete is a challenge for weekend warriors, so skip experimentation (mistakes in concrete are permanent) and go with a pro. You’ll pay $5 to $8 per square foot for a professionally installed concrete base.

If you’re a fan of concrete, check out these imaginative ways to use concrete inside your house.

Brick
Concrete
Concrete Pavers
Rubber Tiles
Flagstone, Slate, and Marble
Decomposed Granite and Pebble Surfaces
Finding Your Own Recycled Materials
Mixing Materials


By: Andrea Nordstrom Caughey© Copyright 2015 NATIONAL ASSOCIATION OF REALTORS®


7 Alternatives to a Reverse Mortgage

7 Alternatives to a Reverse Mortgage

Published: November 18, 2013

A reverse mortgage lets you cash in your home equity without selling your home. The catch? You’ll pay hefty fees. Maybe one of these alternatives would work better for you.

If you’re 62 or older, a reverse mortgage lets you keep your house and receive a lump sum or monthly payments that you don’t have to pay back until you move out or pass away.

Although that can be a blessing if you’re house-rich but cash-poor, the reverse mortgage’s biggest pro (you get cash) comes with cons. Closing costs are steep. And if you spend your home equity early in retirement, you might come up short later in life if you have high medical bills, have to pay for long-term care, or your living expenses outpace your investment income.

Before you commit to an expensive reverse mortgage, it pays to consider alternatives. Maybe one of these seven options will solve your problems.

Related: The Pros and Cons of Reverse Mortgages

1.  Rex Agreements

In a Rex agreement, you agree to sell the future increase or decrease in your home equity. The company buying your equity gives you a lump sum based on your home’s value, how much of your future equity you’re willing to sell, your financial history, and your home’s current condition. A typical Rex agreement would give you about 12.5% of your current home’s value.

With a Rex agreement you don’t have monthly payments or interest charges as you would with a reverse mortgage. When you sell your home, the Rex agreement company gets repaid by taking the agreed upon share of the increase or decrease in your home’s value.

Good option for: Paying off a one-time expense like an existing mortgage or a big medical bill.

Probably won’t work if: You have bad credit or a big mortgage. You’ll need a solid credit history and at least 25% equity in your home to qualify for a Rex agreement.

Cautions: Watch for low-ball appraisals, which can come back to haunt you when you sell and split the profits. Your Rex payment is tax-deferred, not tax free — you’ll need to pay Uncle Sam eventually so consult a tax adviser.

2.  Sell Your Home To Your Children

Planning to leave your home to your children? You could sell it to them now and have them pay you a monthly income or a lump sum. You could set it up like a Rex agreement, where you agree to pay your child a share of the profits when you sell your home in the future. Or, you could sell a portion of your home, say 49%, to your child for a lump sum or via a mortgage (if you want monthly income from your child).

A sale will have tax and estate planning ramifications; working with tax and legal advisers will be a must if this reverse mortgage alternative appeals to you.

Good option for: Parents whose children have high incomes.

Probably won’t work if: You don’t trust your children 100%, or don’t want to do business with family members.

Cautions: When selling your house to someone else, even a child, you may lose the right to live there. Put your agreement in writing and have a lawyer review it.

3.  Home Equity Line of Credit (HELOC)

A HELOC gives you money you can use for anything you want. With most HELOCs, you make interest-only payments the first 10 years, and you may even be able to write off the interest come tax time.

You don’t have to pay off your existing first mortgage to get a HELOC. Since the average life expectancy of a 65-year-old is 19 years, a HELOC might get you through half of the rest of your life.

Good option for: Seniors who want the security of knowing they can pay unexpected expenses in the future. Older homeowners whose life expectancy is 10 years or less.

Probably won’t work if: You have weak credit, can’t show enough income to cover the monthly payment, or you’re trying to get rid of all your monthly mortgage payments.

Caution: The lender can shut down your HELOC if your income or home value fall.

Related: The Risks of HELOCs

4.  Refinance Your Existing Mortgage

If you have an existing mortgage and the monthly payments are too high, consider refinancing or recasting to lower your payment. You’ll pay less each month, but more overall, if you refinance.

Thanks to the federal Home Affordable Refinance Program (HARP) you may be able to refinance even if you owe more than your home is currently worth. If you have plenty of assets, but little income, talk to a Fannie Mae lender. The secondary market giant has a program allowing borrowers who fail to meet income standards to refinance if they can show they have 12 months of payments in a bank or retirement account.

Good option for: Homeowners with relatively small outstanding mortgages and the ability to prove they have enough income or assets to repay their refinanced mortgage.

Probably won’t work if: You have no income and few assets.

5.  Rent Out Part of Your Home

Even though you love your home, if it becomes a financial burden, you may need to consider options other than borrowing. You could sell your house and downsize into something more affordable.

Want to stay where you are? How about renting a room in your house or having a child or other relative move in and share expenses? You pitch in with laundry or cooking. They pitch in with cash. The grandkids get to spend more time with you. Everyone wins.

Good option for: Homeowners with empty bedrooms and congenial attitudes.

Probably won’t work if: You’re particular about how people treat your things, or you don’t get along well with your family.

Caution: Have your new housemates purchase renters insurance. Even if they’re relatives, they might not be covered by your homeowners insurance. Do a credit and background check on unrelated potential housemates.

Related: More Ways to Make Money off Your Home

6.  Get a Job

You may not want to return to your career full time, but you can probably pick up extra cash by returning to work part time or seasonally. Use the money for current expenses or to pay off your existing mortgage.

Good option for: Healthy, mobile seniors.

Probably won’t work if: You can’t handle the stress of working.

Caution: Your Social Security benefits can be trimmed if you earn too much ($15,120 per year in 2013). Check to see how your retirement and health care benefits might be affected.

7.  Seek Public Assistance

You may qualify for public assistance and not realize it. The National Council on Aging’s BenefitsCheckUp will tell you if you’re a candidate for one of more than 2,000 federal, state, and private benefits programs.

Good option for: Everyone

Probably won’t work if: You don’t try it. Even wealthy seniors sometimes qualify for programs like property tax exemptions.

Seek Other Options to Pay Medical Bills

A good number of reverse mortgage borrowers take cash out of their homes to pay medical bills. If you’re one of them, consider these alternatives:

Try to find billing errors. Ask for an itemized bill, the pharmacy ledger, and your medical records from any healthcare provider sending you a large bill. Make sure each charge is for a medication, treatment, or service you actually got and that you were billed only once for each item.

Share your financial problems with your healthcare provider and ask for a payment plan you can afford, even if it’s only $10 a week.

If the bill comes from a healthcare facility, check to see if they’re required to provide free or reduced-price services under the Hill-Burton Act. If they’re still under Hill-Burton, you can apply for your costs to be covered.

Consult with an attorney to find solutions that keep creditors from seizing your home. Even if you owe a large amount, a state homestead exemption might prevent your creditors from foreclosing to get your home equity. An attorney will know if bankruptcy or a negotiated settlement are in your best interest.

Good option for: Low-income homeowners facing large medical bills.

Probably won’t work if: You have other assets you could tap to pay medical bills.

Caution: Don’t sign a “stipulated agreement” promising to make payments to a healthcare creditor without first consulting an attorney. Failing to make stipulated agreement payments could put your home at risk of foreclosure.


By: Barbara Eisner Bayer© Copyright 2015 NATIONAL ASSOCIATION OF REALTORS®


The owner of this website has made a commitment to accessibility and inclusion, please report any problems that you encounter using the contact form on this website. This site uses the WP ADA Compliance Check plugin to enhance accessibility.