15-Minute Home Makeovers

15-Minute Home Makeovers

Here are 7 house pick-me-ups that take about as much time as brewing a pot of coffee and fit your schedule whenever you have a few extra minutes.

Caught between your lack of time and the urge to give your home some spit and polish? Never fear. These ideas will add panache in no time at all.

Easy quick house makeovers infographic

1.  Switch the plates. Upgrade your drab, plastic switch plates with snazzy covers that match or accent your décor. Even the most expensive brass switch plates cost less than $20 each. Or, spend a buck for a plastic plate and decorate it yourself. Use craft paint, or cover the plate with decorative paper. You also can switch outlet covers, but don’t get too fancy. Outlet covers should blend with the wall.

2.  Touch-up boo-boos. A bit of new paint gives any room a fresh face, which is why you should keep extra color-matched paint after you remodel. Touch up banged-up baseboards, door and window trim, and wall marks that won’t wash away. Even spot painting requires care; use a drop cloth to protect other surfaces.

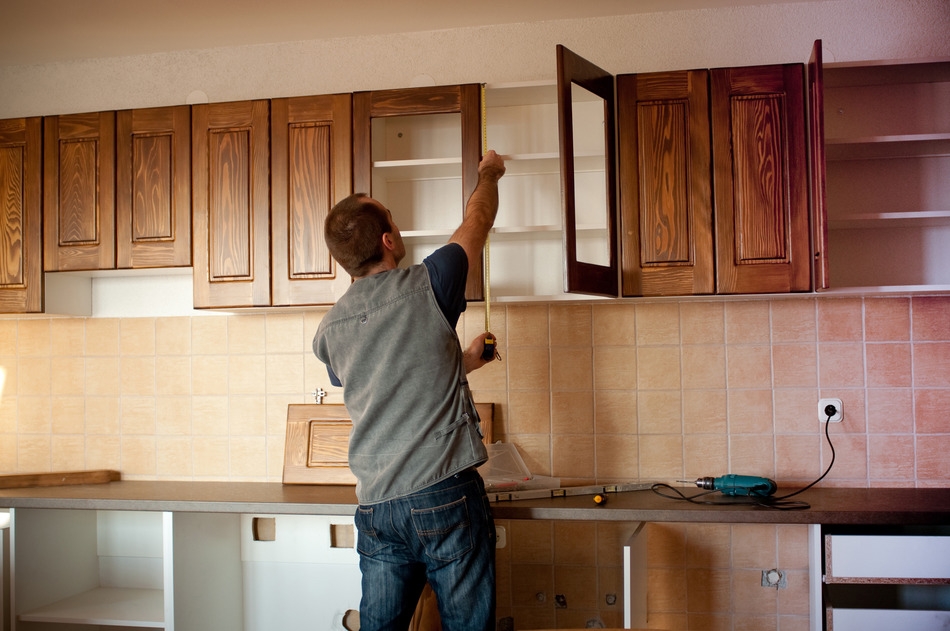
3.  Change out drawer and door hardware. Upgrade your kitchen or bathroom by installing new pulls and knobs. Be sure to measure drawer pulls so you won’t have to drill new holes. Check out these cute and economical ($4.95 for 8) zoo dresser drawer knobs on Esty. Home improvement centers have a large selection of inexpensive pulls and knobs.

4.  Update your mailbox. Bump up curb appeal by spray-painting your old mailbox. You can freshen the same color, or go wild with bright hues. Don’t forget to scrub off dirt and rust before painting with rust-proof paint ($6 to $12 for a 10-ounce can; lots of decorative textures and colors).

5.  Play the numbers game. Decorative house numbers and plates give your home a custom and classy look. Some numbers are quick peel-and-stick affairs; others you’ll have to screw in. They’re made of wood, plastic, brass, stainless steel, and other materials; $6 to $30 each.

6.  Embellish your throne. A new toilet seat gives you a regal bearing. Plastic and enameled seats ($12 to $25) in a rainbow of colors add a dash of panache; a solid wood mahogany or walnut seat ($45-$60) makes an executive statement; cushioned seats ($15 to $20) won’t make a lasting impression — and that’s a good thing.

7. Declutter. You’ll be amazed how a 15-minute daily declutter can make a room look like new. First, get rid of stuff from your fridge door: that large, blank canvas will immediately brighten your kitchen. Corral mail and papers in decorative boxes with tops that can close and hide the mess. Organize school supplies in caddies. Every day, tame a new spot.



By: Lisa Kaplan Gordon © Copyright 2015 NATIONAL ASSOCIATION OF REALTORS®

How to Prevent Water Damage

How to Prevent Water Damage

Preventing water damage is a whole lot cheaper than paying for repairs. Here are three easy prevention tips.

Water damage is the No. 1 culprit that weakens your home’s foundation and the very core that holds your house together.

You’ve heard about core strength for your body. Well, water damage hits at the core strength of your house, eventually causing serious structural damage. Damp wood invites termites and carpenter ants; plus, it causes mold and mildew.

Here are three easy things to do to that will give you piece of mind the next time heavy storms hit.

#1. Ensure Good Drainage

Why it matters: Poor drainage weakens your foundation, causing cracks, uneven settling, and pathways for water to enter your home.

How to do it:

  • Clean your gutters routinely. A clogged gutter will send cascades of water down the side of your house, damaging your siding and foundation.
  • Ensure your downspouts direct water 5 to 10 feet away from your house.
  • Make sure your yard is sloped at least 6 inches over a 10-foot span away from your foundation. That slope keeps water from getting down right next to your foundation, where it could cause walls to lean, crack the masonry, and create leaks. (For crawl spaces, keeping water away makes sure excess water doesn’t pool underneath your floor, making for damp conditions that encourage mold, rot, and insects.)
  • But don’t let the soil get too dry, either. Long dry spells let the soil around your house dry out and shrink. A big rain may make the soil expand, putting pressure on your foundation walls. In a drought, run a soaker hose at least 6 inches from the foundation and 3 inches under the soil to keep the soil from contracting and expanding.

Maintenance cost: Very little. Cleaning gutters can be a no-cost DIY job, or you can hire a pro for $50 to $250, depending on the size and height of your home. To get the soil slope you need, you might have to buy some additional topsoil.

Worst case if you put it off: Your foundation could settle, cracking your basement walls. The cost to stabilize, repair, and seal deteriorated foundation walls is a whopping $15,000 to $40,000.

Related:

  • 7 Signs You Have a Foundation Problem
  • How Foundation Repairs Work

#2. Test Your Sump Pump Regularly

Why it matters: Sump pumps come to life during storms. That’s not when you want to realize yours isn’t working properly. You should check it at least once a year, and ideally perform several checks during heavy storm seasons.

How to test your sump pump:

1. Slowly fill the sump pump pit with water. Watch for the “float” (similar to the float in your toilet) to rise, which should turn on the pump. Then watch to make sure the water level falls.

2. Test your backup pump the same way, but unplug the main pump first.

3. If you don’t have a backup pump — or a generator — and are on municipal water, get one that runs on water pressure. If you’re on well water, your only option is the battery kind.

Maintenance cost: Testing is free; a water-powered backup sump pump, including installation, costs $150 to $350; a new battery for a battery-operated sump starts around $200.

Worst case if you put it off: Your basement could flood, ruining everything in it, including drywall and carpeting. (Did you know your regular insurance doesn’t cover flooding?) Plus you run the risk of mold and mildew — which can also be a very expensive problem.

Related: Replacing Your Sump Pump

#3. Check for Water Leaks and Fix Them


Why it matters:
 Persistent leaks lead to mold and mildew, rot, and even termites and carpenter ants (they like chewing soggy wood, since it’s soft). Yet if you fix a leak soon after it starts, there may be no long-term damage at all.

How to check for leaks:

  • Check for dark spots under pipes inside sink cabinets, stains on ceilings, toilets that rock, and of course drips.
  • At least once a year, inspect your roof. Repair missing, loose, and damaged shingles. Repair any cracked caulking and check for leaks around flashing.

Related:

  • How to Inspect Your Roof
  • Tips for Preventing Leaks

Maintenance cost: Negligible for a simple fix, such as a new washer. A visit from a plumber might set you back $250; a roof repair, a few hundred dollars to $1,000.

Worst case if you put it off: Drips ruin the cabinet under the kitchen sink, and run down into the floor sheathing and joists underneath, so you need a structural repair, plus new cabinets and new kitchen flooring. Or the roof rots, so you need a new roof and repairs to rooms directly beneath.

If you do these three things and still have persistent water problems, such as water getting into your basement or an area of your yard keeps washing out, the solution is a bit more complicated in the form of a French drain. Learn about French drains here.


By: Lara Edge © Copyright 2015 NATIONAL ASSOCIATION OF REALTORS®

Screen in Your Deck for a Bug-Free Summer

Screen in Your Deck for a Bug-Free Summer

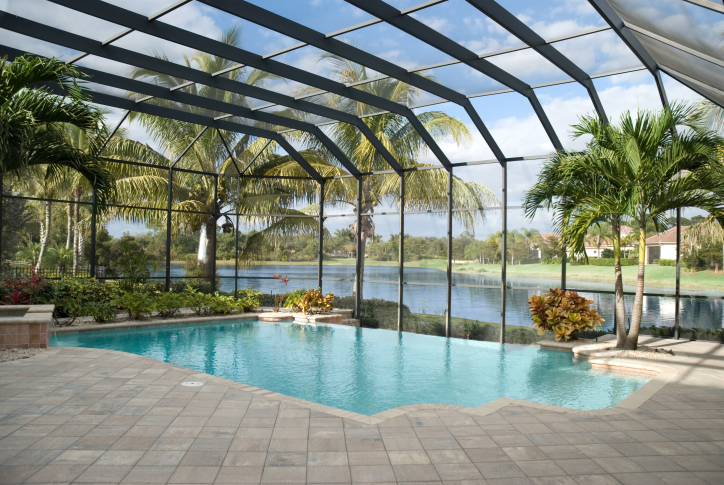
You can make the most of your backyard by converting your deck to a screened-in porch, which turns mosquitoes, heat waves, and downpours into non-events. Plus, the thwack of a screen door is still the soundtrack for summer.

Converting won’t be easy — unless you’ve got top-notch handyman skills, you’ll have to hire a pro. And it won’t be cheap — converting a 14-foot-by-14-foot deck into a porch will cost $10,000-$12,000.

But it’s worth the time and money. Screened-in porches add value to your home. Reginald Carter, a Jacksonville, Fla., appraiser, says the return on investment is about 70% if you stay in your home for at least five years after installing the porch.

Screened-in porches also can help you sell your home faster. In Virginia, for instance, about 70% of buyers can’t live without screened-in porches, says Elaine VonCannon, a REALTOR® from Williamsburg, Va.

“It works for everybody who likes to sit outside,” says VonCannon.

Related: Pictures of Screened-In Porches
Can Your Deck Become a Screened-In Porch?

Maybe.

The biggest structural difference between a deck and porch is the weight of the load that rests on its foundation, joists, and beams, says David Berryhill, owner of Archadeck of Chicagoland.

Most decks are relatively lightweight: A 14-foot-by-14-foot deck can rest safely if it’s attached to the house and supported by three concrete piers. A porch, however, is much heavier because it has a roof.

To prepare your current deck for the additional load, you’ll have to:

  • Possibly add more posts and foundation piers ($500-$5,000). Check with your local building code authority. In some municipalities, building codes require a solid concrete foundation, which could cost up to $10,000 (and would eliminate most decks from consideration as porches).
  • Beef up joists and beams to support the additional roof load.
  • Remove railings if you want a floor-to-ceiling screened porch, which gives you an unobstructed view.
  • Bug-proof deck floors. To keep tiny critters from climbing into your new porch from below, attach a fine mesh screen or landscape paper to the underside of the floor. Or, replace the current floor with tongue-and-groove boards that fit so tightly bugs can’t climb through.

Pick the Right Roof

The right roof makes the difference between a porch that looks like it was always part of your house, and one that looks like an afterthought with no architectural rhyme or reason. Some tips:

  • Select a roof shape that’s compatible with your house’s roofline. A hip roof is strongest, a shed roof the most economical, and a gable roof lets in the most light.
  • In some cases, the new roof can be built over the existing one, but you’ll still have to flash the valley and rearrange the gutters and downspouts.
  • Use the same roofing material as your main roof.

The Skinny on Screens

Know thyself before you select screening for your porch. Do you have rambunctious pets that make strength a top priority? Is there a beautiful view you don’t want blocked by an obtrusive screen?

Here are some options:

Fiberglass (17 cent/sq. ft.): An inexpensive, lightweight screening in black or charcoal. It’s easy to install but tears easily, too, and has a tendency to stretch and look floppy.

Aluminum (26 cents/sq. ft.): Stronger and more durable than fiberglass, and the least visible. On the downside, aluminum dents easily and can oxidize.

Vinyl-Coated Polyester (60 cents-$1.53 /sq. ft.): Used to make pet screens that are super strong — down, Rex, down — and ones that dissipate heat in hot climates.

Bronze ($1.10/sq. ft.): Strong, doesn’t easily oxidize in salt air along coasts, and develops a patina with age.

Monel (alloy of copper and nickel) and stainless steel ($2.25-$5/sq. ft.): Strong, and tear-, rust-, and corrosion-resistant.

Related: Repair a Torn Screen

Screened-In Porch Tips

  • Pre-made screen panels are easier to install and repair than rolls of screening, but you pay the price of $50-$75/running ft.
  • When planning your porch project, check local building codes for setback regulations and building specifications.
  • Don’t forget to add electrical outlets to your porch for lamps, ceiling fans, and phone chargers.
  • Porches block light and can make the inside of your house seem dark. You can cure that by installing a skylight in the room adjacent to the porch.
  • Building codes may require that you have a 3-foot-by-3-foot concrete landing outside the egress door to your porch.


By: Lisa Kaplan Gordon © Copyright 2015 NATIONAL ASSOCIATION OF REALTORS®


Ikea Studied Americans at Home. Here’s What It Found.

Ikea Studied Americans at Home. Here’s What It Found.

Published: April 15, 2014

Ikea was curious about what Americans want from their homes. Surprisingly, it has nothing to do with expensive upgrades.

The Swedish retailer’s first annual “US Life at Home Report” uncovered that, above all else, 95% of Americans consider comfort a top home feature. We’re not talking about cushy furniture or other features that makes life at home physically more comfortable. It’s an emotional thing. Ikea found that American consumers want their homes to have a feel-good environment so they can let their hair down and connect with loved ones.

Here are more nuggets from the report:

We aren’t show-offs. In fact, we’re modest (!). Ikea says, “… home in the U.S. is not so much about status or wealth. Or keeping up with the Joneses.” Only a mere 1% wants their abodes to reflect their success.

We love living rooms. Maybe that’s why open kitchens are hot. Homeowners don’t want to be separated from their favorite room. Of those polled, 65% agree it’s the most popular spot in the house.

We feel cramped in the kitchen. We’re starved for kitchen storage. We also want more elbow room and counter space.

We use technology in the kitchen. But this has nothing to do with futuristic home gadgets. A total of 27% listen to music, use the computer, or watch TV while cooking or hanging out.

We stash stuff under our beds. The bedroom is another room that leaves us feeling squeezed for space. Fifty-four percent of Americans use the space under their beds for storage.

We want to save energy. If the opportunity popped up, 98% of us would buy an Energy Star-rated appliance. We’re also starting to shift away from inefficient incandescent light bulbs.  Forty-three percent of us have transitioned to LED bulbs and have at least one in the house.

We’re getting greener. A whopping 71% of Americans recycle at home. Twenty-eight percent want to generate their own solar power.

The panel for this study consisted of 4,000 U.S. consumers:

  • A combination of male and female heads of household between the ages of 25-54
  • Household income of at least $35,000


By: Deirdre Sullivan © Copyright 2015 NATIONAL ASSOCIATION OF REALTORS®


How to Pick Paint Colors

How to Pick Paint Colors

Paint has remodeling power when you use it to emphasize a room’s best features or play down the flaws.

Every home suffers a few negatives, but not every solution requires pricey structural changes. Paint is an often-overlooked, low-cost remodeler’s remedy for common complaints with interiors, offering the chameleon-like ability to lighten, warm, enlarge, erase, or attract attention.

“Paint is a powerful tool that can enhance the architectural character and intent of space,” says Minneapolis architect Petra Schwartze of TEA2 Architects. “As you choose your paint, think about what the experience in the room should be.”

More Schwartze advice:

  • Always sample paint colors on a few walls. Don’t be shy about painting a few large swaths on walls and trim to consider the effect of natural and artificial lighting. Add samples to opposite sides of a room to judge the paint color from different angles.
  • Check the space with the samples in place and watch how the paint color changes at different times of the day.
  • Evaluate your reaction to the proposed colors: Does the space feel cozy or is the openness enhanced?

How to Enlarge Space with Color

Painting walls white, cream, pastels, or cool colors (tinged with blue or green) creates the illusion of more space by reflecting light. Paint trim similar to walls (or use white on trim) to ensure a seamless appearance that visually expands space.

In addition, using white or light colors on walls lifts the ceiling; darker shades can have a similar effect if you select a high-gloss paint sheen, which reflects light and enhances space.

Use a monochromatic scheme to amplify the dimensions of a room. Select furnishings in one color and paint walls and trim to match. Lack of contrast makes a room seem more spacious.

Make walls appear taller by extending wall color onto the ceiling. Create a 6- to 12-inch-wide border of wall color on the entire ceiling perimeter, or wherever walls meet the ceiling.

Vertical and horizontal stripes of alternating color can make a room grand. Although vertical stripes enhance room height by drawing the eye upward, horizontal stripes lure your gaze around the perimeter, making walls seem further away. Use similar light colors for low-contrast stripes, and your room will look even larger.

Creating Intimacy

When a space feels cavernous, draw walls inward and make it cozy with warm colors (red-tinged) because darker hues absorb light. Similarly, a dark or warm color overhead (in a flat finish) helps make rooms with high or vaulted ceilings less voluminous.

Give Peace a Chance

The right paint choice can lend tranquility to a bathroom, master suite, or other quiet, personal space. A palette of soft, understated color or muted tones help you instill a calming atmosphere. Some good choices include pale lavenders, light grays or greens, and wispy blues.

Define Your Assets

Call out notable features in a room with paint. Dress crown moldings and other trims in white to make them pop against walls with color. Make a fireplace or other feature a focal point by painting it a color that contrasts with walls.

“Using a higher sheen of paint on woodwork, such as baseboards and door or window casings,” says Schwartze, “creates a crisp edge and clear transition from the wall to the trim.”

Hide Flaws

Not everything should stand out in a space. Using a low-contrast palette is a good way to hide unappealing elements or flaws. Conduit, radiators, and other components painted the same color as the wall will seem to disappear.

Selecting low-sheen or flat paint colors also helps hide flaws. Unless walls are smooth, avoid using high-gloss paint because it reflects light and calls attention to an uneven surface.

What’s the Cost?

As a DIY job, painting a 12-foot-by-12-foot space costs about $150, including paint, primer, brushes, drop cloths, and other painting tools and supplies. A professionally painted room using high-quality, brand-name paint costs $200 to $400.


By: Jan Soults Walker© Copyright 2015 NATIONAL ASSOCIATION OF REALTORS®


Extend the Outdoor Living Season

Extend the Outdoor Living Season

Published: October 3, 2011

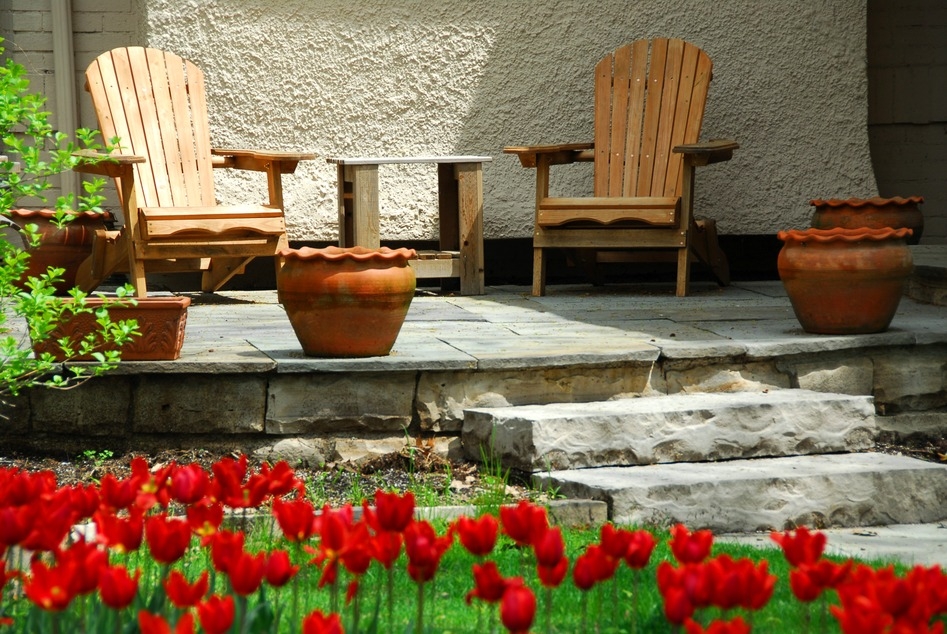
Make an outdoor living area comfy long after the sun sets or the leaves turn with outdoor lighting, a patio heater, and a glowing firepit or portable fireplace.

Light the deck or patio

The sun sets sooner on your outdoor living space in the fall, but that shouldn’t limit the hours you use your deck or patio. Adding low-voltage or solar outdoor lighting fixtures lets you party or relax well after dark.

With both lighting types, you can:

  • Light deck railings and stairs
  • Define the patio perimeter
  • Illuminate the edges of paths and walkways
  • Draw attention to a planter or tree

Other fixtures light up dining tables, grill surfaces, and even underwater in swimming pools.

Low-voltage fixtures clip onto a safe, 12-volt cable connected to a transformer, which plugs into a GFCI-protected 120-volt electrical outlet. A timer or light-sensitive control automatically turns lights on and off.

A low-voltage lighting kit with eight LED stainless steel fixtures, 50 feet of cable, and a transformer starts at $60. Individual low-voltage fixtures range in price from $7 for a simple poly-resin fixture up to about $150 for architectural-grade, cast-brass models.

Solar outdoor lighting fixtures don’t need cables and transformers. They simply turn themselves on automatically after dark. Each stand-alone fixture stakes into the ground or secures to a deck or exterior surface. You’ll save energy, as a sunlight-charged battery powers the bulb.

The downside to solar fixtures is a dimmer glow than low-voltage fixtures, and fewer lighting hours – many solar fixtures run out of stored energy after 4-5 hours on the job. Cloudy days also reduce power.

A four-pack of solar light fixtures that mount on top of deck posts starts at about $30. Or, check out a cast-aluminum solar lantern for about $60.

Get glowing with a firepit or portable fireplace


Bring a cozy glow and a stylish focal point to your outdoor living area with a firepit or portable fireplace. Irresistible for gathering, warming up, and roasting marshmallows, firepits and portable fireplaces come in a variety of materials, sizes, and styles. You’ll also find options for fueling your fire with wood, propane, gas, or gel cans.

Check local fire codes first to find out if your community allows the use of a firepit or portable fireplace on the patio or lawn. (Never use a fire feature on a wood deck.)

A firepit ($100-$500) is an open bowl, dish, or pan that varies in size from 24 inches across to about 40 inches. A firepit may come on a stand (some with wheels) or nestle into a tiled tabletop. Select a model with screening to contain flyaway sparks.

A portable fireplace ($100-$600) features a chimney to vent smoke up and away from people. Some portable fireplaces offer 360-degree views of the fire.

Warm up with a patio heater

Boost the warmth of your outdoor living area by as much as 15-25 degrees in the fall or spring with the addition of a portable patio heater. You’ll find three basic models:

  • Freestanding units resemble large floor lamps. Set them anywhere on your patio that will accommodates their 7-8 foot height. Some models include wheels for mobility. Expect to pay from $150 to $1,500, depending on heat output and fuel source.
  • A tabletop patio heater rests on a table, bench, or garden wall. These compact units typically produce less heat than tall, freestanding models. Prices range from $100 to $450.
  • Ceiling- or wall-mount patio heaters free up floor and table space, and typically emit heat via a halogen lamp. Prices vary from $175 to $1,500.

Make your selection based on how much outdoor living area you want to heat and whether you want a model powered by electricity or natural gas (each requiring a connection) or with a propane tank, which allows mobility.

As a rule of thumb, a 47,000 BTU propane-powered, floor-standing patio heater ($200) will heat an 18-foot diameter space. A 20-pound propane tank (about $36, plus $13 for fuel) offers about 10 hours of heating time.

Electric patio heaters use a quartz tube or halogen lamp that emits radiant heat. An infrared wall-mount electric patio heater ($450) equipped with a 1500-watt bulb heats a 9-foot area around the heater and uses about 14.4 kilowatts for a 10 hour period. At 8 cents per kilowatt for electricity, you spend about $1.15 to operate the unit for 10 hours.


By: Jan Soults Walker© Copyright 2015 NATIONAL ASSOCIATION OF REALTORS®


The owner of this website has made a commitment to accessibility and inclusion, please report any problems that you encounter using the contact form on this website. This site uses the WP ADA Compliance Check plugin to enhance accessibility.