Budget Kitchen Remodeling: 5 Money-Saving Steps

Budget Kitchen Remodeling: 5 Money-Saving Steps

Major kitchen remodels are among the most popular home improvements, but a revamped cooking and gathering space can set you back a pretty penny. According to “Remodeling” magazine’s 2015 “Cost vs. Value Report,” a major, 200-square-foot kitchen remodel costs $56,768, with a 67.8% return on investment come selling time.

If you can’t come up with all that cash or take out a loan to do the remodel in one shot, a good strategy is to proceed in stages. By breaking down the kitchen remodeling process, you’ll be able to proceed at your own pace, as time and money allow.

Related: Stress Less! 6 Things You Can Do for an Anxiety-Free Remodel

Stage One: Start with a Complete Design Plan

Your plan should be comprehensive and detailed — everything from the location of the refrigerator to which direction the cabinet doors will open to whether you need a spice drawer.

To save time (and money) during tear-out and construction, plan on using your existing walls and kitchen configuration. That’ll keep plumbing and electrical systems mostly intact, and you won’t have the added expense — and mess — of tearing out walls.

Joseph Feinberg, vice president of Allied Kitchen and Bath in Fort Lauderdale, Fla., recommends hiring a professional designer, such as an architect or a certified kitchen designer, who can make sure the details of your plans are complete. You’ll pay about 10% of the total project for a pro designer, but you’ll save a whole bunch of headaches that would likely cost as much — or more — to fix. Plus, a pro is likely to offer smart solutions you hadn’t thought of.

For a nominal fee, you also can get design help from a major home improvement store. However, you’ll be expected to purchase some of your cabinets and appliances from that store.

  • Cost: professional designer: $5,800 (10% of total)
  • Key strategies: Once your plans are set, you can hold onto them until you’re ready to remodel.
  • Time frame: 3 to 6 months

Read on to learn more budget kitchen remodeling tips:

Stage Two: Order the Cabinets, Appliances, and Lighting Fixtures
Stage Three: Gut the Kitchen and Do the Electrical and Plumbing Work
Stage Four: Install Cabinets, Countertops, Appliances, Flooring, and Fixtures
Final Phases: Upgrade if Necessary

Stage Two: Order the Cabinets, Appliances, and Lighting Fixtures

Cabinets and appliances are the biggest investments in your kitchen remodeling project. If you’re remodeling in stages, you can order them any time after the plans are complete and store them in a garage (away from moisture) or in a spare room until you’re ready to pull the trigger on the installation.

Remember that it may take four to six weeks from the day you order them for your cabinets to be delivered.

Related: How to Choose Stock Cabinets for Your Kitchen

If you can’t afford all new appliances, keep your old ones for now — but plan to buy either the same sizes, or choose larger sizes and design your cabinets around those larger measurements. You can replace appliances as budget permits later on.

Related: Appliance Buying Guides

The same goes for your lighting fixtures: If you can live with your old ones for now, you’ll save money by reusing them.

You’ll have to decide about flooring, too — one of the trickier decisions to make because it also affects how and when you install cabinets.

You’ll need to know if your old flooring runs underneath your cabinets, or if the flooring butts up against the cabinet sides and toe kicks. If the flooring runs underneath, you’ll have some leeway for new cabinet configurations — just be sure the old flooring will cover any newly exposed floor areas. Here are points to remember:

  • Keep old flooring for cost savings. This works if your new cabinets match your old layout, so that the new cabinets fit exactly into the old flooring configuration. If the existing flooring runs underneath your cabinets and covers all flooring area, then any new cabinet configuration will be fine.
  • Keep your old flooring for now and cover it or replace it later. Again, this works if your cabinet configuration is identical to the old layout.

However, if you plan to cover your old flooring or tear it out and replace it at some point in the future, remember that your new flooring might raise the height of your floor, effectively lowering your cabinet height.

For thin new floor coverings, such as vinyl and linoleum, the change is imperceptible. For thicker floorings, such as wood and tile, you might want to take into account the change in floor height by installing your new cabinets on shims.

  • Cost: cabinets: $16,000 (27% of total); appliances and lighting fixtures: $8,500 (15% of total); vinyl flooring: $1,000 (2% of total)
  • Key strategy: Keep old appliances, lighting fixtures, and flooring and use them until you can afford new ones.
  • Time frame: 2 to 3 weeks

Stage Three: Gut the Kitchen and Do the Electrical and Plumbing Work

Here’s where the remodel gets messy. Old cabinetry and appliances are removed, and walls may have to be opened up for new electrical circuits. Keep in close contact with your contractor during this stage so you can answer questions and clear up any problems quickly. A major kitchen remodel can take six to 10 weeks, depending on how extensive the project is.

During this stage, haul your refrigerator, microwave, and toaster oven to another room — near the laundry or the garage, for example — so you’ve got the means to cook meals. Feinberg suggests tackling this stage in the summer, when you can easily grill and eat outside. That’ll reduce the temptation to eat at restaurants, and will help keep your day-to-day costs under control.

  • Cost: $14,500 for tear-out and installation of new plumbing and electrical (25% of total)
  • Key strategies: Encourage your contractor to expedite the tear-out and installation of new systems. Plan a makeshift kitchen while the work is progressing. Schedule this work for summer when you can grill and eat outside.
  • Time frame: 6 to 10 weeks

Stage Four: Install Cabinets, Countertops, Appliances, Flooring, and Fixtures

 
If you’ve done your homework and bought key components in advance, you should roll through this phase. You’ve now got a (mostly) finished kitchen.

A high-end countertop and backsplash can be a sizable sum of money. If you can’t quite swing it, put down a temporary top, such as painted marine plywood or inexpensive laminate. Later, you can upgrade to granite, tile, solid surface, or marble.

  • Cost: $12,000 (21% of total)
  • Key strategy: Install an inexpensive countertop; upgrade when you’re able.
  • Time frame: 1 to 2 weeks

Final Phases: Upgrade if Necessary

Replace the inexpensive countertop, pull up the laminate flooring, and put in tile or hardwood, or buy that new refrigerator you wanted but couldn’t afford during the remodel. (Just make sure it fits in the space!)



By: Gretchen Roberts:© Copyright 2015 NATIONAL ASSOCIATION OF REALTORS®

The 7 Most-Needed Repair Tips Every Homeowner Should Know

The 7 Most-Needed Repair Tips Every Homeowner Should Know

Published: February 18, 2015

1. Fix a leaky toilet.

Running toilets not only rob sleep, they waste water and jack up your bill. Here’s how to change a flapper — the usual suspect — and solve other likely problems.

Related: How to Fix a Sweaty Toilet

2. Repair drywall holes.

The hardest part of drywall repair is making the patch flush with the existing wall. A “pumpkin patch” is an easy repair that cuts down on sanding.

Related: Another Clever Way to Fix Drywall — with Makeup Sponges!

3. Adjust cabinet doors.

Changes in humidity can make cabinet doors rub, refuse to close, or just look cockeyed. Adjusting them is easy and generally requires only a screwdriver.

4. Open a stuck window.

Windows stick when paint, dust, or moisture builds. Use a utility knife (or a pizza cutter) to remove old paint. Be careful not to gouge the wood sash. If high humidity is making windows hard to move, run a humidifier that sucks moisture out of air.

Related: Save Money with Window Repair Tips

5. Stop a leaking faucet.

A dripping faucet can waste 5 gallons of water per day. If you can’t replace the faulty part immediately, tie a string around the faucet and let it fall into the drain: Dripping water will silently flow down the string.

6. Silence door squeaks.

Take the squeak out of doors by lubricating top and bottom hinges with a little WD-40 or white lithium grease. If you don’t have any on hand, olive oil is a quick but temporary fix.

7. Turn off the main water line.

Don’t wait until water gushes into your house to search for the main water line. When things are calm and dry, locate and practice turning it on and off


By: Lisa Kaplan Gordon:© Copyright 2015 NATIONAL ASSOCIATION OF REALTORS®


Invest a Tax Refund in Your Home: $500 Projects

Invest a Tax Refund in Your Home: $500 Projects

Published: January 5, 2015

The average tax refund fluctuates, but in recent years it’s come in around $2,700. That’s a nice chunk of change to receive from the IRS. Not everyone is so lucky, of course, but even if you only get back $500, there are many great ways to spend your tax refund on your home.

Why invest your tax refund in your home instead of, say, a tropical vacation? Because your home is probably your biggest investment, so it pays to take care of it — literally. Even relatively small investments such as energy audits or low-flow showerheads can yield surprisingly big returns. Consider these five projects under $500.

1. Go with the low flow

If you’re tired of watching money go down the drain, invest in the latest low-flow showerheads. Old showerheads (pre-1992) can pump out 5 gallons of water per minute. Newer showerheads, while more efficient, still use 2.5 gallons per minute. But the latest low-flow showerheads use up to 50% less water than even the newer showerheads, yet technological innovations make it seem as if you’re bathing under the same amount of water.

The latest low-flow showerheads run between $50 and $200 apiece, but the payback can be quick. Swapping out old showerheads can reduce your home’s water-heating costs by about $150 a year. If your showerheads are already updated, but you’re still looking for ways to save on water, install a low-flow toilet. One of these efficient flushers can shave $90 off your annual water bill.

2. When it rains, it pours

Homeowners insurance is critical, but it’s not comprehensive. Most policies offer limited liability protection that could prove inadequate if someone gets hurt on your property and you get sued. Umbrella insurance offers liability protection beyond the limits of your homeowners policy. An extra $1 million in umbrella liability coverage, which extends to your cars, too, typically costs about $300.

If your liability insurance is sufficient, then consider flood insurance instead. Floods can affect homes in all 50 states, yet fewer than 1 in 5 home owners have flood insurance. Typical home owners policies exclude floods. The average flood policy costs $650, according to the National Flood Insurance Program; the average flood claim totals more than $42,000.

3. A model of energy efficiency

A typical homeowner spends an extra $350 a year on heating and cooling due to air leaks. Gaps, even small ones, around doors, windows, and recessed lights waste energy and raise utility bills. You can conduct your own energy audit and try to seal air leaks yourself, but the result will vary wildly depending on your DIY skills.

A better option might be a professional energy audit, which can cost between $400 and $600 for a full diagnostic inspection. Expect the use of sophisticated equipment like thermal or infrared scanners, blower door testers, and smoke puffers that can pinpoint energy leaks. A visual-only inspection by a pro costs less — about $150 — but the findings won’t be as accurate.

4. Lightning only needs to strike once

A power surge, whether caused by a lightning strike or some other fluctuation in your supply of electricity, can wreak havoc on home electronics. Thousands of dollars’ worth of computers, appliances, and entertainment equipment can get fried in the blink of an eye. If you’re lucky, perhaps some of your electronics are plugged in to surge protector power strips. Most probably aren’t.

Although homeowners insurance offers peace of mind that your possessions will get replaced, a smart way to prevent damage in the first place — and avoid the hassle of filing claims and paying deductibles — is investing in a whole-house surge protector. For about $300, an electrician can install the device at your breaker box. It only takes an hour or two. Keep surge protector power strips in place for an added layer of safety.

5. Roll out the rain barrel

Why pay for water when nature supplies it free of charge? The typical homeowner spends about $150 annually on water used outdoors. Meanwhile, an inch of rain dumped on the roof of a 2,000-square-foot house produces 500 gallons of runoff. It makes sense to harvest that rainwater to nourish plants and rinse off patio furniture. Enter the rain barrel.

A rain barrel is much like it sounds: A large container hooked into a downspout that stores rainwater for later outdoor use. A basic commercial rain barrel can cost as little as $50; a more sophisticated system with multiple barrels, pumps, and spigots can run as much as $600. The U.S. Environmental Protection Agency estimates that a rain barrel can save 1,300 gallons of water during peak summer months.


By: Mike DeSenne:© Copyright 2015 NATIONAL ASSOCIATION OF REALTORS®


Inspecting Your Roof to Get Ahead of Problems

Inspecting Your Roof to Get Ahead of Problems

A roof inspection is one of those preventative maintenance jobs that’s easy to overlook. Don’t. Add a once-a-year reminder on your calendar to go out on a warm day and fix any problems you find.

If you’re squeamish about heights, don’t worry. You can do a thorough inspection from the ground using a pair of binoculars.

Or, you can get up close and personal with your roof using a ladder. However, there’s no need to get up on your roof just yet. The less you walk around up there, the better for your roofing — and the safer for you. Work your way around your house, noting any potential problems.

Here’s what to look for:

  • Cracked caulk or rust spots on flashing.
  • Shingles that are buckling, curling, or blistering.
  • Missing or broken shingles.
  • Cracked and worn rubber boots around vent pipes.
  • Missing or damaged chimney cap. (OK, that’s technically not part of your roof, but since you’re looking anyway.)
  • Masses of moss and lichen, which could signal the roof is decaying underneath. Black algae stains are just cosmetic.

If you find piles of colored grit from asphalt roof tiles in the gutters, that’s a bad sign — those sand-like granules cover the surface of roof shingles and shield them from the sun’s damaging ultraviolet rays. Check the age of your roofing and see if it’s nearing the end of its life cycle.

Easy Fixes for Roofing Problems

Any loose, damaged, or missing shingles should be replaced immediately. Check for popped nails that need to be hammered back in place.

If you’re comfortable working on a roof, then it’s not too difficult to replace shingles and caulk flashing yourself. Cost: $24 for a bundle of shingles, $6 for roofing caulk. Allow a half-day to make a few shingle repairs.

Metal and vinyl flashing around chimneys, skylights, and attic vents that has separated needs to be resealed with caulk. However, flashing and vent boots that are beginning to rust or deteriorate should be replaced.

Cost of Professional Repairs

Contact pro roofing companies and seek at least two bids for repair work. You can use a handyman for minor fixes and possibly shave costs, but the person should be bonded, have proof of liability, and have workman’s compensation insurance.

Some costs for common repairs include:

  • A few broken or missing shingles: $100-$150.
  • Large repairs (10-by-10-foot section of roofing): $100-$350 asphalt; $200-$1,000 wood.
  • Replacing flashing or boots around chimneys, skylights, and vents: $300-$500.
  • Repairing flashing in valleys: $15-$25 per running foot.

Clearing Your Roof of Moss

Moss eradication begins in the fall. Apply a moss killer intended for roofs (granules for lawn-use contain iron which will stain a roof).

In the spring, use a broom to remove remaining dead moss. Spread moss killer along the ridge of the roof and on any remaining green patches. Cost: $20 for moss killer to treat 3,000 sq. ft. of roof. Allow about three hours to sweep the roof, clear the gutters, and apply the granules.

Be Alert to Early Signs of a Roof Leak

A yearly roof checkup is great, but problems can occur at any time. Early signs of trouble include:

  • Dark areas on ceilings.
  • Peeling paint on the underside of roof overhangs.
  • Damp spots alongside fireplaces.
  • Water stains on pipes venting the water heater or furnace.

If you find worrisome signs, especially if the roof is old or there’s been a storm with heavy wind or hail, get a professional assessment. Some roofing companies do this for free; specialized roof inspectors, like those who work through the National Roof Certification and Inspection Association, charge about $175.

Related: How to Prevent Water Damage

Replacing Your Roof

If your asphalt roof is 15 years old or more, it may be due for replacement. The national average cost for a new asphalt shingle roof is $19,528, according to “Remodeling” magazine’s 2015 “Cost vs. Value Report,” of which you’ll recoup $13,975 at resale (71.6%). For high-end materials, such as standing-seam metal, the national average cost jumps to as much as $36,329.

Related: Tips to Make Your Roof Last as Long as Possible


By:© Copyright 2015 NATIONAL ASSOCIATION OF REALTORS®


How to Buy a Wall Oven

How to Buy a Wall Oven

First Things First: Gas or Electric?

Typically, the type of power you use in your home determines whether you go with a gas or electric wall oven. If you can go either way, budget and cooking preferences will drive your final decision. Here’s more to chew on:

  • Electric wall ovens heat foods more evenly than gas and are considered easier to clean, according to Consumer Reports.
  • There’s a much larger selection of electric units than gas to choose from.
  • Budget and standard ovens that run on gas generally cost $100 or more than their electric counterparts.

Types of Wall Ovens and Costs

Here’s a breakdown of models and standard features. All are usually available in a black, white, or stainless steel finish.

1.  Conventional electric

Budget wall ovens are the least expensive available, with a price range of $700 to $1,000.  Either dials or electronic touch pads control oven settings and cooking temperatures. Stainless models usually cost $100 more than black or white units.

Standard wall ovens come with self-cleaning features which add $200 to $300 to their price tag ($1,000 to $1,300). Most have electronic touch pads for oven settings and cooking temperatures.

Double ovens come with self-cleaning features and electronic touch pads for oven settings and cooking temperatures. They cost $1,500 to $2,100.

Single ovens with microwave have one built-in oven and one built-in microwave. They come with a steep price tag ($2,100 to $2,500). Most have self-cleaning features and are equipped with electronic touch pads for oven and microwave settings.

2.  Electric convection

Standard convection wall ovens use fans to distribute heat, which speeds up baking and roasting times. Most models come with self-cleaning features. On average, they cost $300 more than standard electric wall ovens without the convection feature. All have electronic or digital controls for oven settings and cooking temperatures. Cost: $1,400 to $2,100.

Double convection wall ovens come with self-cleaning features. The most expensive units ($2,150 to $3,700) are Wi-Fi enabled so you can control temperature and cooking times via a smartphone or mobile device.  All have electronic or digital controls for oven settings and cooking temperatures.

Single convection oven and microwave combinations come with one oven and one microwave. They typically have a steep price tag: $2,500 or more. Most combo ovens have self-cleaning features and electronic or digital controls for oven and microwave settings.

3.  Gas ovens

Budget gas wall ovens are the least-expensive, with prices ranging from $800 to $1,100.  They come with either dials or electronic touch pad controls for oven settings and cooking temperatures. Stainless units start at $1,000.

Standard gas wall ovens come with self-cleaning features and a lower broiler, which add $400 to $500 to their price tag. Most have electronic touch pad controls for oven settings and cooking temperatures. Cost: $1,300 to $1,500.

Convection gas wall ovens do exist. But consumer models are almost as rare as dodo birds since you won’t find them at most big box stores. Fans of these ovens appreciate the moist heat gas generates (a byproduct of gas combustion is water vapor). Luxury appliance retailers typically sell pro-styled gas convection wall ovens.  Units start at $3,500.

Size Does Matter

Wall units offer plenty of flexibility when it comes to kitchen placement. They can be installed at any convenient height, putting an end to the bending and stooping that comes with a conventional kitchen range.

Wall ovens are available in widths of 24, 27, and 30 inches. Keep in mind some styles may skew an inch or two bigger or smaller; check oven specs before you buy.

You’ll also need to make sure your oven’s interior space is big enough for your cooking needs:

  • 2 to 3 cubic feet will accommodate households with one or two people.
  • 3 to 4 cubic feet will accommodate households with three or four people.
  • 4 cubic feet and up and more will accommodate households of four or more.

Features, Functions, and Extras That Have the Biggest Payback

We think the features that pack the most value will boost convenience and ease of use. Here’s a list of tasty picks:

Control lockout prevents little hands from playing with the oven by disabling the control panel.

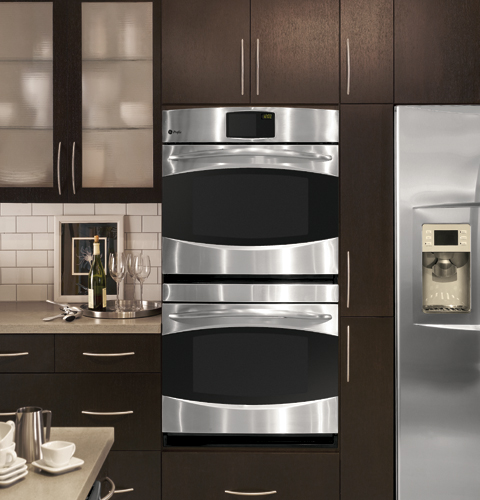
Double ovens are a win-win for hardworking kitchens. They let you simultaneously bake and roast multiple items at different temperatures.

Electronic controls are featured on most wall ovens (except a few budget models and lower-priced double ovens). Unlike old school oven dials, electronic controls allow you to set precise cooking temperatures.

A self-cleaning cycle makes cleaning your oven less of a chore.

Removable oven doors allow quick and easy cleaning and wiping.

Sabbath mode settings allow observant Jews to preprogram oven settings during the Sabbath so they can heat foods. If you’re not in the know, the Sabbath is a day of rest and using modern appliances during this time is forbidden.

Features You Shouldn’t Pay More For

Warming drawers keep prepared foods warm prior to mealtime, but they’re sold as separate units and come with a chilly price tag: $1,000 and up.

Delayed-start and other Wi-Fi features allow you to control your oven when you’re not home. However, the National Fire Protection Association says you should never operate your oven when you’re not home to check on it.


By: Deirdre Sullivan:© Copyright 2015 NATIONAL ASSOCIATION OF REALTORS®


Top 10 Common Repair Costs

Top 10 Common Repair Costs

The good news is that most repairs are simple, inexpensive, and DIY-friendly. If you can fix stuff yourself, you’ll only pay for the cost of materials and save a bundle on these common repairs and replacements.

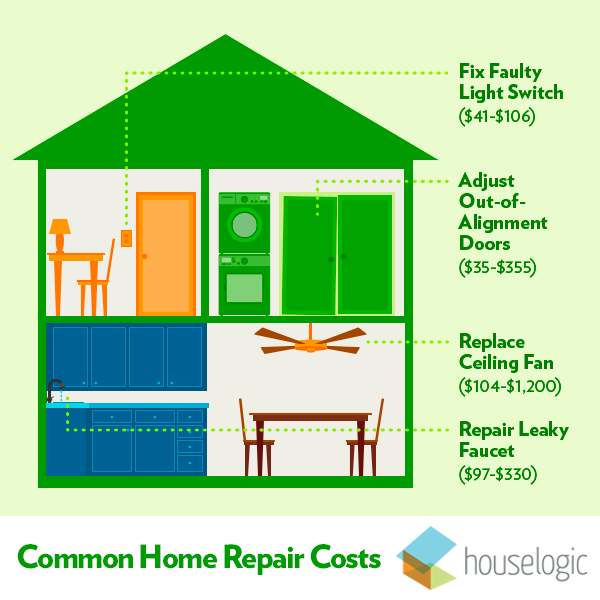
Common home repair costs infographic

1.  Replace Toilet Fill Valves

That annoying sound of water continually filling and draining from your toilet tank is often caused by leaky fill valve, which a plumber can replace, stopping water waste and restoring quiet. Plumber rates vary widely around the country, from $45 to $150 per hour, and the job will take about two hours — the minimum some plumbers require just to take the job.

Labor: $50 to $200

Materials: $11 to $23

Total: $61 to $223

Related: Home Maintenance 101: 7 Things Every Homeowner Should Know

2.  Repair a Leaky Faucet

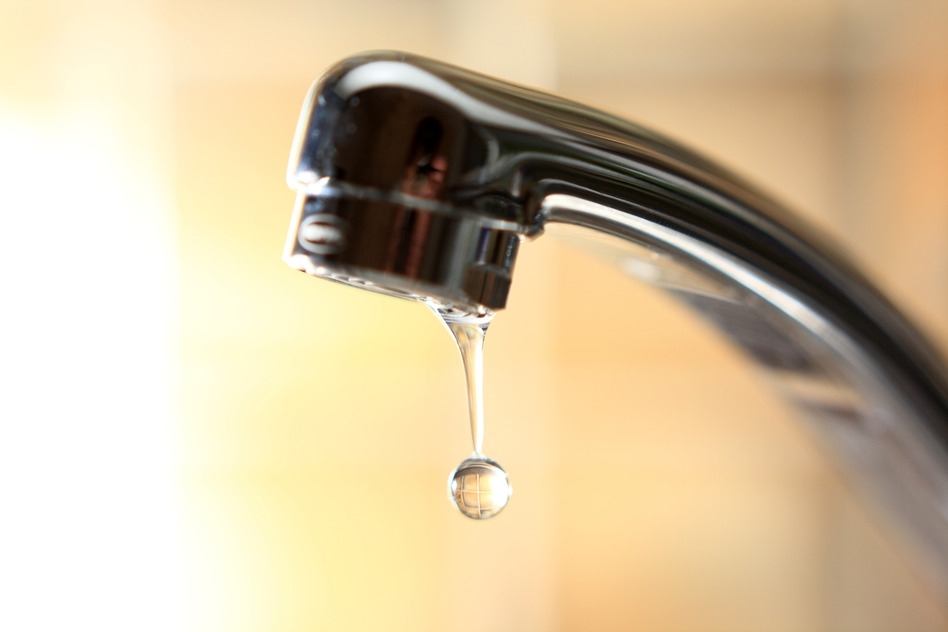
The water torture drip-drip-drip from a leaky faucet won’t just drive you insane, it can drive up water bills, too. Depending on the type of faucet you have, fixes typically involve replacing damaged rubber washers (10 for $2), O-rings (10 for $2), or a faucet cartridge ($8 to $30).

Labor: $95 to $300

Materials: $2 to $30

Total: $97 to $330

Related: The WaterSense Label: What to Look For

3.  Replace Ceiling Fan

If you’ve got a ceiling fan, sooner or later the motor will burn out, the blades will warp, and fashions will change, so you’ll need to replace it. Replacing isn’t a big deal, because upgraded wiring, a reinforced ceiling box, and a light switch with ceiling fan controls are already in place. What you’re paying for is an electrician’s time — one or two hours — and a new fixture.

Labor: $50 to $200

Materials: $54 to $1,000 and up

Total: $104 to $1,200

Related: Ceiling Fans: Know the Spin Before You Install

4.  Repair Drywall

Nicks, gashes, and smashes inevitably mar your beautiful walls. You’ll have to patch and paint to make them look as good as new. A painter can do both jobs and will probably give you a flat rate that will include patching or filling blemishes, then sanding, priming, and painting.

Painters charge $25 to $62 per hour for labor or $2.68 to $4.60 per square foot including materials. Figure it will take about three hours to repair a wall, including drying time for the patching compound and paint. It’s a good idea to save up painting chores so you have enough to keep a painter busy while repairs cure.

Materials include paint at $12 to $50 or more a gallon, which should cover about 350 square feet; plus another $10 to $50 for brushes, rollers, drop clothes, and drywall patching compound.

Labor: $75 to $186

Materials: $22 to $100

Total: $97 to $286

Related: Patch a Drywall Hole

5.  Repair Cracked Tile

Tile is hard and durable, but drop something heavy on it and it’s likely to crack — a reason to always order more tile than you need so you’ll always have spares. To replace cracked tiles, a handyman must pry out the damaged tiles, scrape away old fixative, re-glue new tiles, and spread new grout. Replacing a 2-foot-by-2-foot section of tile should take one to two hours, not including the drying time required for the adhesive to set.

Labor: $30 to $125 per hour; with possible $150 to $350 minimum charge for a handyman

Materials: $1 to $20 per square foot

Total: $34 to $430

Related: Smart Tips for Choosing Bathroom Flooring

6.  Replace Caulk Around Tubs, Sinks, and Showers

Caulk is the waterproof seal around sinks, tubs, and showers that prevents moisture from seeping through gaps and onto drywall and flooring. When caulk cracks or peels, it should be replaced immediately to prevent mold and rot.

A handyman can dig out old caulk around a tub and reseal with new in about an hour.

Labor: $30 to $125 per hour; with possible $150 to $350 minimum charge for a handyman

Materials:  $1 to $4 for a tube of bathroom caulk

Total: $31 to $354

Related: How to Remove Caulk

7.  Fix Gutters

Gutters and downspouts carry water from rain and snow away from your house and onto the ground. Sometimes the weight of wet snow and soggy leaves puts too much pressure on gutters, causing them to pull away from the house or pitch at inefficient angles.

A gutter contractor will clean gutters, and replace or reinstall supportive hardware and hangers. To restore the correct pitch, the contractor must detach and reattach each gutter section.

Labor: $127 to $282 (depending on length of gutter)

Materials: $10 for five hangers; $6 to $9 for gutter sealant

Total: $143 to $301

Related: How to Unclog a Gutter

8.  Fix Out-of-Alignment Doors

Over time, your house moves as its foundation settles and building materials expand and contract with changes in humidity. The movement often is noticed when doorframes shift slightly, causing hinges to creak and doors to not shut properly.

Adding wooden shims to frames and hinges can bring doors back into alignment and let them easily open and close once again. Replacing worn-out screws with longer screws helps secure hinges tightly.

A handyman can fix a door in about an hour. Materials will include shims and screws.

Labor: $30 to $125 per hour; with possible $150 to $350 minimum charge for a handyman

Materials: $5

Total: $35 to $355

Related: Cool Improvements: Replacing Your Interior Doors

9.  Repair Ice Damming

If your house isn’t insulated correctly or your roof isn’t designed correctly, melting roof snow can run off and freeze around roof edges. Eventually, this can form an ice dam that creeps up your roof, damaging shingles and forcing melting water into your home.

One popular solution to ice damming is to install a heating cable along the roof’s edge, which warms the area and prevents freezing. It’s not a DIY job. Roofing contractors will install the cable, and an electrician will install outlets that will juice up the cable. If you want a thermostat to turn the cable on and off automatically, that’ll be extra, too.

Labor and materials: $30 to $60 per linear foot

Total: $371 to $1,319 (average job cost)

Related: How to Prevent Ice Dams

10.  Fix a Faulty Light Switch

Sometimes you turn on the light but nothing happens; or sparks crackle, and the light turns on. It’s disconcerting, but most likely it’s an easy fix. An electrician will turn off the power, take off the faceplate, check and perhaps tighten wires; or replace the switch. All told, it will take less than an hour.

Labor: $50 to $100 per hour

Materials: $1 to $6 for a single pole light switch

Total: $41 to $106

Related: How to Repair a Light Switch

By: Lisa Kaplan Gordon:© Copyright 2015 NATIONAL ASSOCIATION OF REALTORS®

The owner of this website has made a commitment to accessibility and inclusion, please report any problems that you encounter using the contact form on this website. This site uses the WP ADA Compliance Check plugin to enhance accessibility.