by Robert MacDougall | Apr 21, 2015 | renovations
A weekend and a few hundred bucks can unleash your inner craftsman.
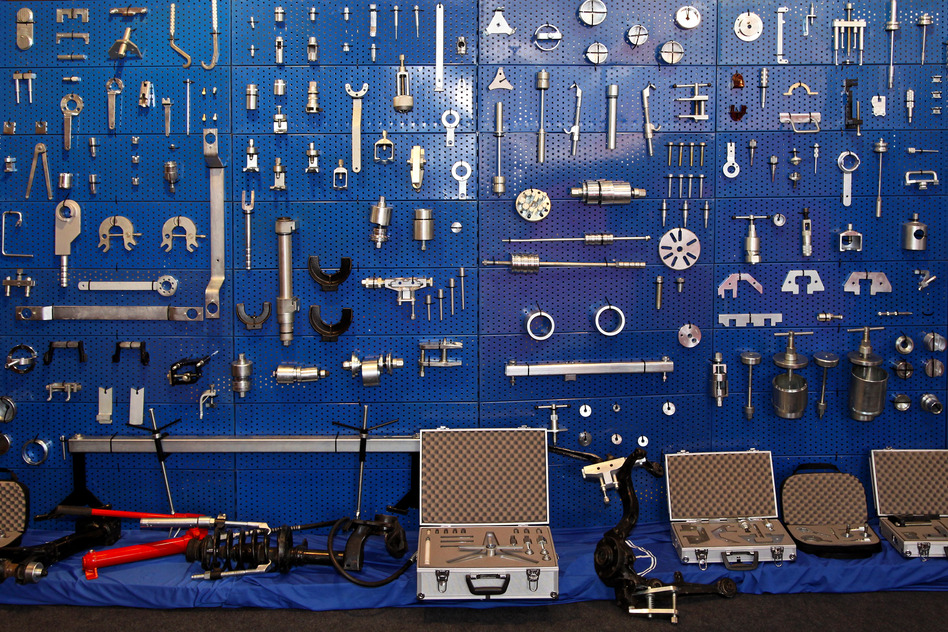
Garages often harbor a not-so-secret second life: heroic home workshop. They’re well-suited to the task, with a tolerance for the noise and dust of do-it-yourself projects.
But if a garage workshop isn’t comfortable and convenient to use, you’ll avoid projects rather than enjoy them. Here are the essentials:
- Adequate work space. Ideally, you’ll need room to work even when your cars are parked inside. Figure a minimum area of 10 ft. long and 6 ft. deep.
- Appropriate storage. Places for tools and supplies are mandatory — the top of your work surface doesn’t count!
- Excellent lighting. Both task and ambient lighting help keep you safe and projects mistake-free.
- Durable surfaces. Pound away on your work surface — it can take it.
- Easy-to-clean environment.
You can assemble a basic workbench, cabinets, shelving, and add simple overhead lighting for less than $500. At the other end of the spectrum, there’s no end; you can spend tens of thousands of dollars creating an ultimate garage shop showplace.
Your Workbench — Heart and Soul of DIY
Your primary work surface should be a rock-solid bench with a hard and heavy top. Buy or build the best you can manage. (Then vow to keep the top clear — tools and materials have a way of eating up workbench space).
Premade workbenches run $100 to $500 and come in many lengths; they’re usually 24 inches deep. A 38-inch height is typical, but you might be more comfortable with a work surface as low as 36 or as high as 42 inches. Some benches include vises, drawers, and shelves.
Build one yourself using readily available plans. A simple, sturdy workbench takes less than a day to build and materials cost less than $100. The Family Handyman magazine offers detailed instructions for several, including an inexpensive, simple bench. Amore complex bench with a miter saw stand and drawers costs $300-$500 to build and takes a weekend.
The Right Bright Light
Garage work surfaces need bright ambient light and strong task lighting.
- High-intensity lights (halogen, LEDs, and others) are great for over-bench task lighting. An LED task light with a flexible goose-neck ($75-$150) puts light where you need it.
- If your garage has a finished ceiling, recessed fixtures (can lights) are inexpensive ($10-$20) and are good for task and ambient lighting.
- Ceiling-mounted fluorescent light fixtures are the classic, low-cost solution for workshop lighting. A two- or four-bulb, 48-inch fluorescent fixture costs less than $50.
When shopping for workshop lighting, think lumens rather than watts. A lumen is a measure of lighting brightness, and is a handy way to compare today’s new energy-efficient light bulbs. Lighting fixtures and bulbs have labels that indicate lumens per device. A general rule of thumb is to use 130 to 150 lumens per square foot of work space.
For example, a 40-watt fluorescent bulb puts out about 2,200 lumens. A 60-watt incandescent bulb puts out about 800 lumens.
Adding Adequate Electrical Power
Along with your new lights, be sure your garage workshop has adequate electrical service — outlets and capacity — to accommodate your arsenal of power tools. Place outlets nearby; don’t depend on extension cords stretched across your garage — they can be a tripping hazard. If you don’t have 30-amp circuits on your garage service, talk with an electrical contractor about making this simple upgrade.
Ballpark $75-$100 an hour for an electrical contractor, plus a probable service-call fee of $50 to $100. Rates will vary across regions of the country.
Good electricians work quickly, so installing shop lights might take only an hour or two if access to electrical service is readily available. Increasing circuit capacity generally requires running new, heavier-gauge wire from your circuit-breaker box to the shop site.
Storage: Everything in Its Place
Don’t make yourself rummage through old coffee cans full of rattling bolts and bits: Visit home improvement centers for garage storage ideas and products.
Modular, wall-mounted garage storage systems let you configure shelves, bins, and hooks the way you need. Cost is about $10 per sq. ft. of wall space.
Plastic bins and hefty tubs protect tools, sandpaper, and tool manuals from insects, rodents, and dust. A 10-gallon plastic tub with lid is $5-$8.
Old kitchen cabinets, available where salvaged building materials are sold, are a great way to add storage — and a homemade workbench. Salvaged cabinets are about 50-75% cheaper than new. Top a run of cabinets with ¾-inch plywood for a durable work surface.
By: Larry Erickson:© Copyright 2015 NATIONAL ASSOCIATION OF REALTORS®
by Robert MacDougall | Apr 9, 2015 | renovations
Follow these seven strategies to get the most financial gain on your kitchen remodel.
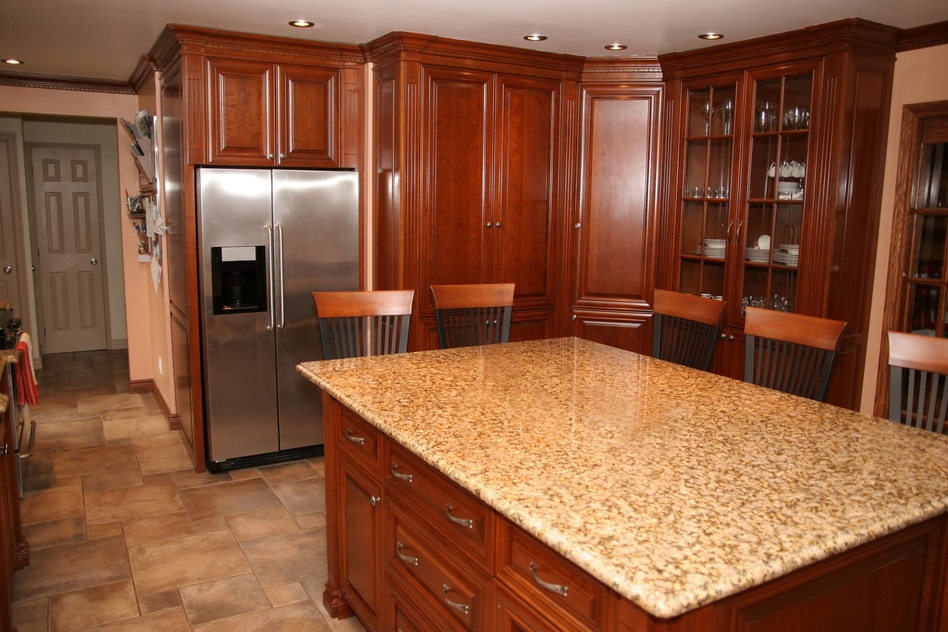
Homeowners spend more money on kitchen remodeling than on any other home improvement project. And with good reason: Kitchens are the hub of home life and a source of pride.
Related: Timeless Kitchens
A significant portion of kitchen remodeling costs may be recovered by the value the project brings to your home. Kitchen remodels in the $50,000 to $60,000 range recoup about 68% of the initial project cost at the home’s resale, according to recent data from “Remodeling” magazine’s “Cost vs. Value Report.”
A minor kitchen remodel of about $19,000 does even better, returning more than 79% of your investment.
To maximize your return on investment, follow these seven strategies to keep you on budget and help you make smart choices.
1. Plan, Plan, Plan
Planning your kitchen remodel should take more time than the actual construction. If you plan well, the amount of time you’re inconvenienced by construction mayhem will be minimized. Plus, you’re more likely to stay on budget.
How much time should you spend planning? The National Kitchen and Bath Association recommends at least six months. That way, you won’t be tempted to change your mind during construction and create change orders, which will inflate construction costs and hurt your return on investment.
Some tips on planning:
Study your existing kitchen: How wide is the doorway into your kitchen? It’s a common mistake many homeowners make: Buying the extra-large fridge only to find they can’t get it in the doorway. To avoid mistakes like this, create a drawing of your kitchen with measurements for doorways, walkways, counters, etc. And don’t forget height, too.
Think about traffic patterns: Work aisles should be a minimum of 42 inches wide and at least 48 inches wide for households with multiple cooks.
Design with ergonomics in mind: Drawers or pull-out shelves in base cabinets; counter heights that can adjust up or down; a wall oven instead of a range: These are all features that make a kitchen accessible to everyone — and a pleasure to work in.
Related: Test Your Ergonomic Design Knowledge
Plan for the unforeseeable: Even if you’ve planned down to the number of nails you’ll need in your remodel, expect the unexpected. Build in a little leeway for completing the remodel. Want it done by Thanksgiving? Then plan to be done before Halloween.
Choose all your fixtures and materials before starting: Contractors will be able to make more accurate bids, and you’ll lessen the risk of delays because of back orders.
Don’t be afraid to seek help: A professional designer can simplify your kitchen remodel. Pros help make style decisions, foresee potential problems, and schedule contractors. Expect fees around $50 to $150 per hour, or 5% to 15% of the total cost of the project.
More tips on planning a kitchen remodel:
Keep the same footprint
Get real about appliances
Don’t underestimate the power of lighting
Be quality-conscious
Add storage, not space
Communicate clearly with your remodelers
2. Keep the Same Footprint
Nothing will drive up the cost of a remodel faster than changing the location of plumbing pipes and electrical outlets, and knocking down walls. This is usually where unforeseen problems occur.
So if possible, keep appliances, water fixtures, and walls in the same location.
Not only will you save on demolition and reconstruction costs, you’ll cut the amount of dust and debris your project generates.
More tips on planning a kitchen remodel:
Plan, plan, plan
Get real about appliances
Don’t underestimate the power of lighting
Be quality-conscious
Add storage, not space
Communicate clearly with your remodelers
3. Get Real About Appliances
It’s easy to get carried away when planning your new kitchen. A six-burner commercial-grade range and luxury-brand refrigerator may make eye-catching centerpieces, but they may not fit your cooking needs or lifestyle.
Appliances are essentially tools used to cook and store food. Your kitchen remodel shouldn’t be about the tools, but the design and functionality of the entire kitchen.
So unless you’re an exceptional cook who cooks a lot, concentrate your dollars on long-term features that add value, such as cabinets and flooring.
Then choose appliances made by trusted brands that have high marks in online reviews and Consumer Reports.
More tips on planning a kitchen remodel:
Plan, plan, plan
Keep the same footprint
Don’t underestimate the power of lighting
Be quality-conscious
Add storage, not space
Communicate clearly with your remodelers
4. Don’t Underestimate the Power of Lighting
Lighting can make a world of difference in a kitchen. It can make it look larger and brighter. And it will help you work safely and efficiently. You should have two different types of lighting in your kitchen:
Task Lighting: Under-cabinet lighting should be on your must-do list, since cabinets create such dark work areas. And since you’re remodeling, there won’t be a better time to hard-wire your lights. (Here’s more about under-cabinet lights.) Plan for at least two fixtures per task area to eliminate shadows. Pendant lights are good for islands and other counters without low cabinets. Recessed lights and track lights work well over sinks and general prep areas with no cabinets overhead.
Ambient lighting: Flush-mounted ceiling fixtures, wall sconces, and track lights create overall lighting in your kitchen. Include dimmer switches to control intensity and mood.
Related: How to Choose the Best Bulb for the Job
More tips on planning a kitchen remodel:
Plan, plan, plan
Keep the same footprint
Get real about appliances
Be quality-conscious
Add storage, not space
Communicate clearly with your remodelers
5. Be Quality-Conscious
Functionality and durability should be top priorities during kitchen remodeling. Resist low-quality bargains, and choose products that combine low maintenance with long warranty periods. Solid-surface countertops, for instance, may cost a little more, but with the proper care, they’ll look great for a long time.
And if you’re planning on moving soon, products with substantial warranties are a selling advantage.
Related:
Kitchen Remodeling Decisions You’ll Never Regret
White: The Savvy and Chic Kitchen Color Choice
More tips on planning a kitchen remodel:
Plan, plan, plan
Keep the same footprint
Get real about appliances
Don’t underestimate the power of lighting
Add storage, not space
Communicate clearly with your remodelers
6. Add Storage, Not Space
Storage will never go out of style, but if you’re sticking with the same footprint, here are a couple of ideas to add more:
Install cabinets that reach the ceiling: They may cost more — and you might need a stepladder — but you’ll gain valuable storage space for Christmas platters and other once-a-year items. In addition, you won’t have to dust cabinet tops.
Hang it up: Mount small shelving units on unused wall areas and inside cabinet doors; hang stock pots and large skillets on a ceiling-mounted rack; and add hooks to the backs of closet doors for aprons, brooms, and mops.
Related: Storage Options that Pack More Space in Your Kitchen
More tips on planning a kitchen remodel:
Plan, plan, plan
Keep the same footprint
Get real about appliances
Don’t underestimate the power of lighting
Be quality-conscious
Communicate clearly with your remodelers
7. Communicate Clearly With Your Remodelers
Establishing a good rapport with your project manager or construction team is essential for staying on budget. To keep the sweetness in your project:
Drop by the project during work hours: Your presence broadcasts your commitment to quality.
Establish a communication routine: Hang a message board on site where you and the project manager can leave daily communiqués. Give your email address and cell phone number to subs and team leaders.
Set house rules: Be clear about smoking, boom box noise levels, available bathrooms, and appropriate parking.
Be kind: Offer refreshments (a little hospitality can go a long way), give praise when warranted, and resist pestering them with conversation, jokes, and questions when they are working. They’ll work better when refreshed and allowed to concentrate on work.
More tips on planning a kitchen remodel:
Plan, plan, plan
Keep the same footprint
Get real about appliances
Don’t underestimate the power of lighting
Be quality-conscious
Add storage, not space
By: John Riha:© Copyright 2015 NATIONAL ASSOCIATION OF REALTORS®

by Robert MacDougall | Mar 24, 2015 | Homeownership, renovations
Published: July 10, 2013
Learn how a pool affects the value of your home, and get advice on construction and maintenance costs.
Does a pool add value to a home? No. And yes.
In general, building a pool is not the best way to add value to your home. You’re better off making physical improvements to your actual house instead of adding a pool to your yard.
Related: What Home Projects Give the Most Value?
However, a pool can add value to your home in some cases:
- If you live in a higher-end neighborhood and most of your neighbors have pools. In fact, not having a pool might make your home harder to sell.
- If you live in a warm climate, such as Florida or Hawaii.
- Your lot is big enough to accommodate a pool and still have some yard left over for play or gardening.
Still, that’s no guarantee you’ll get a return on your investment. At most, your home’s value might increase 7% if all circumstances are right when it comes time to sell. Those circumstances include the points made above, plus:
- The style of the pool. Does it fit the neighborhood?
- The condition of the pool. Is it well-maintained?
- Age of the pool. If you put a pool in today and sell in 20 years, you probably won’t recoup your costs, especially if the pool needs updating.
- You can attract the right buyer. Couples with very young children may shy away from pools because of safety issues, but an older childless couple may fall in love with it.
But only you, the homeowner, can determine the true return on investment. A pool can add value to your quality of life and enhance the enjoyment of your home. You can’t put a price tag on that.
But we can put a price tag on how much a pool costs to build and maintain.
The Cost to Build a Pool
The average cost in the U.S. to install, equip, and fill a 600-sq.-ft. concrete pool starts at $30,000.
Add in details like safety fences (most states require them), waterfalls, lighting, landscaping, and perhaps a spa, and you’re easily looking at totals approaching $100,000.
Costs also depend on the type of pool you choose.
Gunite is the most popular in-ground pool. Gunite is a mixture of cement and sand, which can be poured into almost any shape. It has replaced concrete pools as the sought-after standard.
Fiberglass shells and those with vinyl liners fall on the lower end of the budget scale, but the liners typically need replacing every 10 or so years. Changing the liner requires draining the pool and replacing the edging (called coping), so over time, costs add up. Most homebuyers will insist that you replace a vinyl liner, even if it’s only a few years old.
Related: Fences for Pool Safety
Filtration and Heating
The filtration pump is the biggest energy hog in a pool system, so you want to get the most efficient pump possible. The good news here is that new, variable-speed pumps use up to 80% less energy than old single-speed pumps, cutting operating expenses dramatically.
At about $500, these cost more up front, but some local utilities offer rebates through participating pool dealers. You can further cut energy costs by setting the pump to run at non-peak times, when rates for electricity are lower.
If you’re planning to heat your pool, gas heaters are the least expensive to purchase and install, but they typically have the highest operation and maintenance costs. Many pool owners opt instead for electric heat pumps, which extract heat from the surrounding air and transfer it to the water. Heat pumps take longer than gas to warm the pool, but they’re more energy-efficient, costing $200 to $400 less to operate per swimming season.
Regardless of heating system, covering the pool with a solar blanket to trap heat and reduce evaporation will further lower operating costs.
Related: Solar Pool Heater Costs and Facts
Maintenance Expenses
All pools require that the water be balanced for proper pH, alkalinity, and calcium levels. They also need sanitizing to control bacteria and germs, which is where chlorine has traditionally entered the picture.
These days you have a variety of options, including systems that use bromine, salt, ozone, ionizers, or other chemical compounds that can be less irritating to skin. Chlorine remains the most popular because the upfront costs are reasonable, and you don’t have to be as rigid about checking the levels on a set schedule. But as far as your wallet is concerned, they all even out in the end.
In a seasonal swimming climate, budget about $600 annually for maintenance if you shoulder the chemical balancing and cleaning yourself; in a year-round climate, it’s more like $15 to $25 per week.
To save yourself the task of once-a-week vacuuming, you can buy a robotic cleaning system for between $500 and $800 that will do the job for you. In locations where the pool must be opened and closed for the season, add another $500 each time for a pro to handle this task.
Related: Natural Swimming Pools
Insurance and Taxes
A basic homeowners insurance policy typically covers a pool structure without requiring a separate rider, but you should increase your liability from the standard amount.
It costs about $30 a year to bump coverage from $100,000 to $500,000. Many underwriters require you to fence in the pool so children can’t wander in unsupervised.
In some areas, adding a pool may increase your annual property taxes, but it won’t necessarily add to your home’s selling price. For that reason, try to keep your total building cost between 10% and 15% of what you paid for your house, lest you invest too much in an amenity that won’t pay you back.
By: Julie Sturgeon:© Copyright 2015 NATIONAL ASSOCIATION OF REALTORS®

by Robert MacDougall | Mar 17, 2015 | renovations
You’ll save money by refinishing your own hardwood floors, but the risk to your floors may not be worth it.
Hardwood floors have two big advantages over other types of flooring:
1. They’re a timeless mix of beauty and durability that pair with any design.
2. If your hardwood floors get worn and scuffed, chances are good you won’t have to replace them; you can simply refinish them.
We say “simply” with a word of caution, though. For a pro, the process is straightforward, although there are a lot of steps that must be completed carefully.
DIYers, however, should think twice. Experience definitely counts when it comes to a good floor refinishing job. Mistakes show up big time on wood flooring, and you may end up devaluing your home’s appearance rather than improving it.
Related: Frugal Fixes for Frightful Floors
What Will a Pro Do?
A professional wood floor refinisher takes 2 to 5 days to complete a simple job, and up to two weeks for a complex job calling for custom stains and finishes. Sometimes humid weather interferes with drying times and causes delays.
A floor refinisher will do one of two things:
1. Rebuff your finish. Wood floors are covered with a clear protective coating. Over time, that topcoat can get scratched and scuffed, but the wood floor underneath may be undamaged.
If that’s the case, your floor refinisher will use a floor buffing tool and a succession of grits to restore the luster to your floor’s topcoat. The process is called screening. A new coat of clear finish completes the job. The job runs $1-$2 per sq. ft.
Screening gets a bit more complicated if you’ve waxed or used an oil soap product to clean your floors. If so, your contractor has to remove any residue before buffing to make sure the new topcoat dries correctly.
2. Sand and finish your flooring. The contractor will sand your floors down to bare wood, then apply a stain and two to three coats of finish. The cost is $1.50 to $4 per sq. ft., depending on the repairs necessary and if staining is required.
Steps in the Pro Sanding and Finishing Process Include:
Inspection. An estimator inspects your floors and takes measurements. He’ll check the thickness of your flooring to make sure there’s enough solid wood for a complete sanding job. A solid hardwood floor can take up to a dozen complete sanding and refinishing jobs during its 100-year lifespan. Laminated plank floors can be refinished at least once if the hardwood veneer is at least 1/8-inch thick.
Sanding the floors down to bare wood. This messy job uses progressively finer-grit sandpaper to produce a smooth surface. Look for companies that offer dustless sanding, meaning they hook up their sanding machines to vacuums that remove most — but not all — of the dust. You’ll still need to seal off doorways to keep dust out of the rest of your house.
Applying filler to cracks and holes.
Staining the floor. You can leave your floor natural, but if you want a certain color or tone, you’ll have to stain the floor. Staining usually requires several applications, plus sanding between coats.
Finishing coating the floor. Two or three separate coats are applied, with thorough drying time between coats. You’ll have a choice of:
- Water-based finishes are eco-friendly and have low odors and VOCs. They generally aren’t as tough as other finishes.
- Polyurethane finishes are the industry standard. They’re recommended for high-traffic floors and for kitchens.
- An acid-cured finish is a two-part process that leaves an exceptionally tough coating. It has fast drying times, which may make it possible to apply two coats in a single day. However, some brands produce volatile odors that require you to turn off pilot lights, avoid using light switches, and leave your house until the finish is completely dry.
DIY Floor Refinishing
Floor refinishing is labor-intensive, messy, and loud. Be sure to have top-quality dust masks or a respirator, eye protection, and ear protection. Use plastic sheeting to seal doorways and keep dust out of the rest of your house.
Buffing the Floor — DIY
For buffing a worn topcoat, you’ll need to rent a buffer and buy a gallon of polyurethane floor finish ($55-$65/gallon). It’ll cost you $75 to $125 to buff out and recoat a 15-by-15-ft. room.
Note: You can’t buff out a floor that’s been waxed or cleaned with an oil soap — a favorite product used on wood flooring. You’ll have to strip off any residue before buffing; otherwise, the new finish won’t adhere.
Test the floor in an inconspicuous area, such as a closet. Buff out the old finish and apply a new coat. If the new coat dries and sticks, you’re in business. If not, you’ll have to thoroughly clean the entire hardwood floor with ammonia and water or a commercial floor cleaning product.
Sanding and Refinishing — DIY
To sand and completely refinish a 15-by-15-ft. floor, you’ll spend $125 to $250 for the drum sander, sandpaper, wood filler, and polyurethane floor finish.
A drum sander is a heavy piece of equipment that you walk behind and guide like a lawn mower. You’ll use a series of progressively smaller grits to remove the old finish and sand the bare wood smooth.
A drum sander takes a deft touch; let it linger too long in one spot, and you’ll gouge the flooring.
An orbital sander is a smaller tool you’ll use to remove the finish and sand the wood next to walls and in corners where the drum sander can’t reach.
Dealing with Super-Hard Finishes
Some varieties of prefinished hardwood flooring are coated with super-hard finishes made with aluminum oxide compounds. These tough finishes extend the life of the flooring (and a manufacturer’s guarantee) but are difficult to remove.
Although conventional wisdom says to start with heavy sandpaper grits (40-grit) and work to progressively smaller grits, in this case you’ll want to reverse the process.
Start with a medium grit (80- or 100-grit) to begin breaking down the outer layer of the finish. Once that’s accomplished, you can move to the heavier grit to remove the remainder of the finish and flatten the floor.
By: John Riha:© Copyright 2015 NATIONAL ASSOCIATION OF REALTORS®
by Robert MacDougall | Mar 12, 2015 | renovations
Bathroom exhaust fans make air smell (much!) sweeter, paint last longer, and mold grow slower — or not at all. Learn how to do a bathroom exhaust fan installation.
Return to the Best Bath Ideas for Love & Money
A bathroom exhaust fan is an inexpensive upgrade that packs a value punch. The shoe-box-size fan clears obnoxious bathroom odors (priceless!) and removes moisture, which protects your home and health, and reduces maintenance costs.
And, it turns out, everyone wants one. Exhaust fans are the No. 1 feature homebuyers want in a bathroom, says a National Association of Home Builders report. Ninety percent ranked exhaust fan as No. 1, with linen closet second, and a separate tub and shower as third. Who knew?
Still, many homes don’t have a bathroom fan. Although the fans are required by building code in many places, older homes — pre-1960s — didn’t routinely install them. And homeowners today may be reluctant to retrofit bathrooms with an appliance that requires venting to snake through attics, joists, soffits, and ultimately punctures an exterior wall or roof.
We feel your fear, and we’re here to help. Below, we break down everything you need to know about selecting and installing a bathroom exhaust fan.
What Does a Bathroom Exhaust Fan Do?
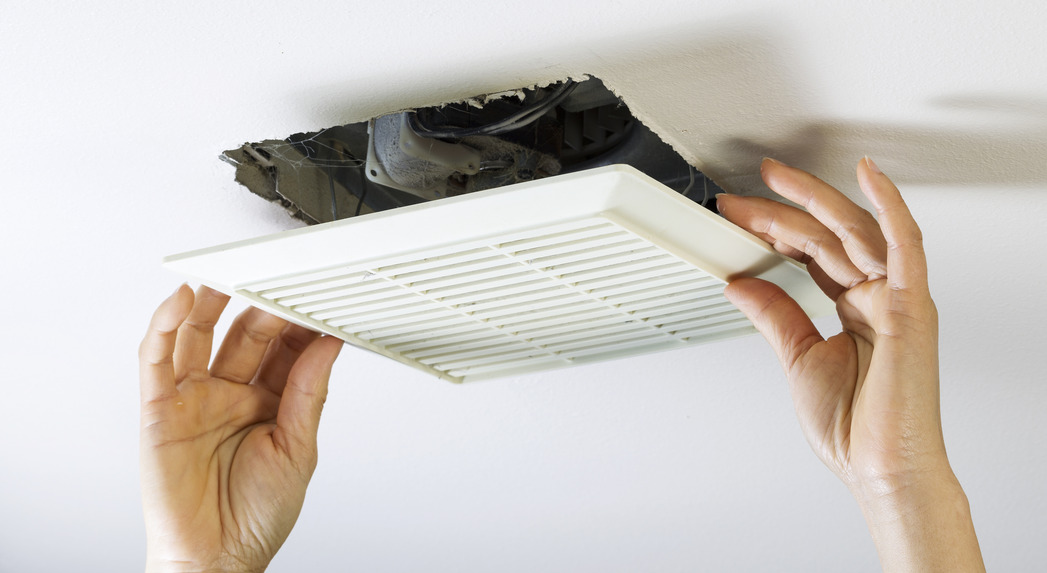
A bathroom exhaust fan is a small, ceiling- or wall-mounted fan that pulls air from the bathroom, sends it through venting (4-inch is preferable), and deposits it outside.
This helps you and your home by:
- Improving indoor air quality, especially by removing bathroom smells.
- Removing shower and bath humidity.
- Preventing door and window warp.
- Retarding paint blister and wallpaper peel.
Related: How To Kill and Prevent Household Mold
How Are Fans Rated?
Exhaust fans are measured by two factors found on the fan’s box:
- CFM (cubic feet per minute): Indicates the strength of the fan’s draw. CFM’s can range from 50 to 1,000-plus, although most bathrooms typically require fans with less than 200 CFM.
- Sone: Measures of the sound the fan makes, typically from 0.5 (almost silent) to 4.0 (sounds like a normal television) — loud for a fan, but it does provide privacy against toilet sounds, especially nice for powder rooms often located near public areas of your home.
Most people choose a 1- or 2-sone fan — quiet enough keep your teeth from rattling, but not so quiet that you’ll forget it’s on.
CFM and sone are related, because stronger fans — with higher CFMs — usually create more noise; quieter fans — lower sone — often can’t adequately clear air from bigger areas.
The important thing is to pick a fan that’s right for your space, ears, and budget.
Sizing Your Fan
The Home Ventilating Institute, which tests and certifies manufacture claims, suggests that homeowners follow these formulas when sizing a fan:
For bathrooms less than 100 sq. ft.: Calculate your bathroom’s square footage (length x width), and pick a fan with at least that number of CFMs. For example: If your bathroom is 6 feet by 8 feet, you should buy a fan that’s at least 48 CFM. A 50-CFM model comes closest and is the minimum size suggested for small bathrooms.
Size a fan for a ginormous bathroom: If your bathroom is bigger than 100 sq. ft., forget about the square footage figure; instead assign a CFM capacity for each fixture:
- 100 CFM — jetted whirlpool tub.
If you have a completely tricked-out bathroom, you may need at least 200 CFM of draw, which you can accomplish with several 50-CFM fans (one fan should be in separate toilet enclosure), or one big, 200-CFM fan.
How To Install Your Fan
Bathroom fan installation isn’t brain surgery — collect air here; exhaust air out there. But it’s not for beginners either, because the project includes removing drywall, perhaps drilling through joists, certainly busting through an exterior wall or roof.
We suggest hiring an HVAC pro, who will charge $150-$700.
If you decide to install a fan yourself, here are some decisions you’ll have to make:
Location: If you have a separate WC, put a small fan there. If your toilet is part of the bathroom, locate the fan between the toilet and tub/shower.
Venting: Exhaust flows through venting attached to the fan and out an exterior wall or roof. Never vent smelly, damp air into an attic or crawl space, which will warp rafters and promote mold growth.
The idea is to run venting the shortest, straightest path from the bathroom to outside. Every extra foot and bend the venting makes increases friction and decreases air draw and fan efficiency.
Appropriate venting runs up into your attic, then along or through floor joists until it reaches the eaves. From there, it can be exhausted out a soffit.
In some instances it may be more practical (and less expensive) to run the vent directly out a wall, or through a vent stack in your roof.
Door clearance: During installation, make sure your bathroom door has at least ¾-inch clearance from the floor, so “makeup air” can easily replace the sucked-out air, putting less stress on the fan.
Related: A Replacement Fan That’s Easy to Install
Fan Options
Bathroom exhaust fans come in custom styles and colors, but most of us would rather spend our decor budget elsewhere and will choose an off-the-rack fan with one or more of the following options:
Fan only: If you’re retrofitting a small bathroom that already has a ceiling fixture, select a basic fan, 50-70 CFM. Cost: $15-$50.
Fan-and-light combo: Good for small bathrooms or WCs. Choose a combo with enough wattage to sufficiently light the area, typically upwards of 60 watts. Cost: $30-$150.
Deluxe combo: All the bells and whistles — fan, light, heater, nightlight, timer (necessary for super-quiet fans you won’t remember are on), humidistat (automatically turns on fan when air moisture rises). Cost: $150-$600.
Return to the Best Bath Ideas for Love & Money
By: Lisa Kaplan Gordon:© Copyright 2015 NATIONAL ASSOCIATION OF REALTORS®


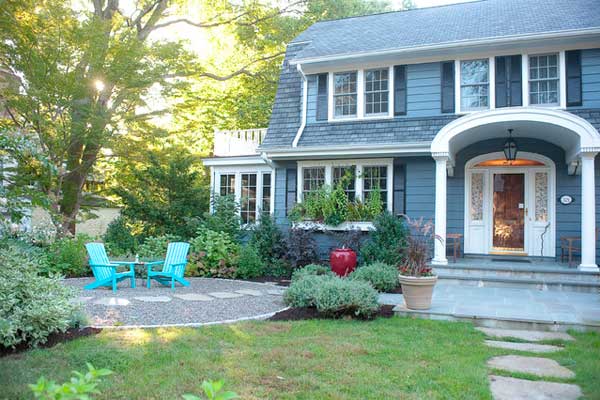 Image: Westover Landscape Design, Inc.Lawns are classic suburbia; they’re also classic maintenance time-sucks. Good-looking patios, on the other hand, don’t need mowing, watering, or fertilizing. Ever. Be a trend-setter and put one in your front yard for you to enjoy and your neighbors to envy. A professionally installed brick or flagstone patio runs $15 to $18 per square foot.
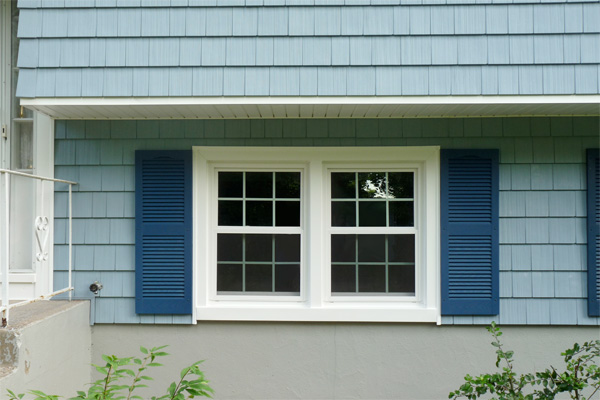 Image: Essex Home Improvements, Inc.Vinyl shakes look as beautiful as real wood but they won’t crack, rot, fade, or need periodic staining and sealing. Even better: At $2 to $7 per square foot, installed, they’re about half the price of real wood shakes. Lots of colors available. Did we say that bugs don’t like them, either? Well, they don’t!
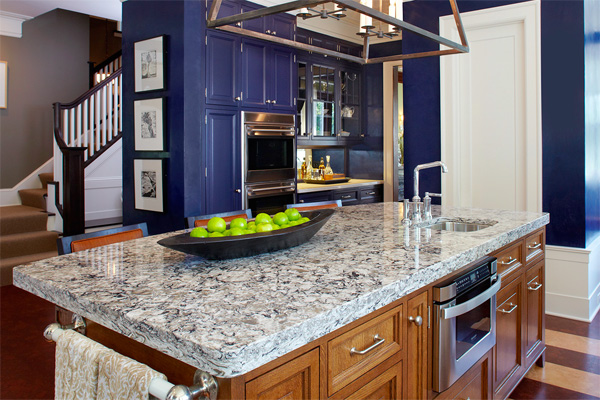 Image: Bellingham from Cambria’s Waterstone Collection
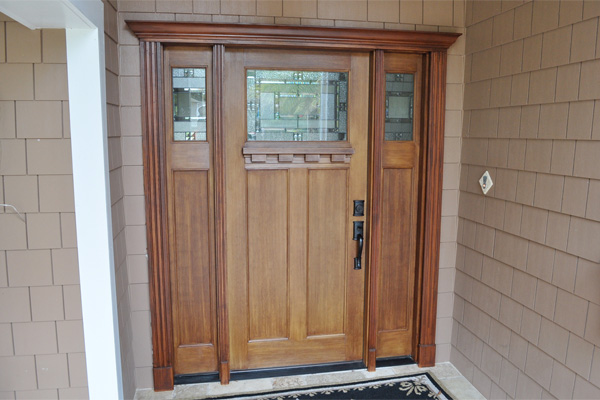 Image: Heckard’s DoorWhat looks like and feels as beautiful as wood, stains like wood, but never chips, warps, or cracks? Answer: fiberglass. All of which makes fiberglass an ideal material for high-style, low-fuss entry doors that mimic oak, mahogany, walnut, fir, and other woods. Average installed cost for this cool curb appeal upgrade: about $3,000.
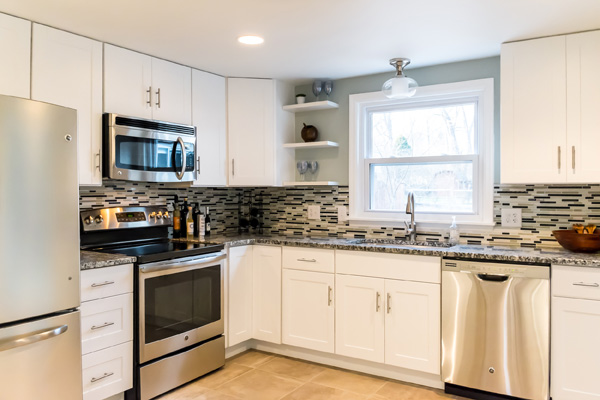 Image: Dwelling Studio / All Around Joe Construction
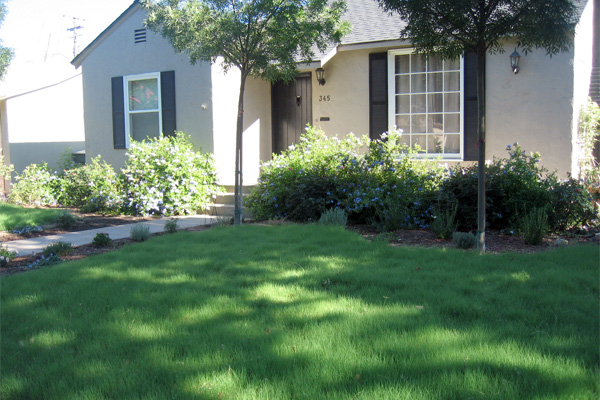 Image: Takao NurseryIf you love a lawn but hate the upkeep, go alternative. Lush, green turf grasses are beautiful and specially formulated so they’ll grow well in various climates. Once established, turf grasses, like the buffalo grass shown here, require very little watering or mowing, and virtually no fertilizers or pesticides.

 Image: Eldorado Stone