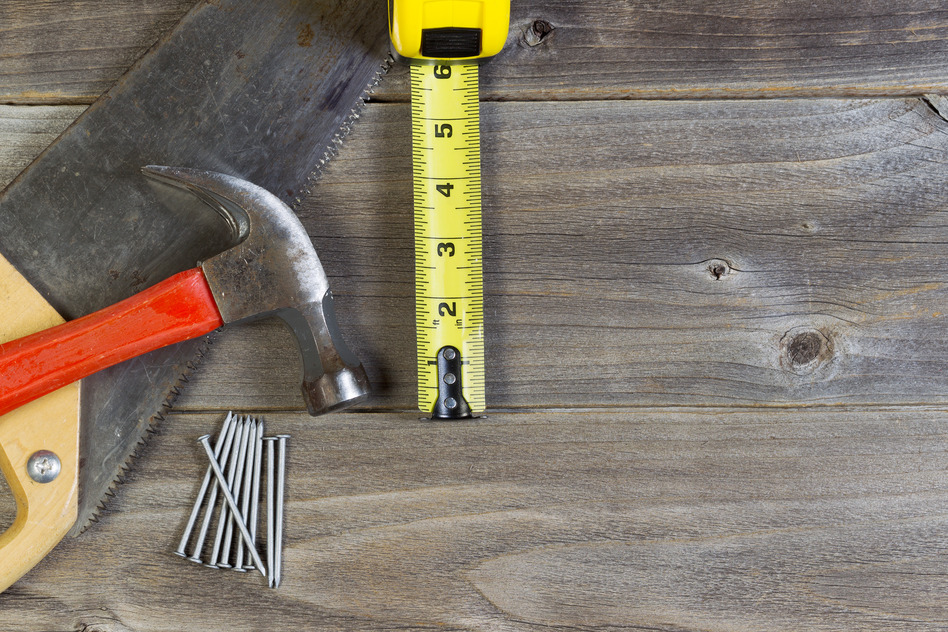
Top 10 Common Repair Costs

Top 10 Common Repair Costs

In the life of every home, repairs happen. Here are the top 10 most common repairs that, sooner or later, your house will require.

Congratulations on buying your first house. Now, you have to learn how to keep it in good repair. To be safe, you should set aside money every year — 1% to 3% of your home’s purchase price — for repairs and maintenance.

The good news is that most repairs are simple, inexpensive, and DIY-friendly. If you can fix stuff yourself, you’ll only pay for the cost of materials and save a bundle on these common repairs and replacements.

1.  Replace Toilet Fill Valves

That annoying sound of water continually filling and draining from your toilet tank is often caused by leaky fill valve, which a plumber can replace, stopping water waste and restoring quiet. Plumber rates vary widely around the country, from $45 to $150 per hour, and the job will take about two hours — the minimum some plumbers require just to take the job.

Labor: $50 to $200

Materials: $11 to $23

Total: $61 to $223

Related: Home Maintenance 101: 7 Things Every Homeowner Should Know

2.  Repair a Leaky Faucet

The water torture drip-drip-drip from a leaky faucet won’t just drive you insane, it can drive up water bills, too. Depending on the type of faucet you have, fixes typically involve replacing damaged rubber washers (10 for $2), O-rings (10 for $2), or a faucet cartridge ($8 to $30).

Labor: $95 to $300

Materials: $2 to $30

Total: $97 to $330

Related: The WaterSense Label: What to Look For

3.  Replace Ceiling Fan

If you’ve got a ceiling fan, sooner or later the motor will burn out, the blades will warp, and fashions will change, so you’ll need to replace it. Replacing isn’t a big deal, because upgraded wiring, a reinforced ceiling box, and a light switch with ceiling fan controls are already in place. What you’re paying for is an electrician’s time — one or two hours — and a new fixture.

Labor: $50 to $200 

Materials: $54 to $1,000 and up

Total: $104 to $1,200

Related: Ceiling Fans: Know the Spin Before You Install

4.  Repair Drywall

Nicks, gashes, and smashes inevitably mar your beautiful walls. You’ll have to patch and paint to make them look as good as new. A painter can do both jobs and will probably give you a flat rate that will include patching or filling blemishes, then sanding, priming, and painting. 

Painters charge $25 to $62 per hour for labor or $2.68 to $4.60 per square foot including materials. Figure it will take about three hours to repair a wall, including drying time for the patching compound and paint. It’s a good idea to save up painting chores so you have enough to keep a painter busy while repairs cure. 

Materials include paint at $12 to $50 or more a gallon, which should cover about 350 square feet; plus another $10 to $50 for brushes, rollers, drop clothes, and drywall patching compound.

Labor: $75 to $186

Materials: $22 to $100

Total: $97 to $286

Related: Patch a Drywall Hole

5.  Repair Cracked Tile

Tile is hard and durable, but drop something heavy on it and it’s likely to crack — a reason to always order more tile than you need so you’ll always have spares. To replace cracked tiles, a handyman must pry out the damaged tiles, scrape away old fixative, re-glue new tiles, and spread new grout. Replacing a 2-foot-by-2-foot section of tile should take one to two hours, not including the drying time required for the adhesive to set.

Labor: $30 to $125 per hour; with possible $150 to $350 minimum charge for a handyman

Materials: $1 to $20 per square foot

Total: $34 to $430

Related: Smart Tips for Choosing Bathroom Flooring

6.  Replace Caulk Around Tubs, Sinks, and Showers

Caulk is the waterproof seal around sinks, tubs, and showers that prevents moisture from seeping through gaps and onto drywall and flooring. When caulk cracks or peels, it should be replaced immediately to prevent mold and rot.

A handyman can dig out old caulk around a tub and reseal with new in about an hour. 

Labor: $30 to $125 per hour; with possible $150 to $350 minimum charge for a handyman 

Materials:  $1 to $4 for a tube of bathroom caulk

Total: $31 to $354

Related: How to Remove Caulk

7.  Fix Gutters

Gutters and downspouts carry water from rain and snow away from your house and onto the ground. Sometimes the weight of wet snow and soggy leaves puts too much pressure on gutters, causing them to pull away from the house or pitch at inefficient angles. 

A gutter contractor will clean gutters, and replace or reinstall supportive hardware and hangers. To restore the correct pitch, the contractor must detach and reattach each gutter section.

Labor: $127 to $282 (depending on length of gutter)

Materials: $10 for five hangers; $6 to $9 for gutter sealant

Total: $143 to $301

Related: How to Unclog a Gutter

8.  Fix Out-of-Alignment Doors

Over time, your house moves as its foundation settles and building materials expand and contract with changes in humidity. The movement often is noticed when doorframes shift slightly, causing hinges to creak and doors to not shut properly. 

Adding wooden shims to frames and hinges can bring doors back into alignment and let them easily open and close once again. Replacing worn-out screws with longer screws helps secure hinges tightly.

A handyman can fix a door in about an hour. Materials will include shims and screws.

Labor: $30 to $125 per hour; with possible $150 to $350 minimum charge for a handyman

Materials: $5

Total: $35 to $355

Related: Cool Improvements: Replacing Your Interior Doors

9.  Repair Ice Damming

If your house isn’t insulated correctly or your roof isn’t designed correctly, melting roof snow can run off and freeze around roof edges. Eventually, this can form an ice dam that creeps up your roof, damaging shingles and forcing melting water into your home.

One popular solution to ice damming is to install a heating cable along the roof’s edge, which warms the area and prevents freezing. It’s not a DIY job. Roofing contractors will install the cable, and an electrician will install outlets that will juice up the cable. If you want a thermostat to turn the cable on and off automatically, that’ll be extra, too. 

Labor and materials: $30 to $60 per linear foot

Total: $371 to $1,319 (average job cost)

Related: How to Prevent Ice Dams

10.  Fix a Faulty Light Switch

Sometimes you turn on the light but nothing happens; or sparks crackle, and the light turns on. It’s disconcerting, but most likely it’s an easy fix. An electrician will turn off the power, take off the faceplate, check and perhaps tighten wires; or replace the switch. All told, it will take less than an hour.

Labor: $50 to $100 per hour

Materials: $1 to $6 for a single pole light switch

Total: $41 to $106


By: Lisa Kaplan Gordon:© Copyright 2015 NATIONAL ASSOCIATION OF REALTORS®


See Why Saltwater Pools Can Be So Much Better Than Traditional Pools

See Why Saltwater Pools Can Be So Much Better Than Traditional Pools

Published: August 4, 2014

Safe, low-odor saltwater pools are gaining in popularity. Could you have saltwater in your future?

If you hate the stink and sting of chlorine, you’ll love saltwater pools.

Once primarily a perk in health spas and resorts, saltwater pools have now become popular among U.S. homeowners. Today, about 30% of all U.S. in-ground pools are saltwater.

“They’ve literally exploded in popularity in the last decade,” says Erika Taylor of “Pool and Spa News.” “It really does make a difference in the way the water feels on your skin. Nothing feels as good as jumping into a saltwater pool.”

How Saltwater Pools Work

Freshwater pools depend on store-bought chlorine to disinfect water and keep it free of algae, bacteria, and other health-harming organisms.

Saltwater pools rely on an electrolytic chlorine generator (ECG). The generator separates the salt in the pool water into its two primary elements, one of which is chlorine. The chlorine is then circulated into the pool to sanitize and disinfect the water.

The big advantage is that the process doesn’t produce chloramines, an irritating byproduct of the store-bought chlorine traditionally used to disinfect pools. It’s the chloramines that give swimming pools that “chlorine smell” and sting eyes.

Related: Swimming Pools: Alternatives to Chlorine

How Salty Are Saltwater Pools?

Saltwater pools aren’t salty like the ocean, says Ray Denkewicz of Hayward Pool Products, a manufacturer of salt chlorination machines. Seawater has concentrations of salt of about 35,000 parts per million (ppm).

Saltwater pools have much lower salt concentrations of 3,000 to 5,000 ppm — about the saltiness of a teardrop. Pool saltwater closely resembles the water that naturally bathes eyes and therefore, doesn’t irritate them.

Saltwater Pool Benefits

Debbi Welch, who owned freshwater pools for 20 years, switched to saltwater nine years ago and says she’ll never switch back.

“It’s unbelievable how much easier it is to manage a saltwater pool,” says Welch.

Low maintenance: Add a few hundred pounds of salt when you open the pool for the season, swish it around to dissolve, then turn on the generator and let it do its thing. No measuring, testing, or continuously dumping more commercial chlorine into the water — although you may have to add more salt during the season. Welch dumped 500 pounds of salt into her 36,000 gallon pool outside Knoxville, Tenn., in late April, then added another 40 pounds in July.

Low annual costs: A salt chlorination generator makes chlorine at about $1 per pound, while off-the-shelf pool chlorine sells for $2 to $4 per pound. Welch says she used to spend about $800 per year to chlorinate her freshwater pool, but only $150 per year to chlorinate her saltwater pool.

Constant chlorine levels: ECGs automatically keep chlorine levels constant, which eliminates frequent testing for chlorine levels, and the need to buy, transport, and add chlorine.

Feels great: Swimmers in saltwater pools say the water feels silky and doesn’t sting eyes or discolor hair like the water in freshwater pools can.

Saltwater Pool Drawbacks

Saltwater pools aren’t perfect, or perfect for every pool owner.

High startup costs: The top expense is the ECG, which ranges from $600 to $1,200, plus another $150 for installation.

Cell replacement costs: Salt cells inside the ECG should be replaced periodically: sooner (4 to 5 years) if you use your pool year-round; later (maybe 10 years) if your pool season is only a few months a year. A cell costs $200 to $600.

Salt corrodes: Saltwater can corrode anything in or around your pool that contains metal, like lights, heaters, screws, diving board attachments, and patio furniture.

Salt stains: Saltwater splashing on soft stone on pool coping and decks can leave stains and pockmarks. Apply a sealant to solve this problem.

Related: Think Natural Swimming Pools are Icky? Think Again


By: Lisa Kaplan Gordon:© Copyright 2015 NATIONAL ASSOCIATION OF REALTORS®

Don’t Miss These Home Tax Deductions

Don’t Miss These Home Tax Deductions

From mortgage interest to property tax deductions, here are the tax tips you need to get a jump on your returns.

Owning a home can pay off at tax time.

Take advantage of these homeownership-related tax deductions and strategies to lower your tax bill:

Mortgage Interest Deduction

One of the neatest deductions itemizing homeowners can take advantage of is the mortgage interest deduction, which you claim on Schedule A. To get the mortgage interest deduction, your mortgage must be secured by your home — and your home can be a house, trailer, or boat, as long as you can sleep in it, cook in it, and it has a toilet.

Interest you pay on a mortgage of up to $1 million — or $500,000 if you’re married filing separately — is deductible when you use the loan to buy, build, or improve your home.

If you take on another mortgage (including a second mortgage, home equity loan, or home equity line of credit) to improve your home or to buy or build a second home, that counts towards the $1 million limit.

If you use loans secured by your home for other things — like sending your kid to college — you can still deduct the interest on loans up $100,000 ($50,000 for married filing separately) because your home secures the loan.

PMI and FHA Mortgage Insurance Premiums

You can deduct the cost of private mortgage insurance (PMI) as mortgage interest on Schedule A if you itemize your return. The change only applies to loans taken out in 2007 or later.

By the way, the 2014 tax season is the last for which you can claim this deduction unless Congress renews it for 2015, which may happen, but is uncertain.

What’s PMI? If you have a mortgage but didn’t put down a fairly good-sized downpayment (usually 20%), the lender requires the mortgage be insured. The premium on that insurance can be deducted, so long as your income is less than $100,000 (or $50,000 for married filing separately).

If your adjusted gross income is more than $100,000, your deduction is reduced by 10% for each $1,000 ($500 in the case of a married individual filing a separate return) that your adjusted gross income exceeds $100,000 ($50,000 in the case of a married individual filing a separate return). So, if you make $110,000 or more, you can’t claim the deduction (10% x 10 = 100%).

Besides private mortgage insurance, there’s government insurance from FHA, VA, and the Rural Housing Service. Some of those premiums are paid at closing, and deducting them is complicated. A tax adviser or tax software program can help you calculate this deduction. Also, the rules vary between the agencies.

Prepaid Interest Deduction

Prepaid interest (or points) you paid when you took out your mortgage is generally 100% deductible in the year you paid it along with other mortgage interest.

If you refinance your mortgage and use that money for home improvements, any points you pay are also deductible in the same year.

But if you refinance to get a better rate or shorten the length of your mortgage, or to use the money for something other than home improvements, such as college tuition, you’ll need to deduct the points over the life of your mortgage. Say you refi into a 10-year mortgage and pay $3,000 in points. You can deduct $300 per year for 10 years.

So what happens if you refi again down the road?

Example: Three years after your first refi, you refinance again. Using the $3,000 in points scenario above, you’ll have deducted $900 ($300 x 3 years) so far. That leaves $2,400, which you can deduct in full the year you complete your second refi. If you paid points for the new loan, the process starts again; you can deduct the points over the life of the loan.

Home mortgage interest and points are reported on Schedule A of IRS Form 1040.

Your lender will send you a Form 1098 that lists the points you paid. If not, you should be able to find the amount listed on the HUD-1 settlement sheet you got when you closed the purchase of your home or your refinance closing.

Property Tax Deduction

You can deduct on Schedule A the real estate property taxes you pay. If you have a mortgage with an escrow account, the amount of real estate property taxes you paid shows up on your annual escrow statement.

If you bought a house this year, check your HUD-1 settlement statement to see if you paid any property taxes when you closed the purchase of your house. Those taxes are deductible on Schedule A, too.

Energy-Efficiency Upgrades

If you made your home more energy efficient in 2014, you might qualify for the residential energy tax credit.

Tax credits are especially valuable because they let you offset what you owe the IRS dollar for dollar for up to 10% of the amount you spent on certain home energy-efficiency upgrades.

The credit carries a lifetime cap of $500 (less for some products), so if you’ve used it in years past, you’ll have to subtract prior tax credits from that $500 limit. Lucky for you, there’s no cap on how much you’ll save on utility bills thanks to your energy-efficiency upgrades.

Among the upgrades that might qualify for the credit:

  • Biomass stoves
  • Heating, ventilation, and air conditioning
  • Insulation
  • Roofs (metal and asphalt)
  • Water heaters (non-solar)
  • Windows, doors, and skylights

To claim the credit, file IRS Form 5695 with your return.

Vacation Home Tax Deductions

The rules on tax deductions for vacation homes are complicated. Do yourself a favor and keep good records about how and when you use your vacation home.

  • If you’re the only one using your vacation home (you don’t rent it out for more than 14 days a year), you deduct mortgage interest and real estate taxes on Schedule A.
  • Rent your vacation home out for more than 14 days and use it yourself fewer than 15 days (or 10% of total rental days, whichever is greater), and it’s treated like a rental property. Your expenses are deducted on Schedule E.
  • Rent your home for part of the year and use it yourself for more than the greater of 14 days or 10% of the days you rent it and you have to keep track of income, expenses, and allocate them based on how often you used and how often you rented the house.

Homebuyer Tax Credit

This isn’t a deduction, but it’s important to keep track of if you claimed it in 2008.

There were federal first-time homebuyer tax credits in 2008, 2009, and 2010.

If you claimed the homebuyer tax credit for a purchase made after April 8, 2008, and before Jan. 1, 2009, you must repay 1/15th of the credit over 15 years, with no interest.

The IRS has a tool you can use to help figure out what you owe each year until it’s paid off. Or if the home stops being your main home, you may need to add the remaining unpaid credit amount to your income tax on your next tax return.

Generally, you don’t have to pay back the credit if you bought your home in 2009, 2010, or early 2011. The exception: You have to repay the full credit amount if you sold your house or stopped using it as primary residence within 36 months of the purchase date. Then you must repay it with your tax return for the year the home stopped being your principal residence.

The repayment rules are less rigorous for uniformed service members, Foreign Service workers, and intelligence community workers who got sent on extended duty at least 50 miles from their principal residence.

Published: December 22, 2014

By: Dona DeZube:© Copyright 2015 NATIONAL ASSOCIATION OF REALTORS®

Kids’ Rooms: Storage Solutions for Every Age

Kids’ Rooms: Storage Solutions for Every Age

From babies who adore you to teens who ignore you, kids change — and so do their storage needs. Here’s how to organize kids’ rooms from cradle to college.

Cradle Crawlers

Transformer cribs. An ordinary crib accommodates baby for two to three years — until he learns how to escape over the rail. Boost storage with a convertible crib with storage drawers ($145 to $350) that’ll convert and adapt to your toddler’s needs and beyond.

Some convertible cribs change into toddler beds, daybeds, or full-size headboards, giving you options as your youngster gets older. If you can’t find a crib with storage below, use the space between the legs for stowing bins or baskets for diapers, toys, and more.

Pimping the closet. Remove the door on the nursery closet for easy access, and install a variety of cool storage features. Drawers, bins, and shelves can round up onesies, booties, baby towels, diapers, and toiletries. A simple wire rack storage system is $90 to $350 at home improvement centers.

Install lower rods so baby, as he grows, can easily latch onto duds (and maybe even hang them up). Expandable hangers ($14 for a 3-pack) fit tiny baby clothes but open up to accommodate larger sizes when needed.

Toddlers and Elementary Age

Look ‘em in the eye. Stow books and puzzles on a low magazine rack or shelving unit so toddlers and elementary-age children can grab a good read or brain teaser on a whim. As children grow, paint the shelf to suit changing tastes and use it for teen magazines, framed photos, and school books.

Cornering the market. Young kids love nooks, so create a cozy hideaway by arranging storage units — open shelves, a desk top, and cabinets — so they (mostly) enclose one corner of your kid’s room. Bookshelves and kids’ desks range from $50 to $200.

Stock up with plenty of games, books, toys, and crafts supplies. Paint cabinet doors with blackboard paint to add an eye-level creative opportunity.

Corral the bling. Little girls often possess a cartload of hair ribbons, barrettes, and bows. Look for special organizers that keep them on display, orderly, and within easy reach. One option: Sort items into the pockets of a clear vinyl shoe holder ($10) that fits on the back of the door.

Tweens, Teens, and Beyond

A magnetic personality. A bulletin board is a great way for your tween or teen to organize and display all those photos of friends and Fido. Or, coat a vertical surface (such as a closet door) with magnetizing primer ($25/quart) and paint over the primer with a hip color. Use assorted magnets and magnetic clips and holders to display artwork, sports schedules, and homework reminders.

Making a (book)case. A bookcase headboard ($100 to $200) is a grown-up way for your teen or college student to keep reading materials organized and the tablet reader handy. Platform storage beneath the bed provides room for drawers or cubbies that can hold baskets and bins for corralling small stuff.

Explore the shallows. Commandeer space between wall studs and create a shallow storage niche outfitted with hooks, shelves, or rods for organizing jewelry and other smallish gear. Add a mirrored door to keep clutter out of sight.

Lofty ambitions. For a small bedroom, a loft-style bed offers a fun spot for snoozing and space below for bookcase storage, a futon, or a study desk. Loft beds for kids’ rooms start at $150 and range to $3,000 or more.

Keep rolling. Give your tween or teen a rolling caddy ($25 to $80) for storing personal bath supplies, jewelry, cosmetics, and hair gear. The caddy stores in the bedroom and rolls to a nearby bath and back.

Related: 8 Small Space Solutions to Shared Kids’ Rooms


By: Jan Soults Walker:© Copyright 2015 NATIONAL ASSOCIATION OF REALTORS®


Small Home Storage: Maximize Your Storage Space

Small Home Storage: Maximize Your Storage Space

Your small home has more storage space than you think. For relatively little money but a lot of common sense and ingenuity, there’s space to be found.

Finding storage space in a small home doesn’t require remodeling or room additions. Start by getting rid of accumulated stuff. Take a hard look at room space, and buy furniture and storage items that can do double duty.

Here are six tips to maximize storage that won’t empty your savings account:

1.  Declutter. It’s the first thing architect Sarah Susanka of “Not So Big House” tells clients who talk of expanding their homes. Haven’t used something for a couple of years? Pitch it, she says. You’ll be amazed at how much space opens up when you do.

Cost: $0

2.  Platform and bunk beds. Add space and eliminate a dresser in a small bedroom with a three-drawer or six-drawer platform bed. Find one at a furniture or big department store, and online.

Cost: $225 to $600 and up, queen size

Bunk beds won’t have drawers, but you’ll save space by stacking beds. And kids love ‘em. They come in a variety of styles and configurations. Some will convert to two twin beds.

Cost: $180 to $400 and up

3.  Shoe organizers. They’re for so much more than just shoes. Hang one in a kitchen closet or pantry, and use it as your small home catch-all for remotes, keys, notepads, cell phones, and chargers, and other household essentials. It’ll free up a kitchen drawer or two for other uses.

Cost: Less than $20

4.  Toe-kick storage. The space under your kitchen cabinets is a treasure trove of storage possibilities. Put placemats, napkins, cookie sheets, and how-to manuals there. Hire a cabinet-maker to install them, or request them as a custom feature in a new-cabinet order.

Cost: About $300 per drawer

5.  Floor-to-ceiling storage. Furniture-style 6-foot-tall bookcases don’t use all available wall space. But extend shelving that extra two feet to the ceiling, and you’ve got room for a lot more books, knickknacks, or art objects. Home improvement stores have brackets and shelves in a variety of colors and sizes to match your décor.

Cost: Under $200, depending on the space size

Related: More Ideas for Small Homes

By: Terry Sheridan:© Copyright 2015 NATIONAL ASSOCIATION OF REALTORS®


Garage Organization Ideas for Under $50

Garage Organization Ideas for Under $50

              If clutter trumps cars in your garage, get organized (and make room for your vehicles) with these smart garage storage solutions, each costing less than $50.

Bikes, Skates, and Other Wheels

Bicycles, skateboards, scooters, and rollerblades — wheeled belongings can get underfoot and land you on your assets or bang up the car. Protect your paint job (not to mention your backside) with these wily storage solutions for your garage.

  • Hoist bicycles to the rafters with a rope-and-pulley system (starting around $40) that makes it easy to raise the bike and lock safely in place. When you’re ready to ride, release the lock and lower your bike to the garage floor. You’ll need an hour or two and basic tools to secure the pair of pulleys to ceiling joists and thread the ropes. (Similar hoists are available for kayaks or small boats; starting around $25.)
  • Avoid unintentional skateboard “tricks” with a specially designed wall rack that makes it easy for kids to hang up helmets and skateboards together; starting around $20. Secure this one to wall joists in less than an hour.
  • Keep scooters and bikes out of the way with tool hooks installed on a length of 1-by-6-inch lumber. You’ll pay $3 for each pair of vinyl-coated screw-in tool hooks and $1 per foot for lumber. You’ll need only an hour or two to secure the lumber to wall joists and screw the hooks into place along the board.

Sporting Goods

Active pursuits require a lot of gear that ends up in the garage. These organizers help tidy up all those sports balls, rackets, bats, gloves, clubs, fishing rods, and other outdoor fun-related goodies.

  • Bring together balls and bats on a convenient wire rack equipped with hangers that hold gloves too; starting around $35.
  • To keep your garage organization from going downhill, stash two pairs of snow skis, poles, and boots in one handy steel ski rack; $45. Securing this rack to wall studs helps it hold the weight of the equipment. If you can’t position it on studs, use wall anchors for a secure installation. You can do the task with or without anchors in an hour or two.
  • Make a port for your fishing rods by suspending two wire shelves from your garage ceiling about 5 feet apart, then threading the rods through the openings. Use shelves left over from a project or purchase a 4-foot-by-16-inch vinyl-coated wire shelf for less than $9, and saw it in half crosswise (or clip with bolt cutters) to make two 2-foot shelves. Snip additional wires where you need wider slots to accept pole handles or reels.

Tools

With a little imagination, you won’t need specially designed storage to organize your tools.

  • Conveniently hang wrenches and bungee cords using an ordinary vinyl-coated wire tie-and-belt rack, available at big box stores; $8.
  • Metal tools cling to a magnetized rail, keeping items in view and easy to retrieve; starting around $30. Simply screw the rail to wall studs to safely hold the weight of the tools (it’s an idea you may be drawn to.)
  • Cushion and protect tools by padding your toolbox drawers with a soft, non-slip liner. The open-weave design keeps moisture away and prevents tools from rolling around. Enough material to line eight average-size drawers is $15. Just cut the liner to length to fit and slip it into the drawer.
  • Organize small items — such as pencils, box cutters, and tape measures — by stashing them in electrical junction boxes; about $2 each (free if you have spares). Purchase a variety of sizes and shapes and secure them to studs or pegboard.

Yard and Garden Gear

Rakes, ladders, clippers, shovels, and sprays — a host of supplies keep your yard and garden looking lush and well-cared-for, but your garage? Not so much. Keep your garden and landscaping tools organized with these novel storage solutions.

  • Transform an old cabinet into a nifty garage storage unit on wheels. Hunt down an old four-drawer filing cabinet for a few dollars at a garage sale. Remove the drawers, turn it on its backside, and use a couple afternoons to apply paint and pegboard sides. Less than $25.
  • Hold heavy tools, long-handled implements, ladders, and more. Long steel rails with extruded holes mount high on the garage wall and secure to studs. Arrange a series of hooks and pegs on the rail to hang big tools. Two 48-inch rails sell for $22.
  • Secure a wooden pallet to wall studs to create a pocket for holding long-handled garden tools. To find free wooden pallets, check with local businesses as well as online classifieds, such as Craigslist. Cost: Free.
  • Keep bottles of fertilizers, repellants, and lubricants upright and easy to retrieve. A can rack ($15) prevents cans and bottles from tumbling off shelves.


By: Jan Soults Walker:© Copyright 2015 NATIONAL ASSOCIATION OF REALTORS® 

The owner of this website has made a commitment to accessibility and inclusion, please report any problems that you encounter using the contact form on this website. This site uses the WP ADA Compliance Check plugin to enhance accessibility.