Matching Room Color and Lighting to Get the Effect You Desire

Matching Room Color and Lighting to Get the Effect You Desire

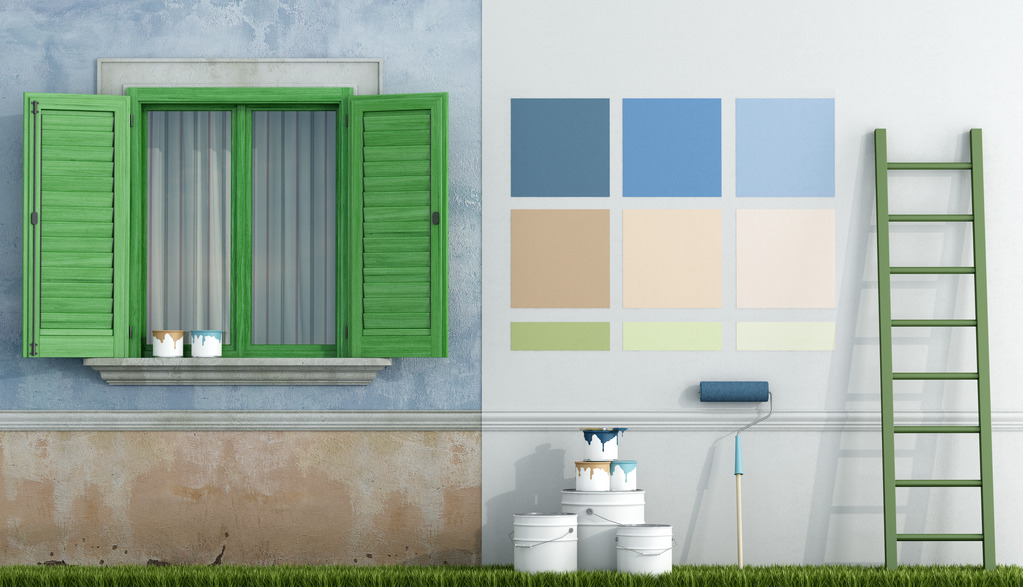
Light changes color, so your lighting design — a top priority for any remodel — should help guide your color choices. Here’s how.

If you want to make your remodel project shine, finalize your lighting design before you select paint and carpet colors. The light you choose to illuminate tasks or set the mood will change the way you see color throughout the room. The Robin’s Egg Blue you picked could look like Paris at Sunset under some kinds of light.

It’s all determined by the way light and colors interact.

“People have to understand that the color of an object won’t look the same 24 hours a day,” says lighting designer Joseph Rey-Barreau. “I just had bamboo flooring installed throughout my house, and during the day it looks totally different than it looks at night.”

The way we “see” color primarily depends on two things:

1.  The light that an object absorbs. Black absorbs all colors; white absorbs none; blue absorbs red.

2.  How the light source works. Natural light (sunlight) changes throughout the day and is affected by a room’s location. Artificial light changes with the type of bulb you use.

How Sunlight Affects Colors

As the amount and angle of the sun changes, so will your room colors.

“Natural light should always be considered when choosing color for a space,” says Sarah Cole of the Farrow & Ball paint company.

North-facing rooms:
Light in these rooms is cool and bluish. Bolder colors show up better than muted colors; lighter colors will look subdued. “Use strong colors and embrace what nature has given,” says Cole.

South-facing rooms: Lots of high-in-the-sky light brings out the best in cool and warm colors. Dark colors will look brighter; lighter colors will virtually glow.

East-facing rooms: East light is warm and yellowy before noon, then turns bluer later in the day. These are great rooms for reds, oranges and yellows.

West-facing rooms: Evening light in these rooms is beautiful and warm, while scant morning light can produce shadows and make colors look dull.

How Light Bulbs Affect Color

The type of bulb you use can alter the colors in a room, too.

Incandescents: The warm, yellow-amber light of these bulbs will make reds, oranges, and yellows more vivid, while muting blues and greens.

Fluorescents: This flat and cool light enriches blues and greens.

Halogens: These white lights resemble natural light and make all colors look more vivid. Using halogens would make the shift from daylight to artificial light less jarring.

Compact fluorescent lights (CFLs): CFLs can produce either a warm white, neutral, or bluish-white light.

Light-emitting diodes (LEDs):
  You can buy warmer or cooler LEDs, and even “smart” LED bulbs whose color you can control wirelessly. “You can point to the color of the sky in a picture at sunset and make the light bulb in the house be that same color,” says Rey-Barreau.

Related: The Latest In Lighting Trends to Enhance Your Home
Tips for Achieving the Color You Want

  • Paint squares of primed drywall with samples of the colors you’re considering, and then move them around the room during the day. Apply at least two coats.
  • Evaluate samples of carpet during different daylight conditions.
  • Most contractors won’t hang lights before you paint, but you can get a color approximation by placing a bulb you’ll be using in a floor or desk lamp. If you’re hyper-sensitive to color or want a very specific look, ask your electrician to hang the lights, then cover them carefully during painting.
  • Remember that natural and artificial light will work together during certain times of day, especially in summer when dusk lasts a long time. Turn on artificial lights even during daylight to see what your colors will look like.
  • Paint sheen also affects color. Glossy finishes will reflect light and change the way the color looks, whereas flat finishes are less reflective and allow colors to look truer under bright light.
  • Light-colored walls can reflect the colors of bold carpets: A bright blue rug, for instance, can cast a bluish tone on a white wall.

By: Lisa Kaplan Gordon:© Copyright 2015 NATIONAL ASSOCIATION OF REALTORS®

How To Prepare Your Home for Holiday Guests

How To Prepare Your Home for Holiday Guests

By: Lisa Kaplan Gordon

Published: November 14, 2011

Is your home ready for holiday visits from friends and family? Here’s how to prepare for the invasion.

I’m lucky and have a guest suite always ready for holiday guests. But even with a dedicated space, preparing my home for the annual onslaught of friends and family takes time and forethought.

Some preparations for holiday guests take only a few minutes; some take a lot longer. My advice: Start preparing your home for the holidays now.

Prioritize

The day before guests arrive is no time to pull apart junk drawers and clean out linen closets. Declutter guest rooms and public areas — foyer, kitchen, living room, den, and dining room. Remove anything unnecessary from countertops, coffee tables, and ottomans; if it’s out of sight, keep it out of mind, for now.

If you run short of time, bag up the clutter and store it in car trunks, basements, and out-of-the-way closets. Sort and arrange after your guests depart.

Safety

Light the way: Even though you can navigate your home blindfolded, your guests can’t. Make sure outside lights are working so they don’t trip on the way to your door. Put motion-activated night lights in hallways, bathrooms, and bedrooms to ensure safe passage after the sun sets.

Child proofing: Ask parents to bring hardware that keeps their small ones safe, such as baby gates and cabinet locks. Transfer toxic cleaners and medicines from base to wall cabinets. Hide matches and lighters.

Fire prevention: If you didn’t freshen smoke detector batteries when you switched the clocks to Daylight Savings Time, change them now. After your guests arrive, run a quick fire drill: Make sure they can locate exits and fire extinguishers, and that they know how to open windows and doors.

Entryway upgrades

Your home’s foyer is the first place guests see, so make a good first impression.

  • Upgrade exterior entry doors or give old doors a new coat of paint. Polish and tighten door hardware, and oil hinges to prevent squeaks.
  • Remove scratches from hardwood floors, stairs, and wood railings. Place a small rug or welcome mat at the entrance to protect floors from mud and snow.
  • Clear out shoes, umbrellas, and other clutter.
  • Add extra hooks to walls so guests can hang coats and hats.
  • Add a storage bench where guests can remove boots and shoes.

Kitchen prep

Your kitchen is command central during the holidays, so make sure it’s ready for guests and extra helpers.

  • To increase storage, install a pot rack to clear cooking items off countertops and ranges.
  • Move your coffee station into a family room so guests don’t crowd the kitchen when you’re trying to fix meals.
  • If you like to visit while you’re cooking, place extra stools and chairs around the perimeter of your kitchen so guests can set a spell.

Sleeping arrangements

If you’ve got a guest room, replace the ceiling fixture with a ceiling fan and light combo, which helps guests customize their room temperature without fiddling with the thermostat for the entire house.

To carve sleeping space out of public areas, buy a folding screen or rolling bookcase, which will provide privacy for sleepers. Fold or roll it away in the morning.

Bathroom storage

Bring toilet paper, towels, and toiletries out of hiding, and place them on open shelves so guests can find them easily.

If you don’t have enough wall space for shelves, place these items in open baskets around the bathroom.

Also, outfit each tub with a bath mat (to avoid falls) and each toilet with a plunger (to avoid embarrassment).


By:© Copyright 2014 NATIONAL ASSOCIATION OF REALTORS®
10 Green Improvements for Under $100 Each

10 Green Improvements for Under $100 Each

1. Seal switches and outlets with insulating foam gaskets.

Believe it or not, your electrical wall outlets and switches are drafty: You lose plenty of indoor air through sockets and switches located on exterior walls of your house. But there’s an ultra-cheap fix for this: Pre-cut insulating foam gaskets sell for less than a buck, and installation is an easy DIY job — all you’ll need is a screwdriver.

Turn off the power to the socket or switch you’ll be working on, then remove the faceplate with the screwdriver. Place the gasket on the inside of the faceplate. Then screw the faceplate back into the socket and voila — energy savings are yours.


2. Trim grocery bills with a vegetable garden.


Vegetables grown in your own backyard are great for making delicious and healthy meals, but they’ll save money on your grocery bills, too. About $80 worth of seeds and soil will yield almost $250 worth of fresh produce. Tomatoes, cucumbers, green beans, and peppers are especially prolific, yielding plenty of veggies to keep you away from the produce aisle.

Heirloom tomatoes will save you $15-$23 per year over store-bought tomatoes, and the plants cost next to nothing, especially if you start from seeds indoors.


3. Seal out drafts with thermally lined drapes.


Window coverings are a nice touch of décor, and they’re handy in saving energy, too. Drapes with an insulating thermal layer block icy drafts in the winter and prevent heat loss out windows.

Floor-to-ceiling fabric works best, especially if it folds back against the wall. This keeps drafts trapped behind the curtain instead of seeping into your rooms.

A 52-by-84-inch pair of thermally lined drapes costs less than $70, depending on brand and type of material. And your options aren’t limited — all sorts of colors and patterns are available.


4. Stop air leaks with weatherstripping.

Even the most sophisticated, energy-efficient heating and cooling system can’t keep you cozy when air slips through cracks under doors and around windows. Air leaks make your HVAC work harder than necessary to keep your home comfortable. A simple remedy? Seal out drafts with weatherstripping.

  • Bronze weatherstripping is good for windows. It lasts for decades, and is just $16 for 17 feet.
  • Adhesive-backed EPDM rubber is less expensive and will last at least 10 years.
  • Self-stick plastic weatherstripping is the same price and easy to install, but doesn’t last as long.
  • Adhesive-backed foam and felt are good choices for sealing for doors. Door weatherstripping gets a lot of use; if it comes loose, hold it in place with staples.

5. Trim energy use with a programmable thermostat.

It’s nice to be cozy, but why spend the money to keep your house at the perfect temperature when you’re not even home to enjoy it? A programmable thermostat lets you set various temperatures for different times of day. The easy setup can save you as much as $180 per year.

You can install a basic programmable thermostat yourself in less than an hour. You can spend a few hundred dollars, but you’ll find basic models with an LED touchscreen for $80.


6. Capture free water with a rain barrel.

It costs about $150 per month to irrigate a 100-by-100-foot lawn in the summertime. So when water falls from the sky for free, why not save it for use later? Rain barrels collect the rainwater that falls off your roof — an inch of rain falling on an average-size roof equals about 500 gallons of water. Rain barrels lower water bills by an average of $35 per month in the summer; plus, you’ll save about 1,300 gallons of water per year.

Commercial barrels cost as low as $50, or you can make one yourself for much less.


7. Get free fertilizer from a compost bin.

Food waste, lawn trimmings, dead leaves — they’re not trash, they’re valuable nutrients for your garden. Turn leftovers and yard waste into compost: A rich organic matter that helps plants grow. You’ll keep waste out of landfills; plus, your plants will need less water and fertilizer. Even better: it’s free!

There are a few different ways to start a compost pile — open piles are good for lawn trimmings, while an enclosed bin or tumbler works better for food waste.

The price of compost bins depend on size and type, but there are plenty of models on the market for under $100. This 65-gallon bin is just $60.

By the way, if you’re moving, don’t leave your compost behind; take your compost with you!


8. Save water with a dual-flush toilet converter.

Dual-flush toilets cost upwards of $300, but for just over $20, you can install a dual-flush converter that’ll replace the lever on your toilet with a two-button option — little button for liquids, big button for solids. The retrofit will help you save as much as 20 gallons of water per day compared with traditional toilets. Installation is an easy DIY job that’ll take only 20 minutes.


9. Outsmart energy loss with a smart power strip.

Even when they’re turned off, appliances can suck energy when they’re plugged in. Standby power consumption robs an average household of about $100 per year in energy costs. Unplug appliances when not in use by flipping the switch on your power strip.
Some devices, such as your DVR, have to stay on all the time to do their job. Smart power strips are the solution — you can unplug your TV when it’s not in use, while leaving the DVR on. Some strips have smart outlets that let you plug in rechargeable devices but automatically power down when the item is charged.

Smart power strips cost between $20 and $40.


10. Cool down with a ceiling fan.

In the summer, you can lower the perceived temperature of a room by 8 degrees just by turning on the ceiling fan. It won’t actually cool the room, but the moving air on your skin will make you feel cooler.

Ceiling fans cost barely more than a light bulb to operate, so they won’t be much of a drain on your energy usage, either. While you can pay up to $600 or so for a fan, there are plenty of ceiling fans for under $100.


Source: Courtney Craig; © Copyright 2014 NATIONAL ASSOCIATION OF REALTORS®


How to Replace Weather Stripping

How to Replace Weather Stripping

Need Help Replacing Weather Stripping?

When weather stripping on doors and windows gets worn out, cold air comes sneaking in. Here’s how to replace weather stripping and stop air leaks.

Weather stripping on windows and doors protects the home from air leaks while increasing comfort and saving energy. But as weather stripping ages, it loses its effectiveness. Stay ahead of the game by checking for worn-out weather stripping and replacing it.

Identifying Worn Weather Stripping

Weather stripping deteriorates due to age, friction, and exposure to the elements. It also can be damaged by people, pets, and pests. At least once each year, inspect your windows and doors to check for air leaks that indicate your weather stripping isn’t doing its job.

  • Self-adhesive foam tape loses its grip over time, causing it to pull away from the door or window frame — or fall off completely. Foam also can lose its resilience, no longer springing up to fill the gap.
  • Rubber and vinyl weather stripping becomes dry, brittle, and cracked. Over time, it can also lose its shape and effectiveness.
  • Spring-metal V-shaped weather stripping bends out of shape, cracks in spots, and comes loose thanks to missing nails.

How to Remove Old Weather Stripping

For peel-and-stick-type weather stripping, simply pull the foam strips off the door or window by hand. Stripping that is fastened in place with nails or screws requires a more tedious process of locating and removing all the fasteners.

Options for New Weather Stripping

There’s no shortage of weather stripping options at hardware stores and home improvement centers. As is often the case, the cheaper and easier the product is to install, the less effective and durable it probably is over time.

Adhesive-backed foam tape is inexpensive — costing less than a buck a foot — and peel-and-stick types are easy as pie to install. It works best where the bottom of a window sash closes against a sill, or a door closes against a doorframe. It’s the compression that produces the seal. Don’t expect this product to survive longer than 3 to 5 years.

V-shaped weather stripping, sometimes called tension-seal weather stripping, is the best option for the side channels of a double-hung window or a tight-fitting door. This product springs open to close gaps and plug leaky windows and doors.

Inexpensive peel-and-stick V-shaped vinyl (as little as $0.50 per foot) is easy to install but won’t last much longer than foam tape. More expensive copper or bronze styles cost as much as $2 per foot and must be nailed into place, but they look better and will last decades.

Tubular rubber or vinyl gaskets prove the most effective for sealing large and irregular gaps, such as around an old door. These hollow tubes are large enough to plug big gaps but soft enough to compress nearly flat. Types that are nailed in place last longer than peel-and-stick varieties. Prices range from less than $1 per foot for peel-and-stick to $1.25 per foot for nail-in-place.

Prepare the Surface

Before installing any new weather stripping, start with a smooth, clean, and dry surface. Remove all old adhesive using an adhesive cleaner and perhaps a light sanding. Fill and sand old nail holes. If old screw holes can’t be reused, fill and sand those as well.

Installation Tips

  • Some peel-and-stick types should only be applied when the temps are at least 50 degrees. Check the product label.
  • Start with one small area to make sure the door or window opens and closes without difficulty before completing the entire job.
  • Measure twice before cutting to prevent mistakes and waste.
  • Cut rubber and vinyl varieties with shears or a utility knife, and metal types with tin snips. Be careful not to bend the thin metal while cutting it.
  • Make sure to face the opening of V-shaped weather stripping out toward the elements to prevent moisture from getting inside.

Installing Weather Stripping

Adhesive-style weather stripping: Remove the backing and press firmly in place. Removing the backing as you go helps prevent the sticky part of the strip from accidentally adhering to something it shouldn’t.

Nail-in weather stripping: Fasten the strips in place by nailing through the pre-punched holes. For double-hung windows, you’ll need to install the lower half, drop the sash, and then install the upper half.


Source: Douglas Trattner, © Copyright 2014 NATIONAL ASSOCIATION OF REALTORS®

10 Tips From a small bath Designer.

10 Tips From a small bath Designer.

10 Tips for Bathroom Renovations

Got a small bathroom to renovate? Go wild with texture and colors if it’s a rarely used guest bath, but stick to clean and simple in a master bath.

That’s the word from designer Jamie Gibbs, who transforms incredibly small New York City bathrooms into beautiful spaces. “I liked being shocked by details in a little space, especially if it’s not going to be used much,” Gibbs says.

His small-bath secrets:

1. Avoid textures in bathrooms that get daily use. In a heavily used bathroom, anything with texture becomes a collection spot for mold, mildew, and toothpaste. Say no to carved vessel sinks or floor tile with indentations.

2. Be careful with no-enclosure showers with drains right in the floor. These Euro showers allow for a feeling of openness, but the average American contractor doesn’t know how to waterproof the floor for them, Gibbs says. The tile seals can be compromised if not installed correctly, causing the materials to decompose, and water to leak underneath.

3. Use opaque windows and skylights to let light filter into all parts of the bath. A long skinny window with frosted glass means you don’t have to burn high-wattage light bulbs. Make sure water condensation will roll off the window into an appropriate place (i.e. not the framing or the wall) to avoid future maintenance issues.

4. Look for fixtures that have a single handle rather than separate hot and cold taps. “Space-saving gearshift faucets are a very good choice in small bathrooms,” says Gibbs. You’ll also save money by not having to drill holes in the countertop for the hot and cold taps.

5. Save space with wall-mounted toilets and bidets, but be aware that the water tank goes into the wall. That’s fine if space is such a premium that you won’t mind going into the wall to make any repairs. But if you share a wall with a neighbor, that’s a different issue.

6. Use a wall-mount faucet to make a reduced-depth vanity work in a small space. “I can get away with a 22” vanity instead of a 24” vanity with a wall mount faucet,” Gibbs says.

7. Check the space between the handles and the faucet of any space-saving fixtures. “If you can only get a toothbrush in it to clean, you’ll save space, but it’s functionally stupid,” Gibbs says. Make sure the sink is functional, too. If you’re using a vessel sink, make sure it’s large enough and not too high. “If it’s too high, you’ll knock it so many times that the fittings will come loose,” Gibbs says.

8. A pedestal sink is all form and no function. “It’s a great-looking sink, but there’s no place to [set] anything,” Gibbs says.

9. Wall-mounted vanities seem like they’re space savers, but they create dead space between the vanity and the floor — a space that often accumulates junk and never gets cleaned.

10. If you’re comfortable with it, go European and put up a glass walls between the bathroom and bedroom to create the illusion of space. Or put bathroom fixtures in the bedroom just outside the bath.

Source: Dona DeZube, © Copyright 2014 NATIONAL ASSOCIATION OF REALTORS®

The owner of this website has made a commitment to accessibility and inclusion, please report any problems that you encounter using the contact form on this website. This site uses the WP ADA Compliance Check plugin to enhance accessibility.