7 Ways to Have an Eco-Friendly Christmas

7 Ways to Have an Eco-Friendly Christmas

Published: December 10, 2010

With a few conscious choices, your merry Christmas can also be an eco-friendly Christmas.

‘Tis the season to consume and decorate, which can leave your bank statement and the planet a little beat up. Celebrate an eco-friendly Christmas and nip your seasonal costs in the bud:

1. Light up with LEDs. LED lights use at least 75% less energy than conventional holiday decorations, according to Energy Star. That saves the average family about $50 on energy bills during the holiday, says Avital Binshtock of the Sierra Club in San Francisco. Or douse the lights and use soy-based or beeswax candles; their emissions are cleaner than those from paraffin candles.

2. Make your own decorations. Save money and keep your kids busy by hand-crafting eco-friendly decor—strings of popcorn or pine cones—instead of buying mass-produced holiday flare.

3. Wrap with stuff you already have. Get creative with reusable shopping bags, magazines, and newspapers instead of using wrapping paper. Even gift bags that recipients can pass on make for a more eco-friendly Christmas, says Brian Clark Howard of The Daily Green.

4. Buy a real tree. Real Christmas trees, wreaths, and garlands are renewable and recyclable, Binshtock says. Real trees mean an annual cost, but that may be a wash if you tend to buy a faux tree several times a decade.

5. Say “no” to glossy paper decorations and wrapping. Shininess and color come from chemicals not easily recycled. Alternative: Decorations or wrapping papers that use soy inks or natural dyes.

6. Package it in cardboard. Plain, corrugated cardboard is good for packaging because it’s easy to recycle. If plastic factors into your holiday plans, look for No. 1 and No. 2 plastics, the easiest to recycle, says Ben Champion, director of sustainability for Kansas State University.

7. Create precious moments that don’t leave a trail of debris.

  • Do something experiential like taking the family to a museum.
  • Give a gift certificate or donation to an organization meaningful to the recipient in the receiver’s name. Happy holidays to you: No sales tax.
  • Buy fair-trade, organic, or locally made products, which are often one-of-a-kind and may not need as much packaging and shipping, Champion says.


By: G. M. Filisko:© Copyright 2014 NATIONAL ASSOCIATION OF REALTORS®


8 Super-Secret Hiding Places for Holiday Presents

8 Super-Secret Hiding Places for Holiday Presents

Published: November 21, 2012

After you’ve fought the crowds for the best bargains, you’ll face another dilemma: Where to hide all those presents?

Whether you’ve got a nosy spouse or a curious kid, you need a good hiding place to squirrel away those gifts until you find time to get them wrapped and under the tree. Here are some ideas we came up with:

1. Borrow a friend’s house. Swap storage spaces with a trusted friend or neighbor, and you won’t spoil any surprises. This is particularly useful if you’re buying someone a big present, like a bicycle or a car — you might talk a neighbor into letting you borrow space in their garage until Christmas morning.

2. Pop the trunk. This won’t work if you have an SUV or hatchback, but if you’ve got a car with a trunk that’s closed off from the backseat, it’s a primo place to hide gifts. Small children will never get in there.

3. Make your office work for you. If your office is a safe, secure place, squirrel some presents there. This is only an option if you work out of your home, though — home offices are prime targets for prying eyes.

4. Take stock of kitchen pots. Got a huge stock pot? Unless you’re planning to make a giant vat of soup anytime soon, the stock pot can hold a load of small gifts, and chances are your family will never think to look there.

5. Make use of your underwear drawer. Small presents can easily fit there. Your spouse probably won’t hesitate to look there, but your kids might stop short of rifling through your skivvies. (We hope.)

6. Crack the crawl space. If you don’t mind a little dirt and some creepy-crawlies, the crawl space can hold some sizable presents. Don’t store anything there for too long, though — unless your crawl space is insulated. Moisture and temperature changes could damage items. Plastic toys are OK to keep outside; electronics should be stored inside.

7. Rent a storage space. If you’ve got a ton of presents to hide, you’ll need to look outside your house. Some storage units offer one-month-minimum specials for as low as $25. Check the storage units in your area for deals.

8. Go for the cleaning supply closet. Worst-case scenario: Your kids might find presents there, but they’d also find the cleaning supplies, which means they might actually clean something. Now that would be a Christmas miracle.

Where do you hide holiday presents?


By: Courtney Craig:© Copyright 2014 NATIONAL ASSOCIATION OF REALTORS®

How to Assess the Real Cost of a Fixer-Upper House

How to Assess the Real Cost of a Fixer-Upper House

When you buy a fixer-upper house, you can save a ton of money, or get yourself in a financial fix.

Trying to decide whether to buy a fixer-upper house? Follow these seven steps, and you’ll know how much you can afford, how much to offer, and whether a fixer-upper house is right for you.

1.  Decide what you can do yourself.

TV remodeling shows make home improvement work look like a snap. In the real world, attempting a difficult remodeling job that you don’t know how to do will take longer than you think and can lead to less-than-professional results that won’t increase the value of your fixer-upper house.

  • Do you really have the skills to do it? Some tasks, like stripping wallpaper and painting, are relatively easy. Others, like electrical work, can be dangerous when done by amateurs.
  • Do you really have the time and desire to do it? Can you take time off work to renovate your fixer-upper house? If not, will you be stressed out by living in a work zone for months while you complete projects on the weekends?

2.  Price the cost of repairs and remodeling before you make an offer.

  • Get your contractor into the house to do a walk-through, so he can give you a written cost estimate on the tasks he’s going to do.
  • If you’re doing the work yourself, price the supplies.
  • Either way, tack on 10% to 20% to cover unforeseen problems that often arise with a fixer-upper house.

3.  Check permit costs.

  • Ask local officials if the work you’re going to do requires a permit and how much that permit costs. Doing work without a permit may save money, but it’ll cause problems when you resell your home.
  • Decide if you want to get the permits yourself or have the contractor arrange for them. Getting permits can be time-consuming and frustrating. Inspectors may force you to do additional work, or change the way you want to do a project, before they give you the permit.
  • Factor the time and aggravation of permits into your plans.

4.  Doublecheck pricing on structural work.

If your fixer-upper home needs major structural work, hire a structural engineer for $500 to $700 to inspect the home before you put in an offer so you can be confident you’ve uncovered and conservatively budgeted for the full extent of the problems.

Get written estimates for repairs before you commit to buying a home with structural issues.

Don’t purchase a home that needs major structural work unless:

  • You’re getting it at a steep discount
  • You’re sure you’ve uncovered the extent of the problem
  • You know the problem can be fixed
  • You have a binding written estimate for the repairs

5.  Check the cost of financing.

Be sure you have enough money for a downpayment, closing costs, and repairs without draining your savings.

If you’re planning to fund the repairs with a home equity or home improvement loan:

  • Get yourself pre-approved for both loans before you make an offer.
  • Make the deal contingent on getting both the purchase money loan and the renovation money loan, so you’re not forced to close the sale when you have no loan to fix the house.
  • Consider the Federal Housing Administration’s Section 203(k) program, which is designed to help home owners who are purchasing or refinancing a home that needs rehabilitation. The program wraps the purchase/refinance and rehabilitation costs into a single mortgage. To qualify for the loan, the total value of the property must fall within the FHA mortgage limit for your area, as with other FHA loans. A streamlined 203(k) program provides an additional amount for rehabilitation, up to $35,000, on top of an existing mortgage. It’s a simpler process than obtaining the standard 203(k).

6.  Calculate your fair purchase offer.

Take the fair market value of the property (what it would be worth if it were in good condition and remodeled to current tastes) and subtract the upgrade and repair costs.

For example: Your target fixer-upper house has a 1960s kitchen, metallic wallpaper, shag carpet, and high levels of radon in the basement.

Your comparison house, in the same subdivision, sold last month for $200,000. That house had a newer kitchen, no wallpaper, was recently recarpeted, and has a radon mitigation system in its basement.

The cost to remodel the kitchen, remove the wallpaper, carpet the house, and put in a radon mitigation system is $40,000. Your bid for the house should be $160,000.

Ask your real estate agent if it’s a good idea to share your cost estimates with the sellers, to prove your offer is fair.

7.  Include inspection contingencies in your offer.

Don’t rely on your friends or your contractor to eyeball your fixer-upper house. Hire pros to do common inspections like:

  • Home inspection. This is key in a fixer-upper assessment. The home inspector will uncover hidden issues in need of replacement or repair. You may know you want to replace those 1970s kitchen cabinets, but the home inspector has a meter that will detect the water leak behind them.
  • Radon, mold, lead-based paint
  • Septic and well
  • Pest

Most home inspection contingencies let you go back to the sellers and ask them to do the repairs, or give you cash at closing to pay for the repairs. The seller can also opt to simply back out of the deal, as can you, if the inspection turns up something you don’t want to deal with.

If that happens, this isn’t the right fixer-upper house for you. Go back to the top of this list and start again.


By: G. M. Filisko:© Copyright 2014 NATIONAL ASSOCIATION OF REALTORS®

7 Rookie Mistakes in Your Vegetable Garden

7 Rookie Mistakes in Your Vegetable Garden

Published: May 9, 2012

Even the best vegetable gardeners can forget basics and make rookie mistakes. Here are 7 no-nos to avoid.

Even if your vegetable garden is the envy of neighbors, it’s still easy to make rookie mistakes that waste precious resources and growing time.

Avis Richards, whose Ground Up Campaign teaches New York City school kids how to grow their own food, reveals the rookie mistakes that all gardeners should avoid.

1. Unwise watering. Too much, too little, too hard, too soft — they’re all watering mistakes that’ll wreck your garden. Before adding water, poke a finger a couple of inches into the soil. If it’s moist, save the water; if it’s dry, train a gentle spray at the base of plants. Better yet, wind a drip hose ($13 for 50 feet) through your garden; that way, you’ll deliver moisture to the roots without wasting water on leaves and to evaporation.

2. Forgetting to test. Even veteran gardeners forget to test their soil every year to make sure it has the pH and nutrients plants need. For about $10, you can send a sample to your state extension service and receive a complete analysis. Or, buy a DIY test kit at your local garden center. When you know what your soil is made of, either select plants that thrive in that type of earth, or amend soil to match your garden’s needs.

3. Planting garden divas. Of course you love summer tomatoes, but they can be tricky to grow during summers that are too hot, too cold, too wet, too dry. So newbies should try growing a couple of tomato plants just for fun, then load gardens with foolproof veggies and herbs, such as beans, peppers, oregano, and parsley. If you must grow a tomato, plant cherry tomatoes that can survive anything summer can throw at them and even yield fruit into fall.

4. Raising too much.
One cherry tomato plant can yield 80 fruit, and a single zucchini plant can keep your neighbors in zucchini bread through winter. So don’t plant more than you can eat, put up, or share with friends. The National Gardening Associationsays an edible garden of about 200 sq. ft. should keep a family of four in veggies all summer. If you do grow more than you need, donate it to a local food bank or plan a swap with fellow gardeners.

5. Growing everything from seed. Some crops, such as salad greens, radishes, carrots, peas, beans, and squash, are easy to grow from seeds that germinate in a couple of weeks. Experience will tell you that eggplant, broccoli, cauliflower, and tomatoes are better grown from seedlings, which someone else has nurtured for months. Pick plants that are short and compact; avoid leggy plants with blooms that are liable to die on the vine as the plant acclimates itself to your garden.

6. Assuming you know.
Gardeners often read seed packages and figure they know everything about growing vegetables. Wrong! The more you know about your hardiness zone, soil, weather, insects, and vegetable varieties, the better your garden will grow. So curl up with a good gardening book, and surf the web for garden bloggers that share your passion. Better yet, join a gardening club where you can share tips and seeds.

7. Relying on pesticides.
Don’t bring out the big guns, which can contaminate the watershed, until you’ve tried less-toxic ways to get rid of garden pests. Ladybugs and praying mantis, which you can buy at garden supply stores, will eat garden intruders, such as aphids and beetles. Non-toxic insecticidal soaps will take care of soft-bodied insects (don’t use if ladybugs are around).

Have you made any rookie mistakes? Got a tip for your fellow newbie gardeners? Let’s hear it!


By: Lisa Kaplan Gordon: © Copyright 2014 NATIONAL ASSOCIATION OF REALTORS®

Guide to Buying and Installing a Sprinkler System

Guide to Buying and Installing a Sprinkler System

An irrigation system saves water, keeps your lawn looking great, and helps maintain your curb appeal. We’ve gathered the info to get you started.

An underground irrigation system delivers water to your landscaping at the right time, and in just the right amount, so you don’t water too much or too little. It’s relatively easy to install and makes a good DIY project.

You’ll also save money doing it yourself. A professionally installed system for a typical ¼-acre lot is $3,000 to $4,000. You can DIY it for under $1,500.

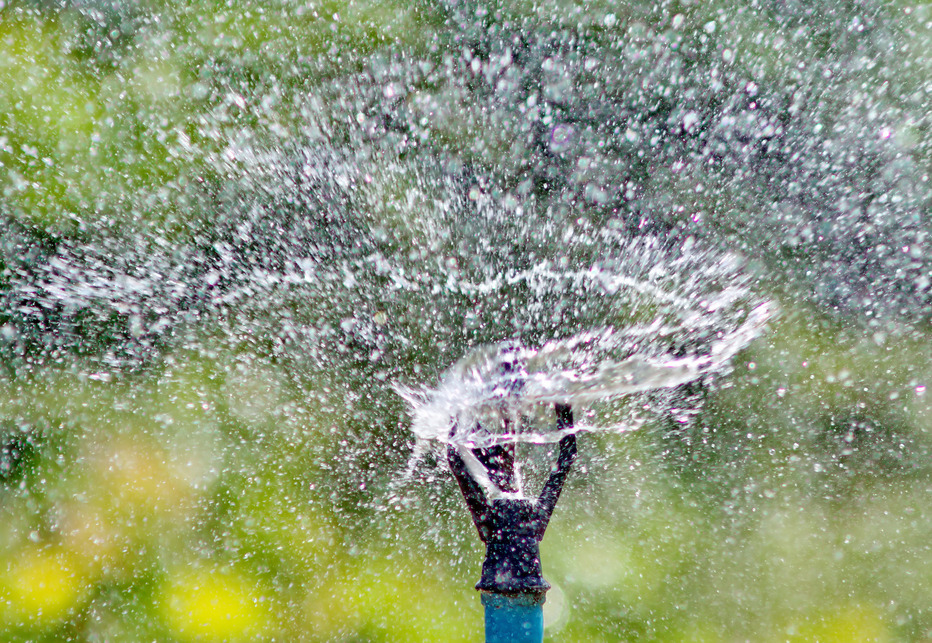
The heart of an underground system is pop-up sprinkler heads. When working, the heads raise up a few inches to spray water on your landscape. When not in use, they drop to ground level so you can mow or walk right over them.

Plus, today’s systems are pretty darn smart. Automated features decide when it’s been raining too much or too little, then adjust the amount of water your landscaping gets. That lowers the worry quotient for you, heads off costly over-watering, and makes the whole system almost maintenance-free.

Getting in the Zone

An irrigation system divides your property into zones. Each zone can be different in terms of the amount of water it gets, and at what time of day it’s watered. Examples of zones include:

  • Lawn zones have pop-up heads with just the right spray radius and range to cover a broad area of grass.
  • Landscaping zones have high-rise heads to water shrubs and ground cover.
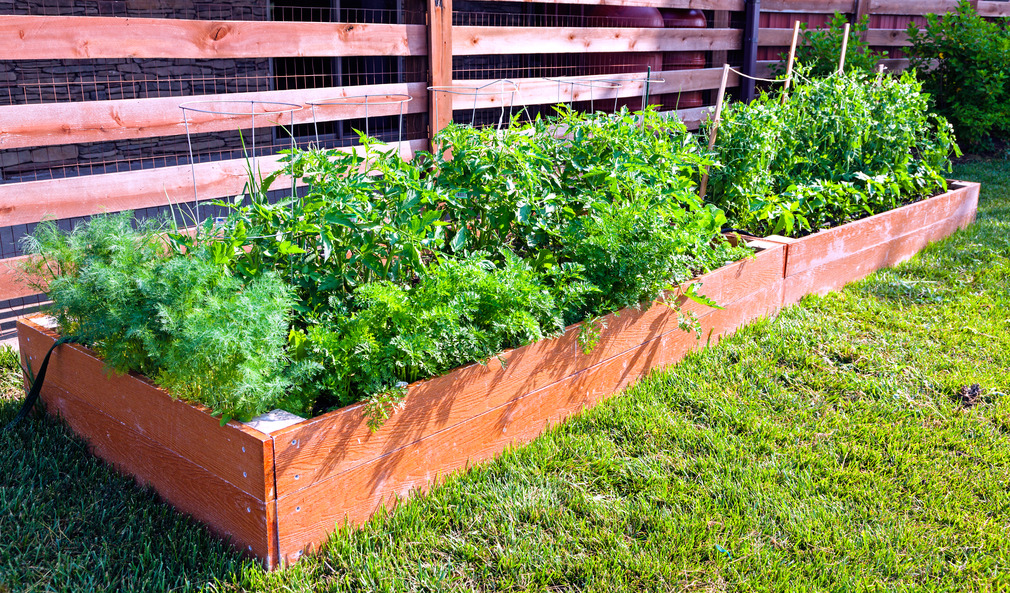
  • Flower and vegetable zones may be equipped with bubblers and tiny spray heads that gently water plants without bruising edibles or knocking petals off blooms.

Everything functions on an automatic timer that controls water flow throughout the system. You can elect to include sensors that monitor rain and humidity — self-adjusting timers that prevent unnecessary watering.

Start with a Plan

Your irrigation journey starts with a plan that maps out:

  • Your yard, house location, and major landscaping features, such as trees.
  • Your irrigation zones.
  • The location of sprinkler heads and bubblers.
  • The location of underground water supply lines.
  • The location of a water-supply shutoff valve.
  • Any automatic sensors.

But planning is a challenge for first-timers. Manufacturers recognize this hurdle and go out of their way to provide planning help. After you give them some info on the size of your lot and your water supply system, they give you an irrigation plan tailored to your property.

You’d be crazy not to take advantage of their services. For one, they’re free. Second, they’re very thorough: downloadable guides and step-by-step videos take you through every part of creating a home irrigation system.

For example, Rainbird and Toro offer planning guides that show you how to make a scale drawing of your property, and how to easily gather information on your water pressure and water flow rate that’ll help determine the design of your system.

When you mail in the drawing and info, the manufacturer returns a custom plan with a materials list and detailed installation instructions, all designed specifically for your property. Replies take several weeks. For a small fee ($20-$30), you can have your plans arrive in a few days.

Orbit shows you how to use Google Maps to make a scaled plan of your lot without ever stepping outdoors. Plans are available instantly.

Get Ready to Dig

Your next job is trenching — digging channels in your yard for the water supply lines and sprinkler heads. With plan in hand, mark out the locations of the irrigation lines using string lines, powdered chalk, or lawn marking paint — it comes in a spray can specially designed to be used upside down ($5).

At this point comes a heads-up about your local building codes. You’ll need to ask a couple of questions of your local building and planning commission:

  • Do I need a permit?
  • Is a licensed plumber required to connect my irrigation system to my home’s water system?
  • How deep should the trenches be? (Most building codes require you to dig down 18 inches to protect the water lines from freezing — in colder climates the required depth is more.)

Unless you relish the idea of hand-digging several hundred feet of trench, rent a gas-powered trenching tool for $100–$160 per day. This walk-behind tool makes short work of deep, narrow trenches.

Very important! To prevent injury, be sure to have all utilities marked before you begin digging. Call your local utilities or dial 811.

Installing the System

With excavation complete, you’re ready to buy all the stuff you need. You’ll build your system from plastic pipe, either rigid or flexible PVC. Both are good choices and use the same methods of assembly.

  • Rigid PVC pipe is inexpensive — ¾-inch diameter pipe is about 25 cents per lineal foot.
  • Flex PVC costs more at about $1 per lineal foot of ¾-inch-diameter pipe, but it installs faster, there are fewer connections, and it’s more forgiving of trenches that aren’t perfectly straight.

There are lots of other components, including sprinkler heads and bubblers, and each type has different ranges and arcs — the size and shape of their spray. That’s another reason to check out the manufacturer’s guides — they’ll give you a complete materials list.

Unless you’re an accomplished DIY electrician and plumber, you’ll probably need a bit more professional help:

  • An electrician to extend a circuit to the automatic timer; figure 2-3 hours at $90-$110 per hour.
  • A plumber to tap into your household water system. Budget another $200-$300.

Ready to Call In the Pros?

If the DIY approach is more than you want to tackle, or your lot is larger than a third of an acre (14,500 sq. ft.), consider hiring a pro. Expect to pay $3,000-$4,000 to have an underground irrigation system installed on a ¼-acre lot.

Aside from saving you a lot of work, a pro is going to get the job done quickly and with minimal disruption. He’ll also come with knowledge of what design best suits local conditions.

Good Tips for Watering Your Landscape

  • Check out these low-cost, low-maintenance DIY watering systems.
  • Planning a trip this summer? Here’s how to water while you’re on vacation.
  • Dry spells are hard on your plants. Make sure you know how to water your plants during a drought.

By: Dave Toht: © Copyright 2014 NATIONAL ASSOCIATION OF REALTORS®


The owner of this website has made a commitment to accessibility and inclusion, please report any problems that you encounter using the contact form on this website. This site uses the WP ADA Compliance Check plugin to enhance accessibility.