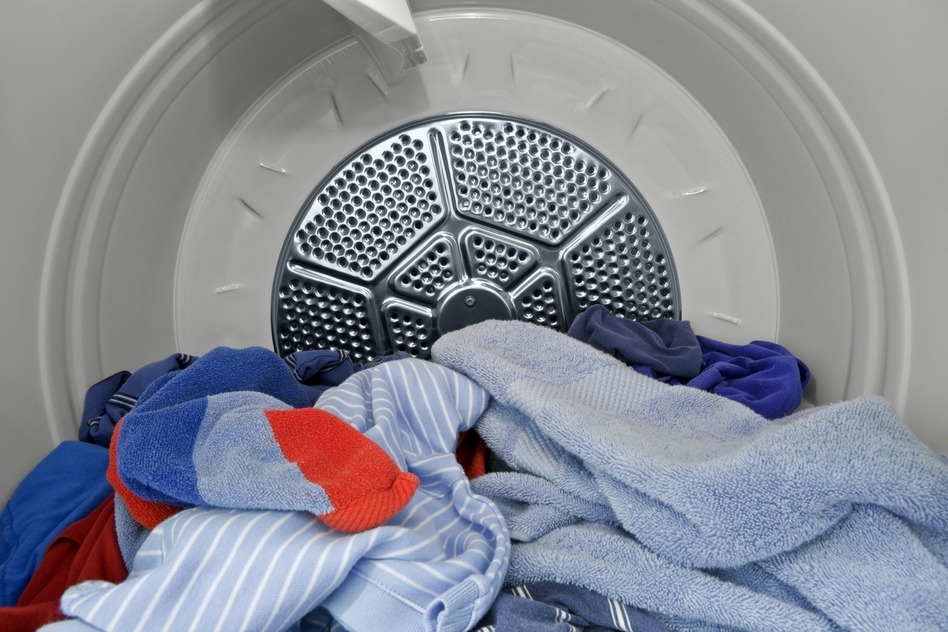
10 Tips for Saving Energy in the Laundry Room

10 Tips for Saving Energy in the Laundry Room

Knowing how to save energy while doing laundry is a good start to helping you trim energy costs in your home.

Here’s a fun laundry room fact: The average American family washes 300 loads of laundry a year, spending about 68 cents per load, for a yearly total of $204.

Most laundry room expenses come from heating water for washing and heating air for drying. But these costs aren’t set in stone, and you can save money by following these energy-reducing tips.

Get the Most From Your Washer

Ninety-percent of the cost of running a washer goes to heating water. Only 10% goes to electricity needed to run the motor. Here’s how to save money while getting your clothes clean.

1. Use cold water. You can save a bundle by washing your clothes in cold water, which is a perfectly efficient way to clean most clothes. Washing a load in cold water costs only about 4 cents, compared to washing in hot/warm water for 68 cents. Annually, you’ll save $40 with an electric water heater and $30 with a gas water heater.

2. Run full loads. It takes as much electricity to wash a small load as it does a full one, so you’ll save money by only washing full loads.

3. Update your machine. If you don’t already have an Energy Star-certified washer, it’s time to get one. These energy-efficient machines use 15 gallons of water per load, compared to 23 gallons for a standard machine. If a gallon of water costs you a penny (the U.S. average), you’ll save $24 a year.

4. Buy a front-loading machine. They use two-thirds less water than top-loaders, reducing water and heating costs.

Related: How to Buy a Washer

Get the Most From Your Dryer

5. Spin faster. The faster you spin clothes in the washer, the less time they’ll need in the dryer. If you have the option, chose a faster spin cycle.

6. Clean lint filters. Remove lint after every load, and clean ducts annually. Your clothes will dry faster, using less energy.

7. Warm it up. If possible, locate your dryer in a warm laundry room rather than in a cold basement. The warmer the air coming into the dryer, the less energy your machine will use to heat it up.

8. Go gas. Drying a load of laundry in a gas dryer generally costs 15 to 33 cents less per load than an electric dryer (32 to 41 cents).

9. Keep it full. Dry only full loads, and try not to mix fast and slow-drying clothes — a practice that wastes energy by continuing to dry clothes that are no longer wet.

10. Let nature help out. When the weather is warm, cut your energy costs by drying clothes outside on a clothesline. If HOA regulations don’t allow you to set up a clothesline outside, then use a stand-alone drying rack inside.


By: Douglas Trattner© Copyright 2015 NATIONAL ASSOCIATION OF REALTORS®


How to Help Your Appliances Last Longer

How to Help Your Appliances Last Longer


Is it just me or does it seem that appliances don’t last as long as they’re supposed to?
Our dryer died after 11 years (two years before a typical dryer’s lifespan is up), and we repaired our refrigerator three times before it reached its 12th birthday (it’s supposed to live for 13 years).

Full disclosure: I wouldn’t give myself an A in appliance care. But in the future, I vow to keep up on regular maintenance that’ll keep my new dryer running longer than my last one.

Rob Carpenter, owner of a Mr. Handyman franchise in Maryland, shares some insider tips about how to extend the life of home appliances.

Refrigerators That Last

Refrigerators break down when doors don’t close tightly, forcing motors to work overtime to keep food cold. To test your door seal, close the door on a dollar bill: If the bill slips, you’ve got a problem that requires refrigerator maintenance.

Magnetic strips embedded in gaskets around refrigerator doors make doors close snugly, but they routinely wear out and should be replaced or re-magnetized every couple of years. If you’re handy, re-magnetizing is a DIY job — just run a powerful magnet along each side of the gasket, in the same direction, about 50 times.

If messing around with the refrigerator door is beyond your pay grade, call a professional. Pros typically charge around $242 to repair door problems.

Related: How to Buy a Refrigerator

Washing Machine Endurance

Loose change banging around your washer drum can cause dents, chipped paint, and rust, so make sure to empty pockets before washing clothes.

Also, maintain your washing machine by regularly cleaning or replacing filters that trap water sediment before it enters your machine. Filters, which look like thimbles, are located in the back where supply hoses attach to the machine. Remove hoses and either poke out debris with a tip of a flathead screwdriver, then remove and wash the filter, or replace it.

Dryers That Keep on Drying

In addition to regularly cleaning out your dryer’s lint trap and exhaust hose, inspect the exterior vent — hot air must escape your house unimpeded.

Make sure the hinged exterior vent pops open when the dryer runs. If it doesn’t, open the cover and scrape out lint with the end of a hanger or dryer vent brush ($13). If your vent is louvered, clean slats with an old toothbrush.

When my dryer recently lost its heat, we called a repair guy who discovered a family of sparrows living in the vent. He sucked the birds out (poor birdies), and then we covered the vent opening with a wire mesh.

Related: The World’s First Solar-Powered Laundry Dryer
Dishwasher Extenders

Here are ways to keep your dishwasher stress-free and long-lasting:

  • Prime your dishwasher by running the hot water in your sink before you begin the cycle. This will clean your dishes with hot water from the very start of the cycle.
  • Once a week, run your dishwasher empty except for a cup of vinegar, which will keep it shining and smelling fresh.
  • Clean out food traps regularly.
  • Wipe clean the seals around dishwasher doors.

Related: Which Homemade Dishwasher Soap Recipe is Best?
Toaster Thoughts

Darkly toasted bread will burn out your toaster two years earlier than lightly toasted bread. So if you can live with lightly crisp rather than almost burnt, you’ll get a few more years out of your toaster. Just saying.

What’s your oldest appliance? What did you do to keep it humming?


By: Lisa Kaplan Gordon© Copyright 2015 NATIONAL ASSOCIATION OF REALTORS®


How to Use Comparable Sales to Price Your Home

How to Use Comparable Sales to Price Your Home

Before you put your home up for sale, understand how the right comparable sales help you and your agent find the perfect price.

Before you put your home up for sale, understand how the right comparable sales help you and your agent find the perfect price.

Knowing how much homes similar to yours, called comparable sales (or in real estate lingo, comps), sold for gives you the best idea of the current estimated value of your home. The trick is finding sales that closely match yours.

What makes a good comparable sale?

Your best comparable sale is the same model as your house in the same subdivision—and it closed escrow last week. If you can’t find that, here are other factors that count:

Location: The closer to your house the better, but don’t just use any comparable sale within a mile radius. A good comparable sale is a house in your neighborhood, your subdivision, on the same type of street as your house, and in your school district.

Home type: Try to find comparable sales that are like your home in style, construction material, square footage, number of bedrooms and baths, basement (having one and whether it’s finished), finishes, and yard size.

Amenities and upgrades: Is the kitchen new? Does the comparable sale house have full A/C? Is there crown molding, a deck, or a pool? Does your community have the same amenities (pool, workout room, walking trails, etc.) and homeowners association fees?

Date of sale: You may want to use a comparable sale from two years ago when the market was high, but that won’t fly. Most buyers use government-guaranteed mortgages, and those lending programs say comparable sales can be no older than 90 days.

Sales sweeteners: Did the comparable-sale sellers give the buyers downpayment assistance, closing costs, or a free television? You have to reduce the value of any comparable sale to account for any deal sweeteners.

Agents can help adjust price based on insider insights

Even if you live in a subdivision, your home will always be different from your neighbors’. Evaluating those differences—like the fact that your home has one more bedroom than the comparables or a basement office—is one of the ways real estate agents add value.

An active agent has been inside a lot of homes in your neighborhood and knows all sorts of details about comparable sales. She has read the comments the selling agent put into the MLS, seen the ugly wallpaper, and heard what other REALTORS®, lenders, closing agents, and appraisers said about the comparable sale.

More ways to pick a home listing price

If you’re still having trouble picking out a listing price for your home, look at the current competition. Ask your real estate agent to be honest about your home and the other homes on the market (and then listen to her without taking the criticism personally).

Next, put your comparable sales into two piles: more expensive and less expensive. What makes your home more valuable than the cheaper comparable sales and less valuable than the pricier comparable sales?

Are foreclosures and short sales comparables?

If one or more of your comparable sales was a foreclosed home or a short sale (a home that sold for less money than the owners owed on the mortgage), ask your real estate agent how to treat those comps.

A foreclosed home is usually in poor condition because owners who can’t pay their mortgage can’t afford to pay for upkeep. Your home is in great shape, so the foreclosure should be priced lower than your home.

Short sales are typically in good condition, although they are still distressed sales. The owners usually have to sell because they’re divorcing, or their employer is moving them to Kansas.

How much short sales are discounted from their market value varies among local markets. The average short-sale home in Omaha in recent years was discounted by 8.5%, according to a University of Nebraska at Omaha study. In suburban Washington, D.C., sellers typically discount short-sale homes by 3% to 5% to get them quickly sold, real estate agents report. In other markets, sellers price short sales the same as other homes in the neighborhood.

So you have to rely on your real estate agent’s knowledge of the local market to use a short sale as a comparable sale.

More from HouseLogic

What You Must Know About Home Appraisals

6 Reasons to Reduce Your Home Price

By: Carl Vogel© Copyright 2015 NATIONAL ASSOCIATION OF REALTORS®


7 Tips for Staging Your Home

7 Tips for Staging Your Home

1.  Start with a Clean Slate

Before you can worry about where to place furniture and which wall hanging should go where, each room in your home must be spotless. Do a thorough cleaning right down to the nitpicky details like wiping down light switch covers. Deep clean and deodorize carpets and window coverings.

2.  Stow Away Your Clutter

It’s harder for buyers to picture themselves in your home when they’re looking at your family photos, collectibles, and knickknacks. Pack up all your personal decorations. However, don’t make spaces like mantles and coffee and end tables barren. Leave three items of varying heights on each surface, suggests Barb Schwarz of Staged Homes in Concord, Pa. For example, place a lamp, a small plant, and a book on an end table.

3.  Scale Back on Your Furniture

When a room is packed with furniture, it looks smaller, which will make buyers think your home is less valuable than it is. Make sure buyers appreciate the size of each room by removing one or two pieces of furniture. If you have an eat-in dining area, using a small table and chair set makes the area seem bigger.

4.  Rethink Your Furniture Placement

Highlight the flow of your rooms by arranging the furniture to guide buyers from one room to another. In each room, create a focal point on the farthest wall from the doorway and arrange the other pieces of furniture in a triangle around the focal point, advises Schwarz. In the bedroom, the bed should be the focal point. In the living room, it may be the fireplace, and your couch and sofa can form the triangle in front of it.

5.  Add Color to Brighten Your Rooms

Brush on a fresh coat of warm, neutral-color paint in each room. Ask your real estate agent for help choosing the right shade. Then accessorize. Adding a vibrant afghan, throw, or accent pillows for the couch will jazz up a muted living room, as will a healthy plant or a bright vase on your mantle. High-wattage bulbs in your light fixtures will also brighten up rooms and basements.

6.  Set the Scene

Lay logs in the fireplace, and set your dining room table with dishes and a centerpiece of fresh fruit or flowers. Create other vignettes throughout the home — such as a chess game in progress — to help buyers envision living there. Replace heavy curtains with sheer ones that let in more light.

Make your bathrooms feel luxurious by adding a new shower curtain, towels, and fancy guest soaps (after you put all your personal toiletry items are out of sight). Judiciously add subtle potpourri, scented candles, or boil water with a bit of vanilla mixed in. If you have pets, clean bedding frequently and spray an odor remover before each showing.

7.  Make the Entrance Grand

Mow your lawn and trim your hedges, and turn on the sprinklers for 30 minutes before showings to make your lawn sparkle. If flowers or plants don’t surround your home’s entrance, add a pot of bright flowers. Top it all off by buying a new doormat and adding a seasonal wreath to your front door.

Related:

  • Spring Cleaning Guide
  • 11 Ways to Create a Welcoming Front Entrance for Under $100
  • Fragrant Plants that Will Keep Your Home Smelling Good

G.M. Filisko is an attorney and award-winning writer who occasionally rearranges her furniture to find the best placement—and keep her dog on his toes. A frequent contributor to many national publications including Bankrate.com, REALTOR® Magazine, and the American Bar Association Journal, she specializes in real estate, business, personal finance, and legal topics.


By: G. M. Filisko © Copyright 2015 NATIONAL ASSOCIATION OF REALTORS®

Keep Your Home Sale from Falling Apart

Keep Your Home Sale from Falling Apart

After finding a buyer, all you have to do to make it to closing is to avoid these five traps.

Finding a buyer for your home is just the first step on the homeselling path. Tread carefully in the weeks ahead because if you make one of these common seller mistakes, your deal may not close.

Mistake #1: Ignore Contingencies

If your contract requires you to do something before the sale, do it. If the buyers make the sale contingent on certain repairs, don’t do cheap patch-jobs and expect the buyers not to notice the fixes weren’t done properly.

Mistake #2: Don’t Bother to Fix Things That Break

The last thing any seller needs is for the buyers to notice on the pre-closing walk-through that the home isn’t in the same condition as when they made their offer. When things fall apart in a home about to be purchased, sellers must make the repairs. If the furnace fails, get a professional to fix it, and inform the buyers that the work was done. When you fail to maintain the home, the buyers may lose confidence in your integrity and the condition of the home and back out of the sale.

Related: 10 Common Repair Costs

Mistake #3: Get Lax About Deadlines

Treat deadlines as sacrosanct. If you have three days to accept or reject the home inspection, make your decision within three days. If you’re selling, move out a few days early, so you can turn over the keys at closing.

Mistake #4: Refuse to Negotiate Any Further

Once you’ve negotiated a price, it’s natural to calculate how much you’ll walk away with from the closing table. However, problems uncovered during inspections will have to be fixed. The appraisal may come in at a price below what the buyers offered to pay. Be prepared to negotiate with the buyers over these bottom-line-influencing issues.

Related: How to Field a Lowball Purchase Offer

Mistake #5: Hide Liens from Buyers

Did you neglect to mention that Uncle Sam has placed a tax lien on your home or you owe six months of homeowners association fees? The title search is going to turn up any liens filed on your house. To sell your house, you have to pay off the lien (or get the borrower to agree to pay it off). If you can do that with the sales proceeds, great. If not, the sale isn’t going to close.

Related:

  • How Much Value Does Regular Maintenance Add to Your Home?
  • 7 Steps to a Stress-Free Home Closing

G.M. Filisko is an attorney and award-winning writer who wanted a successful closing on a Wisconsin property so bad that she probably made her agent rethink going into real estate. A frequent contributor to many national publications including Bankrate.com, REALTOR® Magazine, and the American Bar Association Journal, she specializes in real estate, business, personal finance, and legal topics.

By: G. M. Filisko© Copyright 2015 NATIONAL ASSOCIATION OF REALTORS®


Budget Kitchen Remodeling: 5 Money-Saving Steps

Budget Kitchen Remodeling: 5 Money-Saving Steps

Major kitchen remodels are among the most popular home improvements, but a revamped cooking and gathering space can set you back a pretty penny. According to “Remodeling” magazine’s 2015 “Cost vs. Value Report,” a major, 200-square-foot kitchen remodel costs $56,768, with a 67.8% return on investment come selling time.

If you can’t come up with all that cash or take out a loan to do the remodel in one shot, a good strategy is to proceed in stages. By breaking down the kitchen remodeling process, you’ll be able to proceed at your own pace, as time and money allow.

Stage One: Start with a Complete Design Plan

Your plan should be comprehensive and detailed — everything from the location of the refrigerator to which direction the cabinet doors will open to whether you need a spice drawer.

To save time (and money) during tear-out and construction, plan on using your existing walls and kitchen configuration. That’ll keep plumbing and electrical systems mostly intact, and you won’t have the added expense — and mess — of tearing out walls.

Joseph Feinberg, vice president of Allied Kitchen and Bath in Fort Lauderdale, Fla., recommends hiring a professional designer, such as an architect or a certified kitchen designer, who can make sure the details of your plans are complete. You’ll pay about 10% of the total project for a pro designer, but you’ll save a whole bunch of headaches that would likely cost as much — or more — to fix. Plus, a pro is likely to offer smart solutions you hadn’t thought of.

For a nominal fee, you also can get design help from a major home improvement store. However, you’ll be expected to purchase some of your cabinets and appliances from that store.

  • Cost: professional designer: $5,800 (10% of total)
  • Key strategies: Once your plans are set, you can hold onto them until you’re ready to remodel.
  • Time frame: 3 to 6 months

Read on to learn more budget kitchen remodeling tips:

Stage Two: Order the Cabinets, Appliances, and Lighting Fixtures
Stage Three: Gut the Kitchen and Do the Electrical and Plumbing Work
Stage Four: Install Cabinets, Countertops, Appliances, Flooring, and Fixtures
Final Phases: Upgrade if Necessary

Stage Two: Order the Cabinets, Appliances, and Lighting Fixtures

Cabinets and appliances are the biggest investments in your kitchen remodeling project. If you’re remodeling in stages, you can order them any time after the plans are complete and store them in a garage (away from moisture) or in a spare room until you’re ready to pull the trigger on the installation.

Remember that it may take four to six weeks from the day you order them for your cabinets to be delivered.

Related: How to Choose Stock Cabinets for Your Kitchen

If you can’t afford all new appliances, keep your old ones for now — but plan to buy either the same sizes, or choose larger sizes and design your cabinets around those larger measurements. You can replace appliances as budget permits later on.

Related: Appliance Buying Guides

The same goes for your lighting fixtures: If you can live with your old ones for now, you’ll save money by reusing them.

You’ll have to decide about flooring, too — one of the trickier decisions to make because it also affects how and when you install cabinets.

You’ll need to know if your old flooring runs underneath your cabinets, or if the flooring butts up against the cabinet sides and toe kicks. If the flooring runs underneath, you’ll have some leeway for new cabinet configurations — just be sure the old flooring will cover any newly exposed floor areas. Here are points to remember:

  • Keep old flooring for cost savings. This works if your new cabinets match your old layout, so that the new cabinets fit exactly into the old flooring configuration. If the existing flooring runs underneath your cabinets and covers all flooring area, then any new cabinet configuration will be fine.
  • Keep your old flooring for now and cover it or replace it later. Again, this works if your cabinet configuration is identical to the old layout.

However, if you plan to cover your old flooring or tear it out and replace it at some point in the future, remember that your new flooring might raise the height of your floor, effectively lowering your cabinet height.

For thin new floor coverings, such as vinyl and linoleum, the change is imperceptible. For thicker floorings, such as wood and tile, you might want to take into account the change in floor height by installing your new cabinets on shims.

  • Cost: cabinets: $16,000 (27% of total); appliances and lighting fixtures: $8,500 (15% of total); vinyl flooring: $1,000 (2% of total)
  • Key strategy: Keep old appliances, lighting fixtures, and flooring and use them until you can afford new ones.
  • Time frame: 2 to 3 weeks

Stage Three: Gut the Kitchen and Do the Electrical and Plumbing Work

Here’s where the remodel gets messy. Old cabinetry and appliances are removed, and walls may have to be opened up for new electrical circuits. Keep in close contact with your contractor during this stage so you can answer questions and clear up any problems quickly. A major kitchen remodel can take six to 10 weeks, depending on how extensive the project is.

During this stage, haul your refrigerator, microwave, and toaster oven to another room — near the laundry or the garage, for example — so you’ve got the means to cook meals. Feinberg suggests tackling this stage in the summer, when you can easily grill and eat outside. That’ll reduce the temptation to eat at restaurants, and will help keep your day-to-day costs under control.

  • Cost: $14,500 for tear-out and installation of new plumbing and electrical (25% of total)
  • Key strategies: Encourage your contractor to expedite the tear-out and installation of new systems. Plan a makeshift kitchen while the work is progressing. Schedule this work for summer when you can grill and eat outside.
  • Time frame: 6 to 10 weeks

Stage Four: Install Cabinets, Countertops, Appliances, Flooring, and Fixtures

 
If you’ve done your homework and bought key components in advance, you should roll through this phase. You’ve now got a (mostly) finished kitchen.

A high-end countertop and backsplash can be a sizable sum of money. If you can’t quite swing it, put down a temporary top, such as painted marine plywood or inexpensive laminate. Later, you can upgrade to granite, tile, solid surface, or marble.

  • Cost: $12,000 (21% of total)
  • Key strategy: Install an inexpensive countertop; upgrade when you’re able.
  • Time frame: 1 to 2 weeks

Final Phases: Upgrade if Necessary

Replace the inexpensive countertop, pull up the laminate flooring, and put in tile or hardwood, or buy that new refrigerator you wanted but couldn’t afford during the remodel. (Just make sure it fits in the space!)

 

By: Gretchen Roberts:© Copyright 2015 NATIONAL ASSOCIATION OF REALTORS®


The owner of this website has made a commitment to accessibility and inclusion, please report any problems that you encounter using the contact form on this website. This site uses the WP ADA Compliance Check plugin to enhance accessibility.