The Right Disaster Insurance for Your Region

The Right Disaster Insurance for Your Region

Published: June 20, 2013

The region in which you live dictates what kind of disaster insurance you might need to protect your home from Mother Nature’s wrath.

Real estate comes down to location, location, location. Same goes for disasters. Where you live offers clues to how susceptible your home is to damage by floods, tornadoes, hurricanes, earthquakes, wildfires, and other calamities.

These regional risks also indicate whether you need to consider purchasing supplemental disaster insurance to cover claims that wouldn’t be included under a typical homeowners policy. Determining if you live in a disaster-prone region and reviewing your existing coverage are good first steps.

The next step is to create a home inventory, ideally with a digital camera or camcorder. Store copies of those files far away from your house or online at a backup storage site. That way, even if your home and computer are damaged, you’ll have proof of what was lost. Remember, too, to devise a family evacuation plan and assemble an emergency kit with food, water, and supplies.

Floods

Homes in low-lying areas, near bodies of water, or downstream from dams are particularly vulnerable. Saturated carpet, insulation, and drywall can promote mold growth. Since flood damage is often excluded from homeowners policies, it’s important to weigh the risk to your property.

At-risk regions: All

Coverage: Find out if your homeowners policy differentiates between “falling water” flooding — heavy rain, which may be covered — and “ground water” flooding, which usually isn’t. Most insurers sell flood insurance, but it may be more difficult to get in high-risk regions. The National Flood Insurance Program is open to anyone. Most experts recommend insuring your home and its contents at the replacement value.

Cost: The average flood insurance policy costs $600 per year, while the average flood claim is $30,000, according to the NFIP.
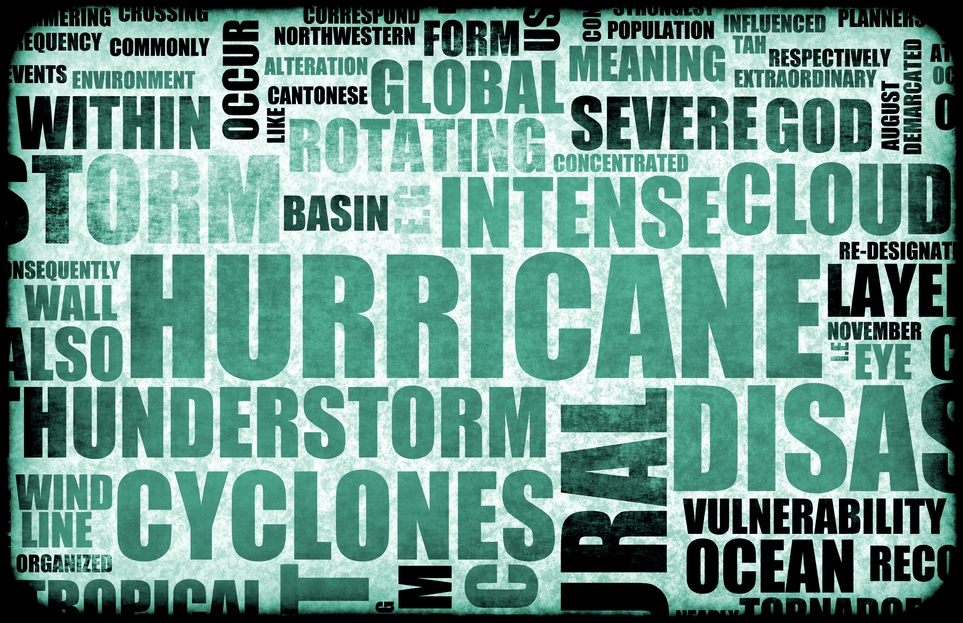
Hurricanes

Damage from hurricanes can result from heavy winds, rain, hail, and tidal or groundwater surge. Insurers in areas that have been battered by storms — especially coastal regions in the Southeast — are more skittish than those in other areas.

At-risk regions: Primarily East Coast and Gulf Coast

Coverage: In low-risk areas, your homeowners policy may cover any damage not done by rising water or groundwater surge. In high-risk areas, you may need to purchase additional coverage or participate in a state-run pool for hurricane and windstorm coverage. Your state’s insurance commissioner can provide details. Be sure to check whether additional hurricane coverage includes flooding from tidal or groundwater surge, or if you need a separate flood policy.

Cost: David Miller, CEO of Brightway Insurance in Jacksonville, Fla., says he has seen comprehensive windstorm and flood policies range from $300 for low-risk areas to up to $20,000 for high-end homes in the riskiest communities.

Earthquakes

Although earthquakes are associated with California, fault lines run through virtually every region. The U.S. Geological Survey tracks the latest quakes and keeps maps that show existing fault lines. Even minor earthquakes can damage belongings and leave houses structurally unsound.

At-risk regions: West Coast, especially California, and parts of Midwest

Coverage: Homeowners policies typically exclude earthquake damage. In California, supplemental coverage is available through the California Earthquake Authority. In other states, it’s usually available from private carriers. Your state’s insurance commissioner will have information on options.

Cost: A typical earthquake policy runs between $1.50 and $3 per $1,000 of coverage per year, with a deductible of 5% to 15% of the home’s value. If a home is insured for $200,000, the deductible would be $10,000 to $30,000, possibly with separate deductibles for the structure and the contents.

Tornadoes

Winds can reach up to 300 miles per hour and spiral into violent funnels. Although there’s not much that can be done to guard against tornadoes, keeping a home’s exterior in good repair can help mitigate damage from high winds.

At-risk regions: Eastern U.S, especially Central Plains

Coverage: Tornadoes are typically covered under your homeowners insurance. However, it’s a good idea to read over your policy or call your agent for confirmation.

Cost: Homeowners insurance premiums in recent years have averaged about $800 annually.

Wildfires

Approximately 68,000 wildfires burned more than 9.3 million acres in 2012. Every state but Hawaii was hit. Areas that are experiencing drought are most at risk. Damage to homes can result from flames themselves, but also from smoke, soot, and even the water used to fight the fires.

At-risk regions: All

Coverage: Fire is typically covered by a standard homeowners policy. Be sure to verify exactly what your coverage entails. Is cleanup included? How about full replacement value?

Cost: In recent years homeowners policies have averaged as low as $477 (Idaho) to as high as $1,409 (Texas).

Mine subsidence

Homes built over or near abandoned mines are at risk of structural damage if the ground shifts or sinkholes develop. Mine subsidence can also affect the water supply and utilities in the area.

At-risk regions: Primarily Eastern U.S.

Coverage: Mine subsidence isn’t typically covered by homeowners insurance. Coverage is usually available through state-sponsored pools, so check with your state’s insurance commissioner.

Cost: Premiums vary. In Pennsylvania, $130,000 in residential coverage is about $7 per month. In Illinois, it costs less than $95 per year to insure a house worth up to $250,000.


By: Gwen Moran © Copyright 2015 NATIONAL ASSOCIATION OF REALTORS®


Screen in Your Deck for a Bug-Free Summer

Screen in Your Deck for a Bug-Free Summer

You can make the most of your backyard by converting your deck to a screened-in porch, which turns mosquitoes, heat waves, and downpours into non-events. Plus, the thwack of a screen door is still the soundtrack for summer.

Converting won’t be easy — unless you’ve got top-notch handyman skills, you’ll have to hire a pro. And it won’t be cheap — converting a 14-foot-by-14-foot deck into a porch will cost $10,000-$12,000.

But it’s worth the time and money. Screened-in porches add value to your home. Reginald Carter, a Jacksonville, Fla., appraiser, says the return on investment is about 70% if you stay in your home for at least five years after installing the porch.

Screened-in porches also can help you sell your home faster. In Virginia, for instance, about 70% of buyers can’t live without screened-in porches, says Elaine VonCannon, a REALTOR® from Williamsburg, Va.

“It works for everybody who likes to sit outside,” says VonCannon.

Related: Pictures of Screened-In Porches
Can Your Deck Become a Screened-In Porch?

Maybe.

The biggest structural difference between a deck and porch is the weight of the load that rests on its foundation, joists, and beams, says David Berryhill, owner of Archadeck of Chicagoland.

Most decks are relatively lightweight: A 14-foot-by-14-foot deck can rest safely if it’s attached to the house and supported by three concrete piers. A porch, however, is much heavier because it has a roof.

To prepare your current deck for the additional load, you’ll have to:

  • Possibly add more posts and foundation piers ($500-$5,000). Check with your local building code authority. In some municipalities, building codes require a solid concrete foundation, which could cost up to $10,000 (and would eliminate most decks from consideration as porches).
  • Beef up joists and beams to support the additional roof load.
  • Remove railings if you want a floor-to-ceiling screened porch, which gives you an unobstructed view.
  • Bug-proof deck floors. To keep tiny critters from climbing into your new porch from below, attach a fine mesh screen or landscape paper to the underside of the floor. Or, replace the current floor with tongue-and-groove boards that fit so tightly bugs can’t climb through.

Pick the Right Roof

The right roof makes the difference between a porch that looks like it was always part of your house, and one that looks like an afterthought with no architectural rhyme or reason. Some tips:

  • Select a roof shape that’s compatible with your house’s roofline. A hip roof is strongest, a shed roof the most economical, and a gable roof lets in the most light.
  • In some cases, the new roof can be built over the existing one, but you’ll still have to flash the valley and rearrange the gutters and downspouts.
  • Use the same roofing material as your main roof.

The Skinny on Screens

Know thyself before you select screening for your porch. Do you have rambunctious pets that make strength a top priority? Is there a beautiful view you don’t want blocked by an obtrusive screen?

Here are some options:

Fiberglass (17 cent/sq. ft.): An inexpensive, lightweight screening in black or charcoal. It’s easy to install but tears easily, too, and has a tendency to stretch and look floppy.

Aluminum (26 cents/sq. ft.): Stronger and more durable than fiberglass, and the least visible. On the downside, aluminum dents easily and can oxidize.

Vinyl-Coated Polyester (60 cents-$1.53 /sq. ft.): Used to make pet screens that are super strong — down, Rex, down — and ones that dissipate heat in hot climates.

Bronze ($1.10/sq. ft.): Strong, doesn’t easily oxidize in salt air along coasts, and develops a patina with age.

Monel (alloy of copper and nickel) and stainless steel ($2.25-$5/sq. ft.): Strong, and tear-, rust-, and corrosion-resistant.

Related: Repair a Torn Screen

Screened-In Porch Tips

  • Pre-made screen panels are easier to install and repair than rolls of screening, but you pay the price of $50-$75/running ft.
  • When planning your porch project, check local building codes for setback regulations and building specifications.
  • Don’t forget to add electrical outlets to your porch for lamps, ceiling fans, and phone chargers.
  • Porches block light and can make the inside of your house seem dark. You can cure that by installing a skylight in the room adjacent to the porch.
  • Building codes may require that you have a 3-foot-by-3-foot concrete landing outside the egress door to your porch.


By: Lisa Kaplan Gordon © Copyright 2015 NATIONAL ASSOCIATION OF REALTORS®


Ikea Studied Americans at Home. Here’s What It Found.

Ikea Studied Americans at Home. Here’s What It Found.

Published: April 15, 2014

Ikea was curious about what Americans want from their homes. Surprisingly, it has nothing to do with expensive upgrades.

The Swedish retailer’s first annual “US Life at Home Report” uncovered that, above all else, 95% of Americans consider comfort a top home feature. We’re not talking about cushy furniture or other features that makes life at home physically more comfortable. It’s an emotional thing. Ikea found that American consumers want their homes to have a feel-good environment so they can let their hair down and connect with loved ones.

Here are more nuggets from the report:

We aren’t show-offs. In fact, we’re modest (!). Ikea says, “… home in the U.S. is not so much about status or wealth. Or keeping up with the Joneses.” Only a mere 1% wants their abodes to reflect their success.

We love living rooms. Maybe that’s why open kitchens are hot. Homeowners don’t want to be separated from their favorite room. Of those polled, 65% agree it’s the most popular spot in the house.

We feel cramped in the kitchen. We’re starved for kitchen storage. We also want more elbow room and counter space.

We use technology in the kitchen. But this has nothing to do with futuristic home gadgets. A total of 27% listen to music, use the computer, or watch TV while cooking or hanging out.

We stash stuff under our beds. The bedroom is another room that leaves us feeling squeezed for space. Fifty-four percent of Americans use the space under their beds for storage.

We want to save energy. If the opportunity popped up, 98% of us would buy an Energy Star-rated appliance. We’re also starting to shift away from inefficient incandescent light bulbs.  Forty-three percent of us have transitioned to LED bulbs and have at least one in the house.

We’re getting greener. A whopping 71% of Americans recycle at home. Twenty-eight percent want to generate their own solar power.

The panel for this study consisted of 4,000 U.S. consumers:

  • A combination of male and female heads of household between the ages of 25-54
  • Household income of at least $35,000


By: Deirdre Sullivan © Copyright 2015 NATIONAL ASSOCIATION OF REALTORS®


What’s the No. 1 Thing People Want in Their Bathroom?

What’s the No. 1 Thing People Want in Their Bathroom?

Bathroom exhaust fans make air smell (much!) sweeter, paint last longer, and mold grow slower — or not at all. Learn how to do a bathroom exhaust fan installation.

Return to the Best Bath Ideas for Love & Money

A bathroom exhaust fan is an inexpensive upgrade that packs a value punch. The shoe-box-size fan clears obnoxious bathroom odors (priceless!) and removes moisture, which protects your home and health, and reduces maintenance costs.

And, it turns out, everyone wants one. Exhaust fans are the No. 1 feature homebuyers want in a bathroom, says a National Association of Home Builders report. Ninety percent ranked exhaust fan as No. 1, with linen closet second, and a separate tub and shower as third. Who knew?

Still, many homes don’t have a bathroom fan. Although the fans are required by building code in many places, older homes — pre-1960s — didn’t routinely install them. And homeowners today may be reluctant to retrofit bathrooms with an appliance that requires venting to snake through attics, joists, soffits, and ultimately punctures an exterior wall or roof.

We feel your fear, and we’re here to help. Below, we break down everything you need to know about selecting and installing a bathroom exhaust fan.

What Does a Bathroom Exhaust Fan Do?

A bathroom exhaust fan is a small, ceiling- or wall-mounted fan that pulls air from the bathroom, sends it through venting (4-inch is preferable), and deposits it outside.

This helps you and your home by:

  • Improving indoor air quality, especially by removing bathroom smells.
  • Removing shower and bath humidity.
  • De-fogging mirrors.
  • Thwarting mold growth.
  • Preventing door and window warp.
  • Slowing fixture rust.
  • Retarding paint blister and wallpaper peel.

Related: How To Kill and Prevent Household Mold

How Are Fans Rated?

Exhaust fans are measured by two factors found on the fan’s box:

  • CFM (cubic feet per minute): Indicates the strength of the fan’s draw. CFM’s can range from 50 to 1,000-plus, although most bathrooms typically require fans with less than 200 CFM.
  • Sone: Measures of the sound the fan makes, typically from 0.5 (almost silent) to 4.0 (sounds like a normal television) — loud for a fan, but it does provide privacy against toilet sounds, especially nice for powder rooms often located near public areas of your home.

Most people choose a 1- or 2-sone fan — quiet enough keep your teeth from rattling, but not so quiet that you’ll forget it’s on.

CFM and sone are related, because stronger fans — with higher CFMs — usually create more noise; quieter fans — lower sone — often can’t adequately clear air from bigger areas.

The important thing is to pick a fan that’s right for your space, ears, and budget.

Sizing Your Fan

The Home Ventilating Institute, which tests and certifies manufacture claims, suggests that homeowners follow these formulas when sizing a fan:

For bathrooms less than 100 sq. ft.
: Calculate your bathroom’s square footage (length x width), and pick a fan with at least that number of CFMs. For example: If your bathroom is 6 feet by 8 feet, you should buy a fan that’s at least 48 CFM. A 50-CFM model comes closest and is the minimum size suggested for small bathrooms.

Size a fan for a ginormous bathroom: If your bathroom is bigger than 100 sq. ft., forget about the square footage figure; instead assign a CFM capacity for each fixture:

  • 50 CFM — toilet.
  • 50 CFM —  bathtub.
  • 100 CFM — jetted whirlpool tub.
  • 50 CFM — shower.

If you have a completely tricked-out bathroom, you may need at least 200 CFM of draw, which you can accomplish with several 50-CFM fans (one fan should be in separate toilet enclosure), or one big, 200-CFM fan.

How To Install Your Fan

Bathroom fan installation isn’t brain surgery — collect air here; exhaust air out there. But it’s not for beginners either, because the project includes removing drywall, perhaps drilling through joists, certainly busting through an exterior wall or roof.

We suggest hiring an HVAC pro, who will charge $150-$700.

If you decide to install a fan yourself, here are some decisions you’ll have to make:

Location: If you have a separate WC, put a small fan there. If your toilet is part of the bathroom, locate the fan between the toilet and tub/shower.

Venting: Exhaust flows through venting attached to the fan and out an exterior wall or roof. Never vent smelly, damp air into an attic or crawl space, which will warp rafters and promote mold growth.

The idea is to run venting the shortest, straightest path from the bathroom to outside. Every extra foot and bend the venting makes increases friction and decreases air draw and fan efficiency.

Appropriate venting runs up into your attic, then along or through floor joists until it reaches the eaves. From there, it can be exhausted out a soffit.

In some instances it may be more practical (and less expensive) to run the vent directly out a wall, or through a vent stack in your roof.

Door clearance: During installation, make sure your bathroom door has at least ¾-inch clearance from the floor, so “makeup air” can easily replace the sucked-out air, putting less stress on the fan.

Related: A Replacement Fan That’s Easy to Install

Fan Options

Bathroom exhaust fans come in custom styles and colors, but most of us would rather spend our decor budget elsewhere and will choose an off-the-rack fan with one or more of the following options:

Fan only: If you’re retrofitting a small bathroom that already has a ceiling fixture, select a basic fan, 50-70 CFM. Cost: $15-$50.

Fan-and-light combo: Good for small bathrooms or WCs. Choose a combo with enough wattage to sufficiently light the area, typically upwards of 60 watts. Cost: $30-$150.

Deluxe combo: All the bells and whistles — fan, light, heater, nightlight, timer (necessary for super-quiet fans you won’t remember are on), humidistat (automatically turns on fan when air moisture rises). Cost: $150-$600.


By: Lisa Kaplan Gordon © Copyright 2015 NATIONAL ASSOCIATION OF REALTORS®


6 Tips for Buying a Home in a Short Sale

6 Tips for Buying a Home in a Short Sale

By preparing for a real estate short sale, you can emerge with a great home at a favorable price.

When sellers need to sell their home for less than they owe on their mortgage, they’re shooting for a short sale. Short sale homes can sometimes be bargains, but only if you do your homework, stay patient, and remain unemotional during the sometimes lengthy and difficult short sale process.

Here are six tips for protecting yourself emotionally and financially when bidding on a short sale.

1. Get help from a short sale expert

A real estate agent experienced in short sales can identify which homes are being offered as short sales, help you determine a purchase price, and advise you on what to include in your offer to make the lender view it favorably. Ask agents how many buyers they’ve represented in short sales and, of those, how many successfully closed the transaction.

2. Build a team

Ask agents to recommend real estate attorneys knowledgeable in short sales and title experts. A title officer can do a title search to identify all the liens attached to a property you’re interested in. Because each lienholder must consent to a short sale, a property with multiple liens, like first and second mortgages, mechanic’s and condominium liens, or homeowners association liens, will be harder to purchase.

A title search may cost $250 to $300 up front, but it can help weed out less desirable properties requiring multiple approvals.

3. Know the home’s fair market value

By agreeing to a short sale, lenders are consenting to lose money on the loan they made to the sellers to purchase the home. Their goal is to keep those losses as low as possible. If your offer is dramatically less than the home’s fair market value, it may be rejected. Your agent can help you identify the price that’s good for you. The lender will determine whether approval is in its best interest.

4. Expect delays

There are two stages to a short sale. First, the sellers must consent to your purchase offer. Then they must submit it to their lender, along with documentation to convince the lender to agree to the sale.

The lender approval process can take weeks or months, even longer if the lender counteroffers. Expect bigger delays if several lienholders are involved; each can make a counteroffer or reject your offer.

5. Firm up your financing

Lenders will weigh your ability to close the transaction. If you’re preapproved for a mortgage, have a large downpayment, and can close at any time, they’ll consider your offer stronger than that of a buyer whose financing is less secure.

6. Avoid contingencies

If you must sell your current home before you can close on the short-sale property, or you need to close by a firm deadline, your offer may present too many moving parts for a lender to approve it.

Also, consider ordering an inspection so you’re fully informed about the home. Keep in mind that lenders are unlikely to approve an offer seeking repairs or credits for such work. You’ll probably have to purchase the home “as is,” which means in its present condition.

This article includes general information about tax laws and consequences, but isn’t intended to be relied upon by readers as tax or legal advice applicable to particular transactions or circumstances. Consult a tax professional for such advice; tax laws may vary by jurisdiction.

More from HouseLogic

What you need to know about the homebuyer tax credit
How to claim your homebuyer tax credit

Other web resources

Real-life discussions of short sales

G.M. Filisko is an attorney and award-winning writer who luckily has avoided the need for a short sale on her properties. A frequent contributor to many national publications including Bankrate.com, REALTOR® Magazine, and the American Bar Association Journal, she specializes in real estate, business, personal finance, and legal topics.


By: G. M. Filisko© Copyright 2015 NATIONAL ASSOCIATION OF REALTORS®


The owner of this website has made a commitment to accessibility and inclusion, please report any problems that you encounter using the contact form on this website. This site uses the WP ADA Compliance Check plugin to enhance accessibility.