The 7 Most-Needed Repair Tips Every Homeowner Should Know

The 7 Most-Needed Repair Tips Every Homeowner Should Know

Published: February 18, 2015

Relax. Here’s how to make short work of every common repair annoyance from a leaky toilet to a sticky window.

1. Fix a leaky toilet.

Running toilets not only rob sleep, they waste water and jack up your bill. Here’s how to change a flapper — the usual suspect — and solve other likely problems.

Related: How to Fix a Sweaty Toilet

2. Repair drywall holes.

The hardest part of drywall repair is making the patch flush with the existing wall. A “pumpkin patch” is an easy repair that cuts down on sanding.

Related: Another Clever Way to Fix Drywall — with Makeup Sponges!

3. Adjust cabinet doors.

Changes in humidity can make cabinet doors rub, refuse to close, or just look cockeyed. Adjusting them is easy and generally requires only a screwdriver.

4. Open a stuck window.

Windows stick when paint, dust, or moisture builds. Use a utility knife (or a pizza cutter) to remove old paint. Be careful not to gouge the wood sash. If high humidity is making windows hard to move, run a humidifier that sucks moisture out of air.

Related: Save Money with Window Repair Tips

5. Stop a leaking faucet.

A dripping faucet can waste 5 gallons of water per day. If you can’t replace the faulty part immediately, tie a string around the faucet and let it fall into the drain: Dripping water will silently flow down the string.

6. Silence door squeaks.

Take the squeak out of doors by lubricating top and bottom hinges with a little WD-40 or white lithium grease. If you don’t have any on hand, olive oil is a quick but temporary fix.

7. Turn off the main water line.

Don’t wait until water gushes into your house to search for the main water line. When things


By: Lisa Kaplan Gordon: Copyright 2015 NATIONAL ASSOCIATION OF REALTORS®

6 Things Everyone Should Do When Moving Into a New House

6 Things Everyone Should Do When Moving Into a New House

Published: February 18, 2015

Moving into your first home is exciting! But it also means you’ve got work to do.

When I bought my first house, my timing couldn’t have been better: The house closing was two weeks before the lease was up on my apartment. That meant I could take my time packing and moving, and I could get to know the new place before moving in.

I recruited family and friends to help me move (in exchange for a beer-and-pizza picnic on the floor) and, as a bonus, I got to pick their brains about what first-time homeowners should know.

Their help was one of the best housewarming presents I could have gotten. And thanks to their expertise and a little Googling, here’s what I learned about what to do before moving in.

1. Change the locks. You really don’t know who else has keys to your home, so change the locks. That ensures you’re the only person who has access. Install new deadbolts yourself for as little as $10 per lock, or call a locksmith — if you supply the new locks, they typically charge about $20-$30 per lock for labor.

2. Check for plumbing leaks. Your home inspector should do this for you before closing, but it never hurts to double-check. I didn’t have any leaks to fix, but when checking my kitchen sink, I did discover the sink sprayer was broken. I replaced it for under $20.

Keep an eye out for dripping faucets and running toilets, and check your water heater for signs of a leak.

Here’s a neat trick: Check your water meter at the beginning and end of a two-hour window in which no water is being used in your house. If the reading is different, you have a leak.

3. Steam clean carpets. Do this before you move your furniture in, and your new home life will be off to a fresh start. You can pay a professional carpet cleaning service — you’ll pay about $50 per room; most services require a minimum of about $100 before they’ll come out — or you can rent a steam cleaner for about $30 per day and do the work yourself. I was able to save some money by borrowing a steam cleaner from a friend.

4. Wipe out your cabinets. Another no-brainer before you move in your dishes and bathroom supplies. Make sure to wipe inside and out, preferably with a non-toxic cleaner, and replace contact paper if necessary.

When I cleaned my kitchen cabinets, I found an unpleasant surprise: Mouse poop. Which leads me to my next tip . . .

5. Give critters the heave-ho. That includes mice, rats, bats, termites, roaches, and any other uninvited guests. There are any number of DIY ways to get rid of pests, but if you need to bring out the big guns, an initial visit from a pest removal service will run you $100-$300, followed by monthly or quarterly visits at about $50 each time.

For my mousy enemies, I strategically placed poison packets around the kitchen, and I haven’t found any carcasses or any more poop, so the droppings I found must have been old. I might owe a debt of gratitude to the snake that lives under my back deck, but I prefer not to think about him.

6. Introduce yourself to your circuit breaker box and main water valve. My first experience with electrical wiring was replacing a broken light fixture in a bathroom. After locating the breaker box, which is in my garage, I turned off the power to that bathroom so I wouldn’t electrocute myself.

It’s a good idea to figure out which fuses control what parts of your house and label them accordingly. This will take two people: One to stand in the room where the power is supposed to go off, the other to trip the fuses and yell, “Did that work? How about now?”

You’ll want to know how to turn off your main water valve if you have a plumbing emergency, if a hurricane or tornado is headed your way, or if you’re going out of town. Just locate the valve — it could be inside or outside your house — and turn the knob until it’s off. Test it by turning on any faucet in the house; no water should come out.

By: Courtney Craig:© Copyright 2015 NATIONAL ASSOCIATION OF REALTORS®

Go Tub-Less: Dump Your Tub for a Dreamy Shower

Go Tub-Less: Dump Your Tub for a Dreamy Shower

Changing your bathtub to a shower is trending your house in the right direction. Here’s how to plan for a smooth transition.

If you’re thinking of converting your bathtub to a shower, you’re in good company. The American Institute of Architects says that the tub-less bathroom is growing in popularity.

Its annual Home Design Trends Survey found that more than 60% of homeowners preferred a stall shower without a tub in 2013. Compare that to 49% in 2012, the first year they specifically surveyed about tub-less bathrooms.

However, there’s a caveat: Even if you only use your tub to wash the mini-blinds, most real estate agents are adamant about having at least one bathtub in your house to preserve marketability.

A recent Houzz poll agrees, with 58% of respondents claiming, “you’ll never sell that house without a tub.”

The conclusion? Go ahead and convert your old tub or tub/shower combo into a cool, walk-in shower, as long as one other bathroom in your house has a tub for tasks such as bathing small children.

Do You Need to Relocate Your Shower?

If you’re planning a simple conversion (not a full bathroom makeover), then your project is straightforward.

If your old tub is in an alcove, you can remove it and be left with a space that’s about 30-34 inches deep and 5 feet wide — a good space for a shower. With minor modifications, your water supply and drain lines will already be in place, saving you money on plumbing costs.

If you have a free-standing tub, a bit more planning may be involved. Many free-standing tubs are positioned under or near windows — and you’ll want to avoid windows in your new shower enclosure.

That means putting your shower in a different location. But you’ll want to have it as close as possible to the existing water supply and drain lines to keep plumbing costs low. Moving plumbing to a new location can add hundreds of dollars to your project.

Will Your Dream Shower Fit?

Most building codes say the floor of a shower stall should be at least 30-by-30 inches. A 36-by-36-inch-wide stall is recommended by the National Kitchen and Bath Association (NKBA). If you’re building to the NKBA standards, an existing tub alcove probably needs modification — such as adding short sections of wall — to make the finished shower space 36 inches deep.

Related: A DIYer Regrets Not Putting More Space in Her Shower

Other key measurements:

  • Finished ceiling height: At least 80 inches.
  • Distance from side of toilet to shower wall: 15 inches minimum measured from the center of the toilet to the wall; 18 inches is recommended.
  • Distance from front of toilet to shower wall (or any wall): 21 inches minimum measured from the front of the toilet bowl to the wall; 30 inches is recommended.
  • Shower door swing: Should clear all obstructions, especially the toilet and vanity cabinet. Sliding glass doors or shower curtains can help solve door swing problems.

Related: Don’t Make These Common Remodeling Mistakes

Tear-Out Tips

Removing your old tub might not be simple. If it’s cast-iron, you’ll need some muscle to get it out of way. If it’s in good condition, you could sell it online or donate it to a ReStore outlet. Intact tile and any fixtures also can be donated or sold to stores that sellsalvaged building materials.

During tear-out, you should:

  • Evaluate the condition of existing pipes and replace if necessary.
  • Check framing and subfloor for mold, mildew, and rot, and repair as needed.
  • Make sure your shower valve is in good condition — now is the time to upgrade to a single-handle, pressure-balancing valve that controls temps and volume ($100-$160).

The Shower Floor: Curbs or Curbless?

The floor of your shower (aka the shower pan) has a lot to say about the style and cost of your conversion. You have a choice of two basic types of pan: one corrals water with curbs that you step over as you enter; the other is curbless.

Shower pans with curbs form a complete enclosure to contain water spray and channel it to a drain. The floor of the shower pan has the proper pitch to drain water. Showers with curbs are usually easier — and cheaper — to install than curbless installations.

Curbless shower stalls (aka barrier-free showers) are very au courant but trickier to make — the drainage slope of the floor has to be built below the level of the surrounding flooring surface. That means either raising the level of the surrounding floor, or lowering the shower pan.

If you raise the bathroom floor, it’ll be higher than any other floor that it meets, such as the floor of your master bedroom. You’ll need a transition threshold, which can be awkward and defeats the advantage of curbless shower if you’re wanting to be able to roll in a wheelchair.

What are the Options?

Shower stall kits are low-cost options. They’re typically made of acrylic or fiberglass, and include pre-made sides, a skid-proof floor pan with curbs and a drain hole, and a hinged glass door. They’re made to fit into corners and old bathtub alcoves.

The seamless, individual pieces make kit installation fast and relatively easy. The shower pan has curbs to contain water and a built-in slope for drainage. Kits are made in various sizes to fit all sorts of configurations, and some include extras such as built-in seats and shelves for bath products.

You can also find curbless kits, but the requirements are the same — you’ll either have to raise the level of the bathroom floor, or lower the floor of the kit for a seamless transition.

Tiled showers with curbs are built on site. The curbs typically are made with flat 2-by-4s stacked on top of each other and finished with ceramic tile. Either a solid or glass wall sits atop the curbs.

Shower pans for use with tile are one-piece acrylic or fiberglass, or custom-made from poured mortar. The mortar is sloped by hand toward the drain, then covered with a waterproof rubber or vinyl membrane. Another layer of mortar — then tile — completes the job.

Curbless showers use specially-made pans designed to fit flush with the surrounding subfloor so that tile can be laid continuously over both the shower and bathroom floor.

If your floor is slab, you’ll have to remove a section of the slab to make room for the pan. That’s a noisy, messy job, but a concrete contractor should be able to do the work in 2-3 hours.

If not, an alternative is to cut down the tops of the floor joists so that you can install a shower pan slightly below the level of your existing flooring. That way, the tile of your new shower will be flush with your existing flooring and you’ll have a continuous, seamless floor. However, altering joists requires approval from your local building authority. You might be required to beef up supports before removing any wood.

What’s the Cost?

Shower stall kits with acrylic or fiberglass sides and a hinged door are $200-$2,000; curbless one-piece shower enclosures are $2,000-$4,000. A competent DIYer can install a kit in a weekend.

A professionally installed, tiled shower enclosure is $1,000-$3,500 depending on complexity, size, and the type of tile and fixtures you choose. Add another $500-$1,000 for tear-out, new plumbing pipes, fixtures, and any custom carpentry.

In Closing, Some Fun Shower Facts:

  • 42% of Americans pee in the shower.
  • 52% sing in the shower (the most-sung tune: “Singin’ In The Rain”).
  • 53% prefer to shower in the morning; 29% shower in the evening.
  • 7% claim they never shower or take a bath — ever.

Source: 2004 American Standard study done to promote its VertiSpa line


By: John Riha:© Copyright 2015 NATIONAL ASSOCIATION OF REALTORS®


Early Spring Lawn Care Tips to Revive Your Frozen Turf

Early Spring Lawn Care Tips to Revive Your Frozen Turf

Has the polar vortex wrecked your lawn? These tips for early spring lawn care will green up your lawn in no time.

A polar vortex has pounded lawns this winter with ridiculous sub-zero temperatures and record snowfalls. So don’t be surprised if parts of your lawn — especially in low-lying areas — are dead on arrival in spring.

“Snow acts like a cover, but ice is bad for turf,” says Chris Lemcke, technical director of Weed Man USA lawn care. “Ice freezes plant cells and crushes blades and leads to death.”

Freeze-thaw-freeze conditions are even worse for turf roots, which can become brittle and die.  Road salt also is bad for lawns. The turf near streets and along driveways and paths may need resuscitation or replacement when spring grass should be greening up.

Dead or Sleeping?

When snow and ice melt, your late-winter turf starts awakening from hibernation and changes from brown grass to green; if your lawn died, it won’t change color.

The best way to see if your lawn is dead or sleeping is to tug the brown areas. If the turf comes up easily, the roots have failed and the grass is dead. If there’s resistance, then there’s hope.

How to Bring Lawns Back

When is the right time to bury your dead lawn — grass, roots, clinging soil — in a compost pile and start growing new grass?

  • After the last chance of frost
  • When night temperatures top 35 degrees
  • When soil temps reach 50-65 degrees

Dead patches of lawn are easy to pull up because no roots bind the turf to the soil. Cut around dead areas with a spade, then yank up the patch.

Then it’s time to reseed.

1.  Scatter seed on soil and lightly rake it in.

2.  Water daily with a light mist for 15 minutes to keep soil moist. If the soil dries out, seed will not germinate.

3.  When seed germinates, water deeply.

4.  Feed young blades a high-phosphorous fertilizer.

5.  Let grass grow at least 3 inches before its first cut.

If you can afford sod — 8-30 cents/sq. ft. compared with $28 for a 5-pound bag of seed that’ll cover 2,000 sq. ft. — Lemcke recommends laying sod on dead patches instead of seeding. Sod is more forgiving when it comes to watering and resists weeds better than seed.

An Ounce of Prevention

You can’t control the weather, but you can mitigate winter’s affect on your lawn.

  • Add topsoil to low areas of your yard to reduce the impact of ice. Then reseed or sod.
  • If you notice dead turf where you piled shoveled snow, spread out your snow pile next year.
  • To reduce salt damage, apply deicers after you shovel snow, so salt doesn’t seep into your grass. Also, use calcium chloride-based deicers, which do less damage than sodium chloride-based salts.


By: Lisa Kaplan Gordon:© Copyright 2015 NATIONAL ASSOCIATION OF REALTORS®

How to Keep Things Cleaner Longer

How to Keep Things Cleaner Longer

These tricks and tips will help you outsmart dirt while cutting back on housework.

Giving your home that spring-clean feeling takes some elbow grease, but these ideas make it easier to fight those dirty jobs faster and less often.

1.  Defy Dust

Trick: You can combat dust by adjusting your home’s humidity level.

The facts: Low humidity levels cause static electricity. Not only does static attract dust, it makes it stick, so it’s difficult to remove. High humidity causes problems, too — it’s an ideal environment for dust mites. These microscopic critters are a double threat: They’re a common allergen, and they contribute to dust production. There are as many as 19,000 dust mites in half a teaspoon of house dust, according to the American College of Allergy, Asthma, and Immunology. Yuck!

Next steps: Keep your home’s humidity level between 40% to 50%. That’ll eliminate static while decreasing dust mite growth.

Tip:
Make it easy to keep your household vents dust free. Remove and wash them once a year with mild soap and water. After they’re clean and completely dry, apply a liberal coat of car wax; then buff.

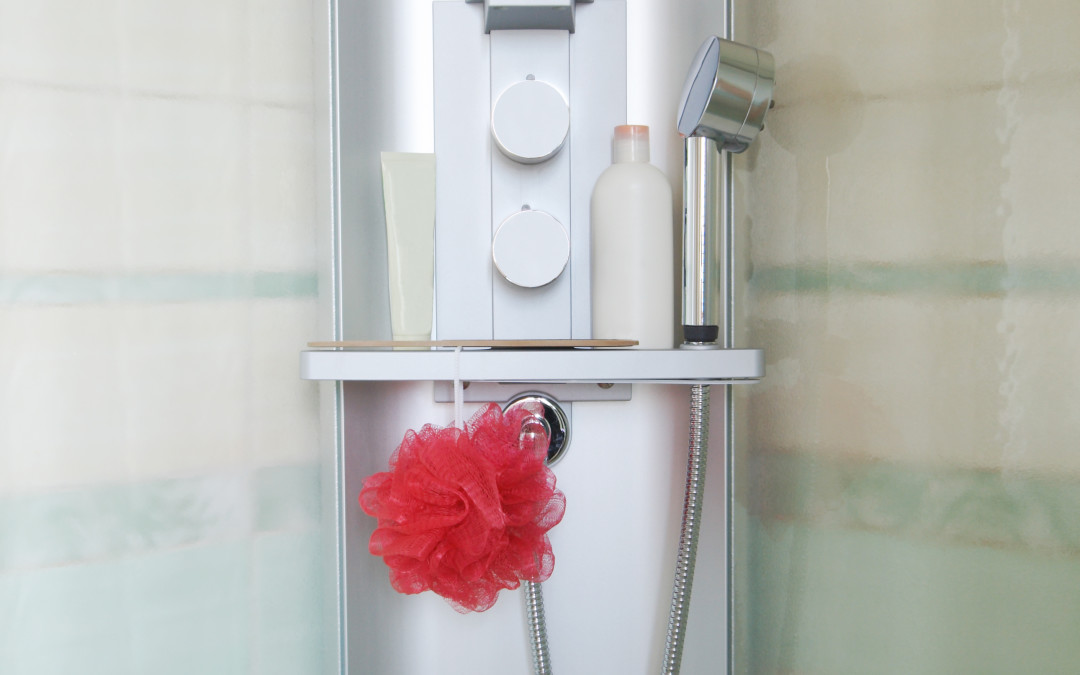
2.  Keep Glass Shower Doors Crystal Clear

Trick: You can eliminate soap scum build-up by coating your glass shower doors with a rain-repellant product made for car windshields.

The facts: When applied to glass, products like these create an invisible barrier that causes water, oils, and debris (like soap suds) to bead and roll off.

Next steps:
Find this product anywhere that sells basic auto supplies. You’ll know it’s time to reapply when water stops beading on shower doors. Keep in mind, windshield rain repellants were made to treat glass, not plastic.

Tip:
Automatic shower cleaners claim to let you clean your shower and tub less frequently — like every 30 days. After you finish bathing, the gadget will douse your shower and tub with a cleanser that prevents soap scum build-up while combating mold and mildew. You can buy automatic shower cleaners at most big-brand retailers, like Target and Walmart.

Related:

  • Green Clean Your Bathroom for Pennies
  • 5 Things You Forgot to Clean in Your Bathroom

3.  Seal Your Stone Countertops

Why:
Natural stone countertops, including granite and marble, are porous, so if they’re not sealed, liquids like red wine, juice, or soy sauce can stain them.

The facts: A countertop sealer repels stains by causing spills to bead instead of getting absorbed. Likely, your contractor sealed your countertop when it was installed.

Next steps: To keep your countertops in tip-top shape, re-apply sealer twice a year. To see if you need a fresh coat, pour a tiny bit of water on your natural stone countertop. If the water doesn’t bead or doesn’t stay beaded for two to three minutes, it’s time to reseal.

Tip:
Shopping for stone countertops? Slabs with lots of swirls or veins tend to be more porous.

4.  Protect Your Furniture and Carpets

Why: Protective furniture sprays and carpet sealants guard against inevitable spills. Some of these products also protect fabrics from fading and resist mold, mildew, and bacteria.

The facts: Protective sprays and sealants, like Scotchgard and Ultra-Guard, cause liquids to bead on the surface instead of being absorbed.

Next steps: Apply the appropriate sealer once a year after a deep upholstery and carpet cleaning.

Tip: In the future, you may not need to buy a protective furniture spray or carpet sealer thanks to a new fabric coating that repels dirt and water. It’s made by Liquipel, the company that created a water-shield substance to protect cell phones, MP3 players, and other electronic devices. The company plans to release a water-repellent clothing line next year. We bet household fabrics and materials will be next.

Rust-Oleum introduced a similar product, NeverWet, last year. But the company doesn’t recommend it for furniture, because the product “will repel liquids when applied to fabric, but will change the appearance.“

5.  Give Oven-Cleaning Products the Boot

Why: Most cleaners give off noxious fumes and make a horrible mess.

The facts: The basic ingredient in many oven cleaners is lye, which can burn your eyes and your skin; it’s usually fatal if swallowed.

Next steps: Use a wet pumice stone to scrape off dirt and grease. It’s faster than oven cleaner and toxin-free.

Tip: Need to wipe your range or anything else down? You can bust filth faster by heating up a clean, damp sponge or cloth in a microwave for 30 seconds before wiping with or without a cleaning product. Put on rubber gloves before you pick up that hot sponge.

Related: Green Clean Your Kitchen to Avoid Chemicals

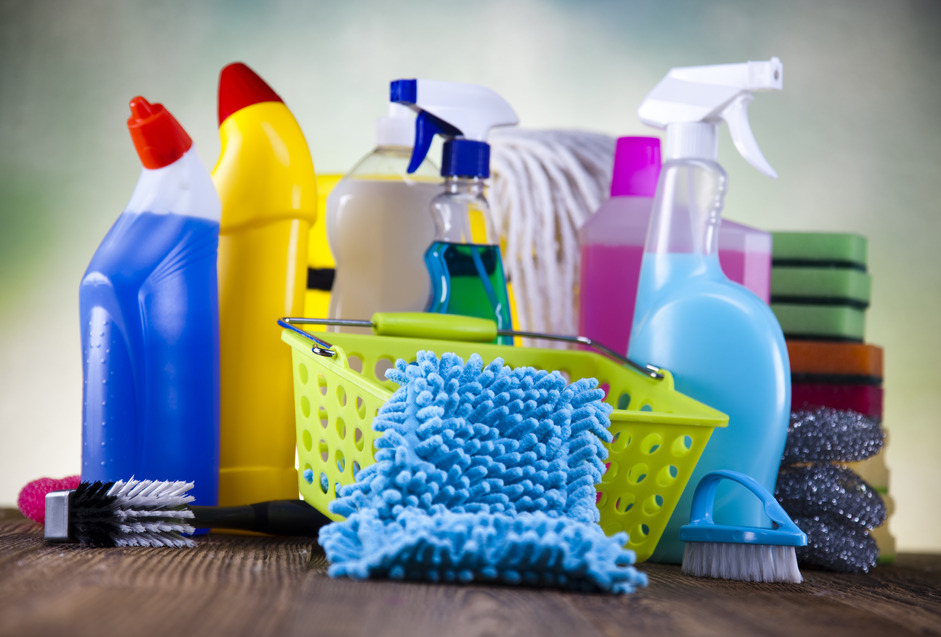
6.  Keep Things Tidy with Quick Touch-Ups

Why: Small cleaning projects prevent filth from building up.

The facts: When you spot clean daily, you can prevent smudges from staining, banish dust bunnies, and even combat allergens.

Next steps: Create a spot-cleaning kit so you can address small, dirty situations in minutes.

  • Cleaning pads are great for eradicating dirty fingerprints on walls and light switches.
  • Damp micro-cloths can reduce airborne dander when used daily to wipe down pets.
  • Dry sweeper cloths can quickly pick up dust and dry dirt off floors, shelves, and electronics.

Tip: Keep stored items cleaner longer by shutting closets, cabinets, and drawers, so circulating dust and dirt can’t get in.

7.  Ditch Your Outdated Low-Wattage Bulbs

Why: Good lighting can make you and your home look and feel great.

The facts: A room lit with low-wattage incandescent bulbs and compact fluorescents can look dark and dingy. “Daylight” bulbs brighten things up. These full-spectrum light bulbs mimic natural light, so they give better visual accuracy. Bonus: Like sunlight, these bulbs can boost your mood.

Next steps: When shopping for bulbs, look for those marked “daylight” that have a range between 5,000 to 6,500 kelvins.

Tip: Don’t understand the difference between warm white bulbs and daylight bulbs? Check out the video for a side-by-side comparison:

Related:

  • Save Energy and Feel Better with Daylighting
  • Did You Know that Dirty Light Bulbs Waste Energy?

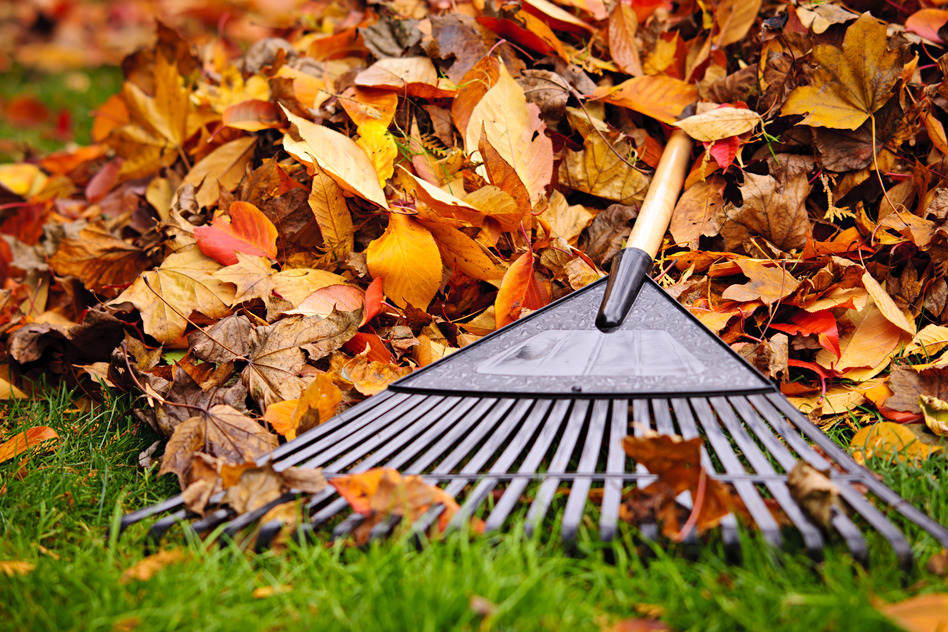
8.  Use a Cleaner Sweeper

Why: Brooms hold on to dirt.

The facts:
You don’t want to just push dirt around when you sweep. You can use spray dusters (like the ones used on computer keyboards) to blow dust bunnies off brooms, and soapy water to get rid of the grime. But how about combing dirt off broom bristles while you’re sweeping?

Next steps: Check out the Broom Groomer. It was invented by a guy who cut his hand on broken glass when it got stuck on the bristles of his broom. Watch the video to see how it works:

Tip: About 80% of dirt in homes walks in from the outside. Stop dirt with a bristly doormat before it’s tracked inside.


By: Deirdre Sullivan:© Copyright 2015 NATIONAL ASSOCIATION OF REALTORS®


The owner of this website has made a commitment to accessibility and inclusion, please report any problems that you encounter using the contact form on this website. This site uses the WP ADA Compliance Check plugin to enhance accessibility.